Shopify
Ealyx provides a native Shopify App that enables the trade-in experience directly within your store.
Setting up Ealyx on a Shopify website requires completing three mandatory steps:
- Request the App and your credentials: You can obtain the App and your credentials from your Account Manager or request them through our Portal.
- Install the App in your Shopify store.
- Configure the blocks according to our integration guidelines.
Installation and Activation of the Ealyx App
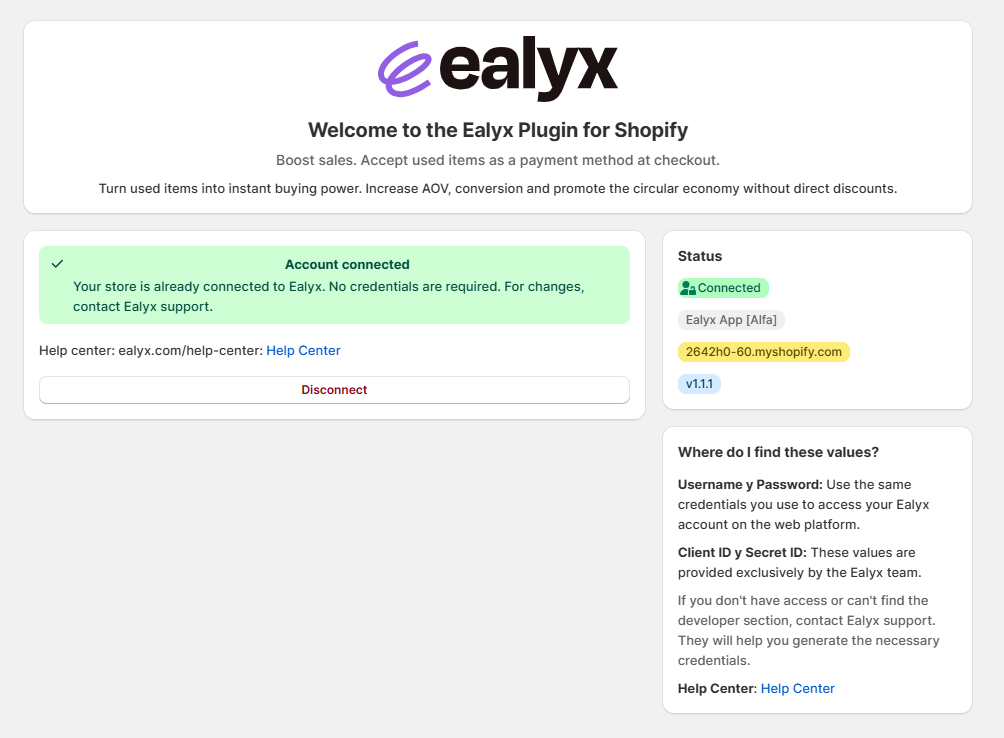
Once you have access to the App, you must authenticate your store to activate it.
- In your Shopify admin panel, go to Apps → Ealyx.
- When opening the App, you will see the authentication panel.
- Enter your credentials and click “Save”.
After saving, the App will display the authenticated view, similar to the example below:
Add & Configure the Ealyx Blocks
All Ealyx functionality is inserted through the Shopify Theme Editor, without any code snippets.
Before adding individual blocks:
- Go to Online Store → Themes
- Click Edit theme on your active theme.

Once inside the Theme Editor, follow the block-specific instructions below.
Ealyx Block Types & Configuration
Below you will find:
- How to add the Ealyx block to each page
- How to configure it
- Recommended positions
- Best-practice guidance
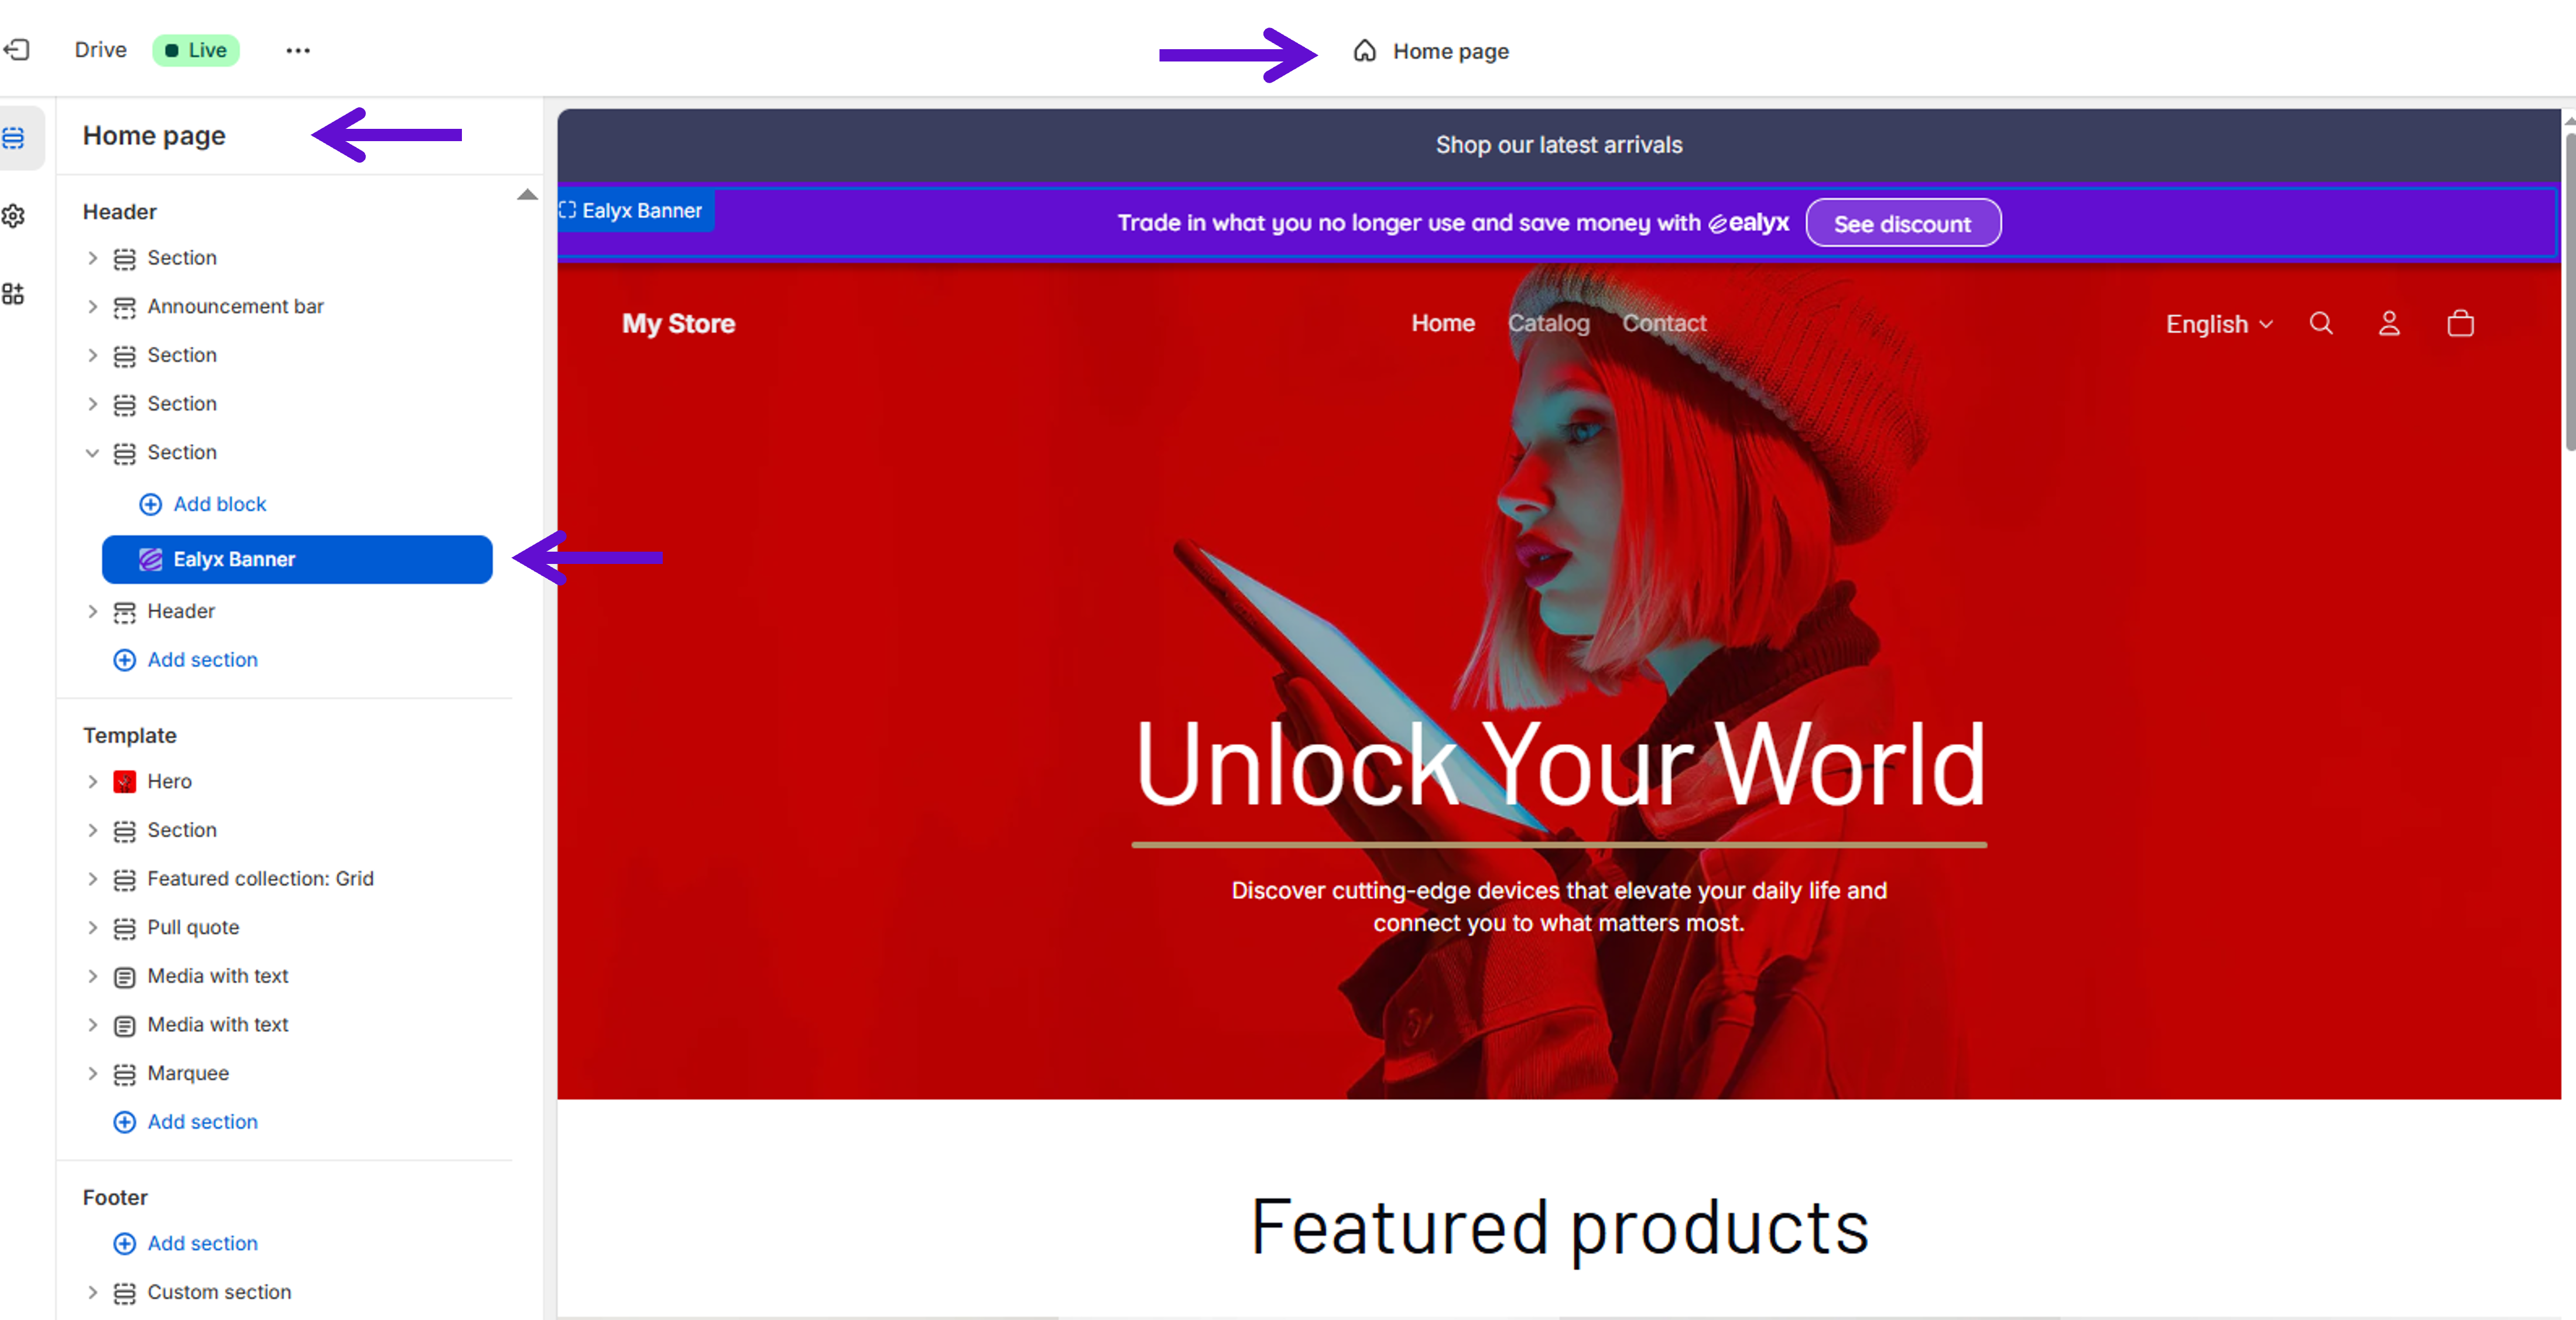
Home Page
The Ealyx Block on the Home page allows you to highlight the trade-in benefit prominently at the beginning of the shopping journey.
How to Add
- Inside the Theme Editor, open the Home page template.
- Select the corresponding section → Before your Header.
- Click add Block.
- In the apps section, select Ealyx App.
💡 You may also add the same Ealyx Block to Collections, Product, and Cart pages for consistent messaging.
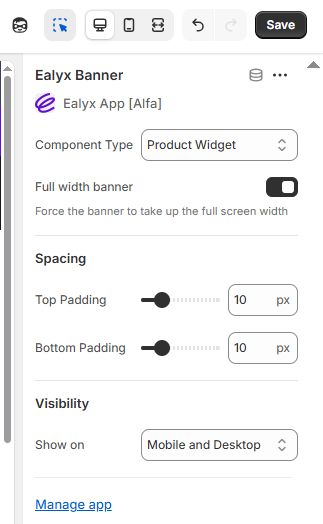
Configure the Ealyx Block
Configuration options include:
- Component type → Banner
- Full-width toggle → On
- Upper & lower padding → 10px
- Visibility → Mobile and Desktop
These settings appear in the right-side configuration panel.

Recommended Position
Place the block:
- At the top of the Home page
- Directly under the Shopify Announcement Bar (optional)
Why:
Placing the block here ensures maximum visibility for the trade-in benefit.
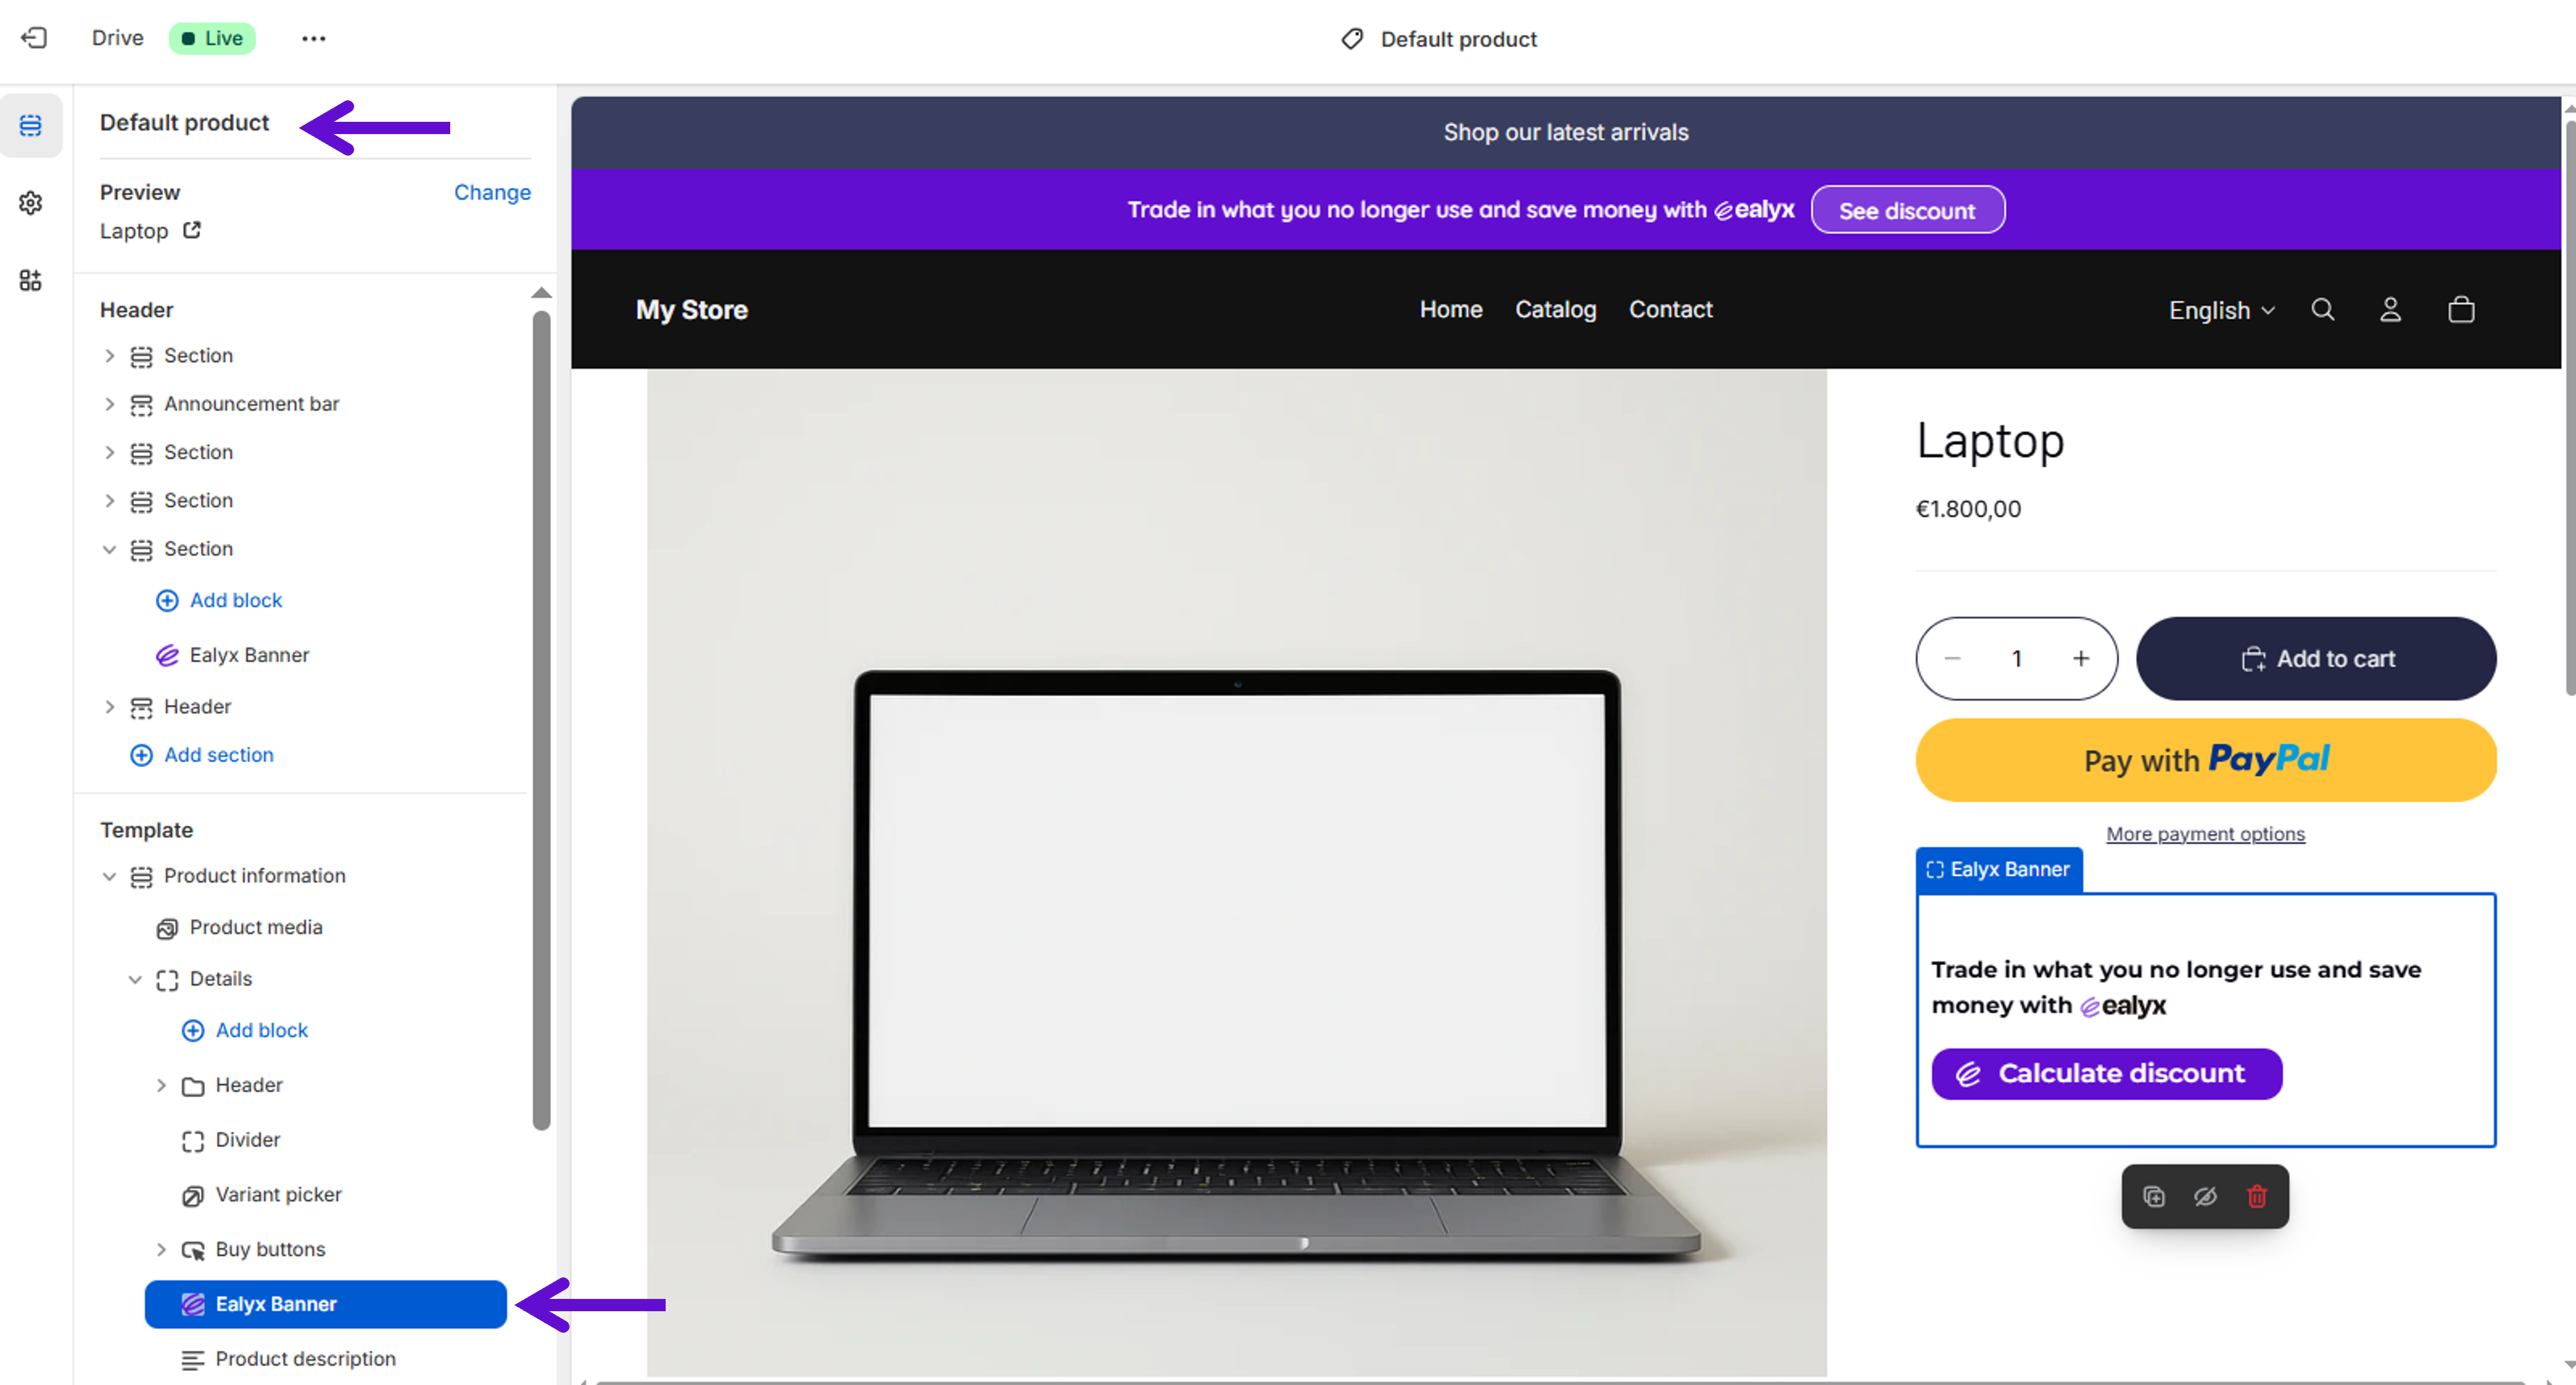
Product Page
The Ealyx Block on product pages displays the trade-in value directly where users make purchase decisions. This block is highly conversion-oriented.
How to Add
- In the Theme Editor, switch to the Product template.
- Select the corresponding section → Below the Buy buttons.
- Click add Block.
- In the apps section, select Ealyx App.
Configure the Ealyx Block
Settings include:
- Component type → Product Widget
- Full-width toggle → On
- Upper & lower padding → 10px
- Visibility → Mobile and Desktop
Recommended Position
Drag the block to position it:
- Below the More payment options text, or
- Above the “Add to cart” button
Why:
At this stage, shoppers are evaluating affordability. Showing the trade-in benefit here maximizes conversion.
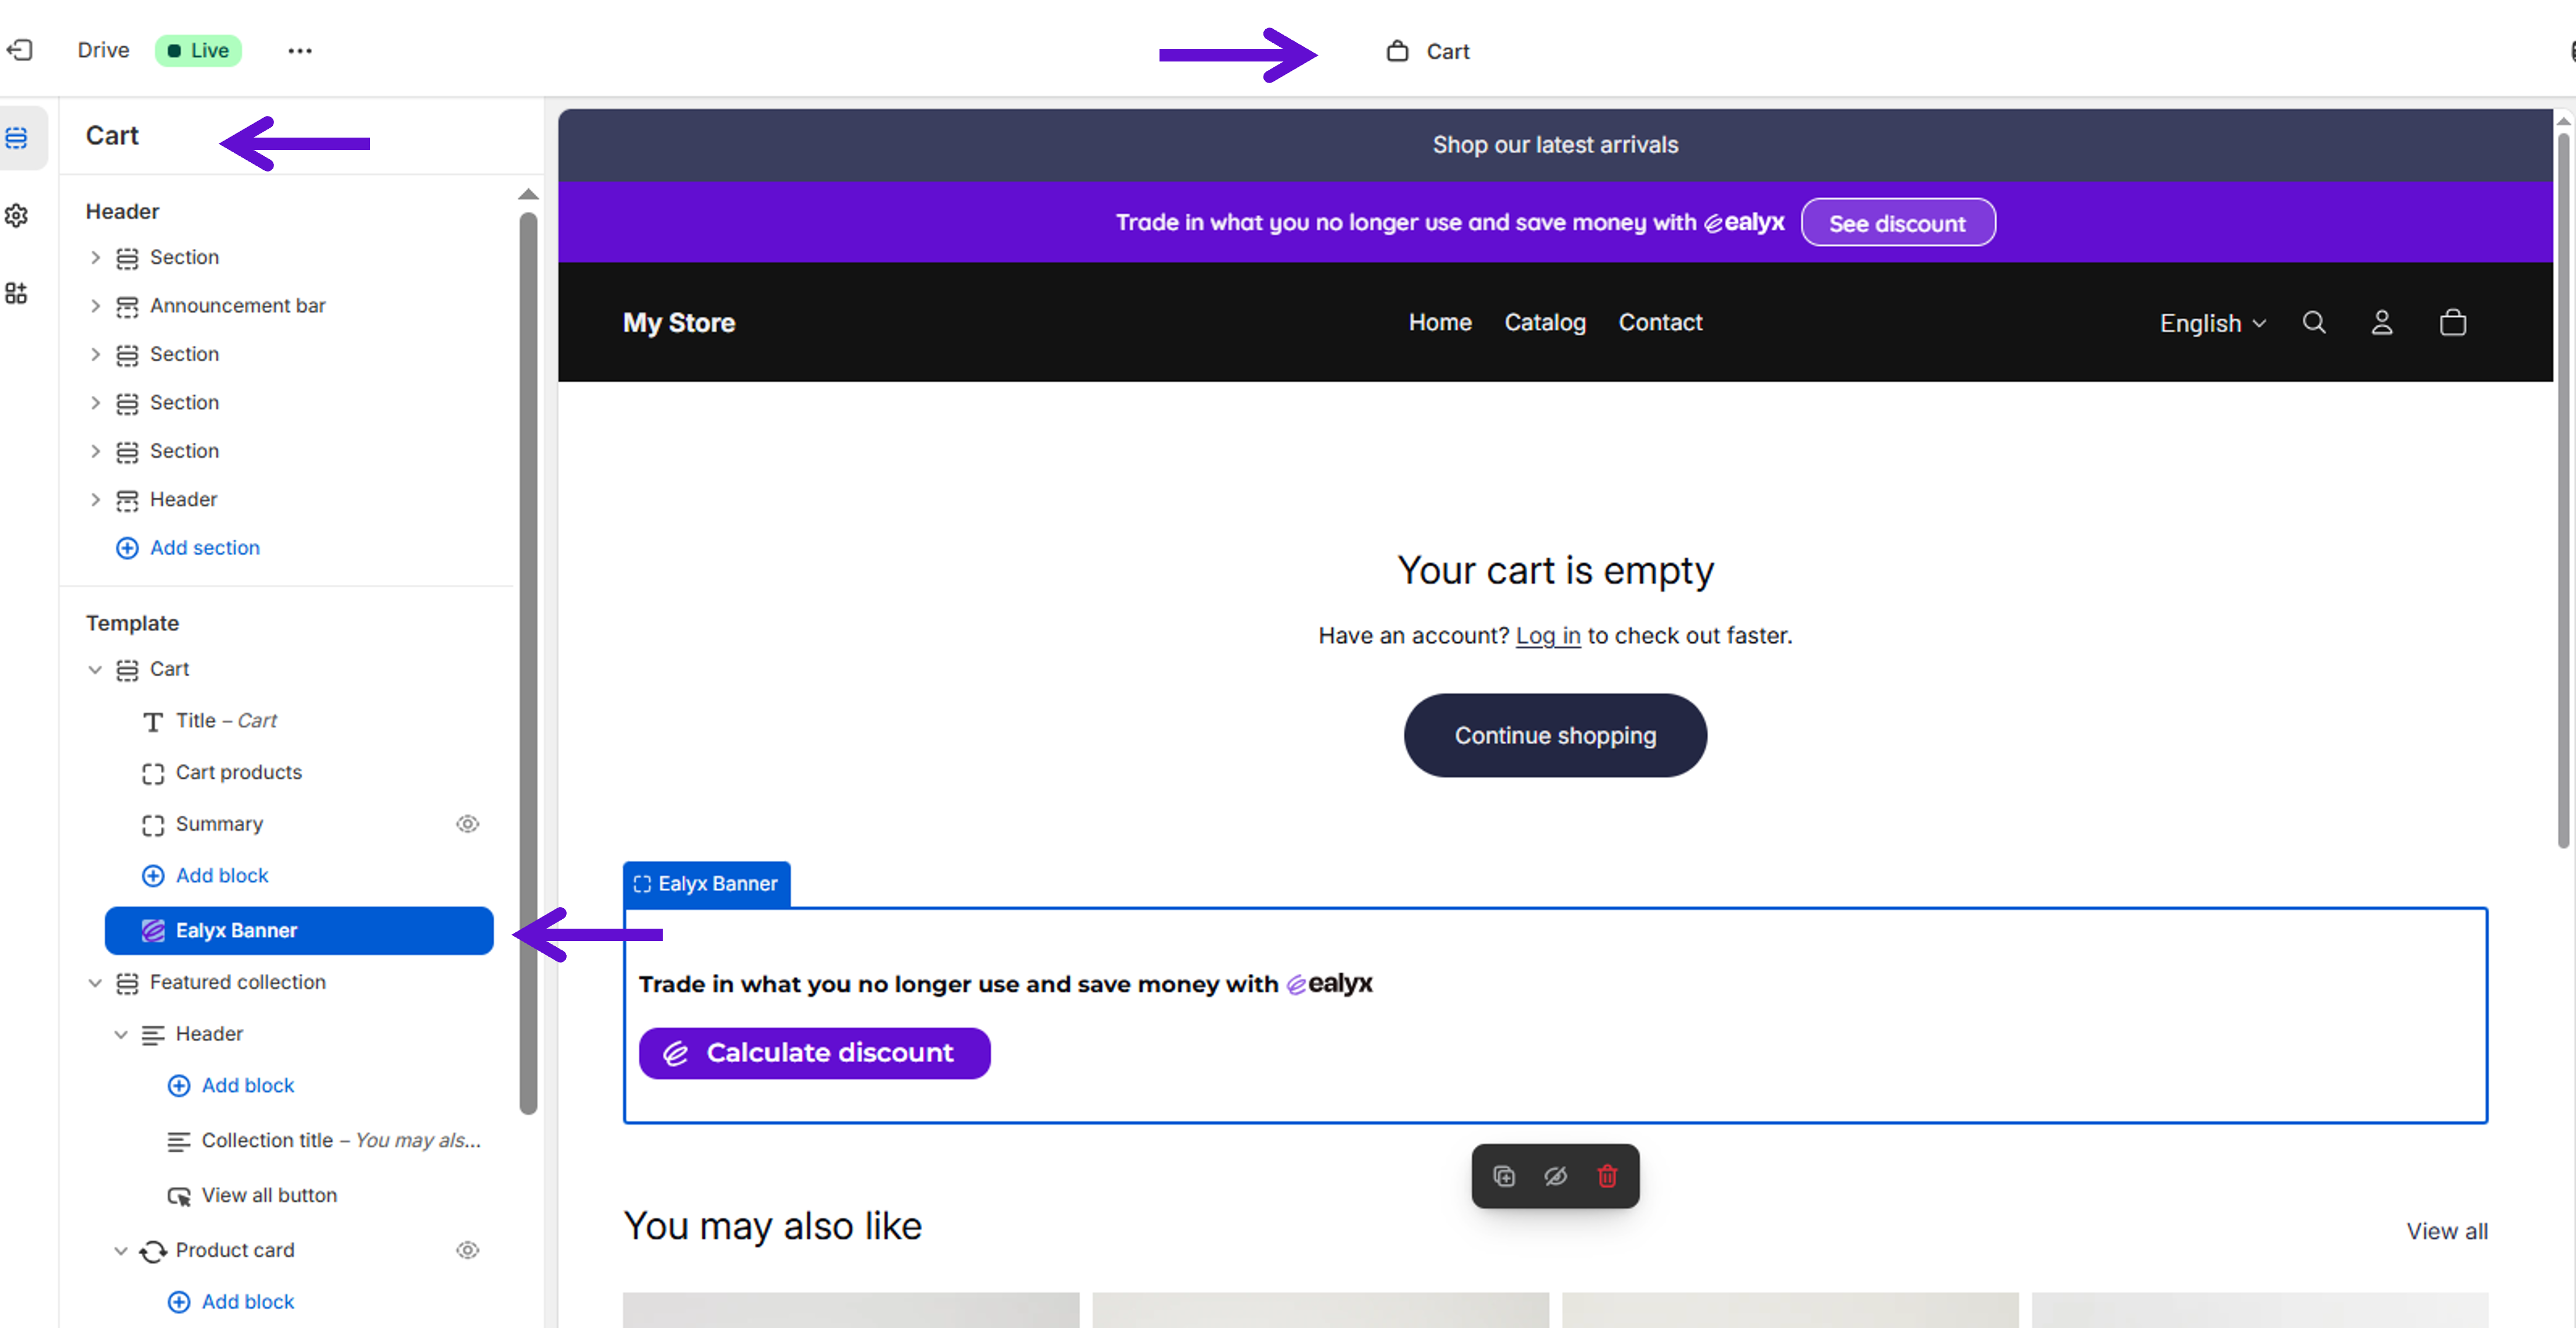
Cart Page
The Ealyx Block on the Cart page lets customers review the trade-in option before checkout.
If the user already completed a valuation, the block also shows the device being traded in and the discount applied.
How to Add
- In the Theme Editor, switch to the Cart template.
- Select the corresponding section → At the bottom of the cart section
- Click add Block.
- In the apps section, select Ealyx App.
Configure the Ealyx Block
Settings include:
- Component type → Cart Summary
- Full-width toggle → On
- Upper & lower padding → 10px
- Visibility → Mobile and Desktop
Recommended Position
Place the block:
- At the bottom of the Cart page
Why:
Users reviewing their total should immediately see how a trade-in can reduce the checkout amount.
Additionally, if a user already initiated a trade-in, this ensures they see:
- The product they are selling
- The discount applied in the order summary
Additional Required Step (Cart Page Only)
The Cart block requires adding a small Liquid snippet manually inside your theme code.
Where to add the code
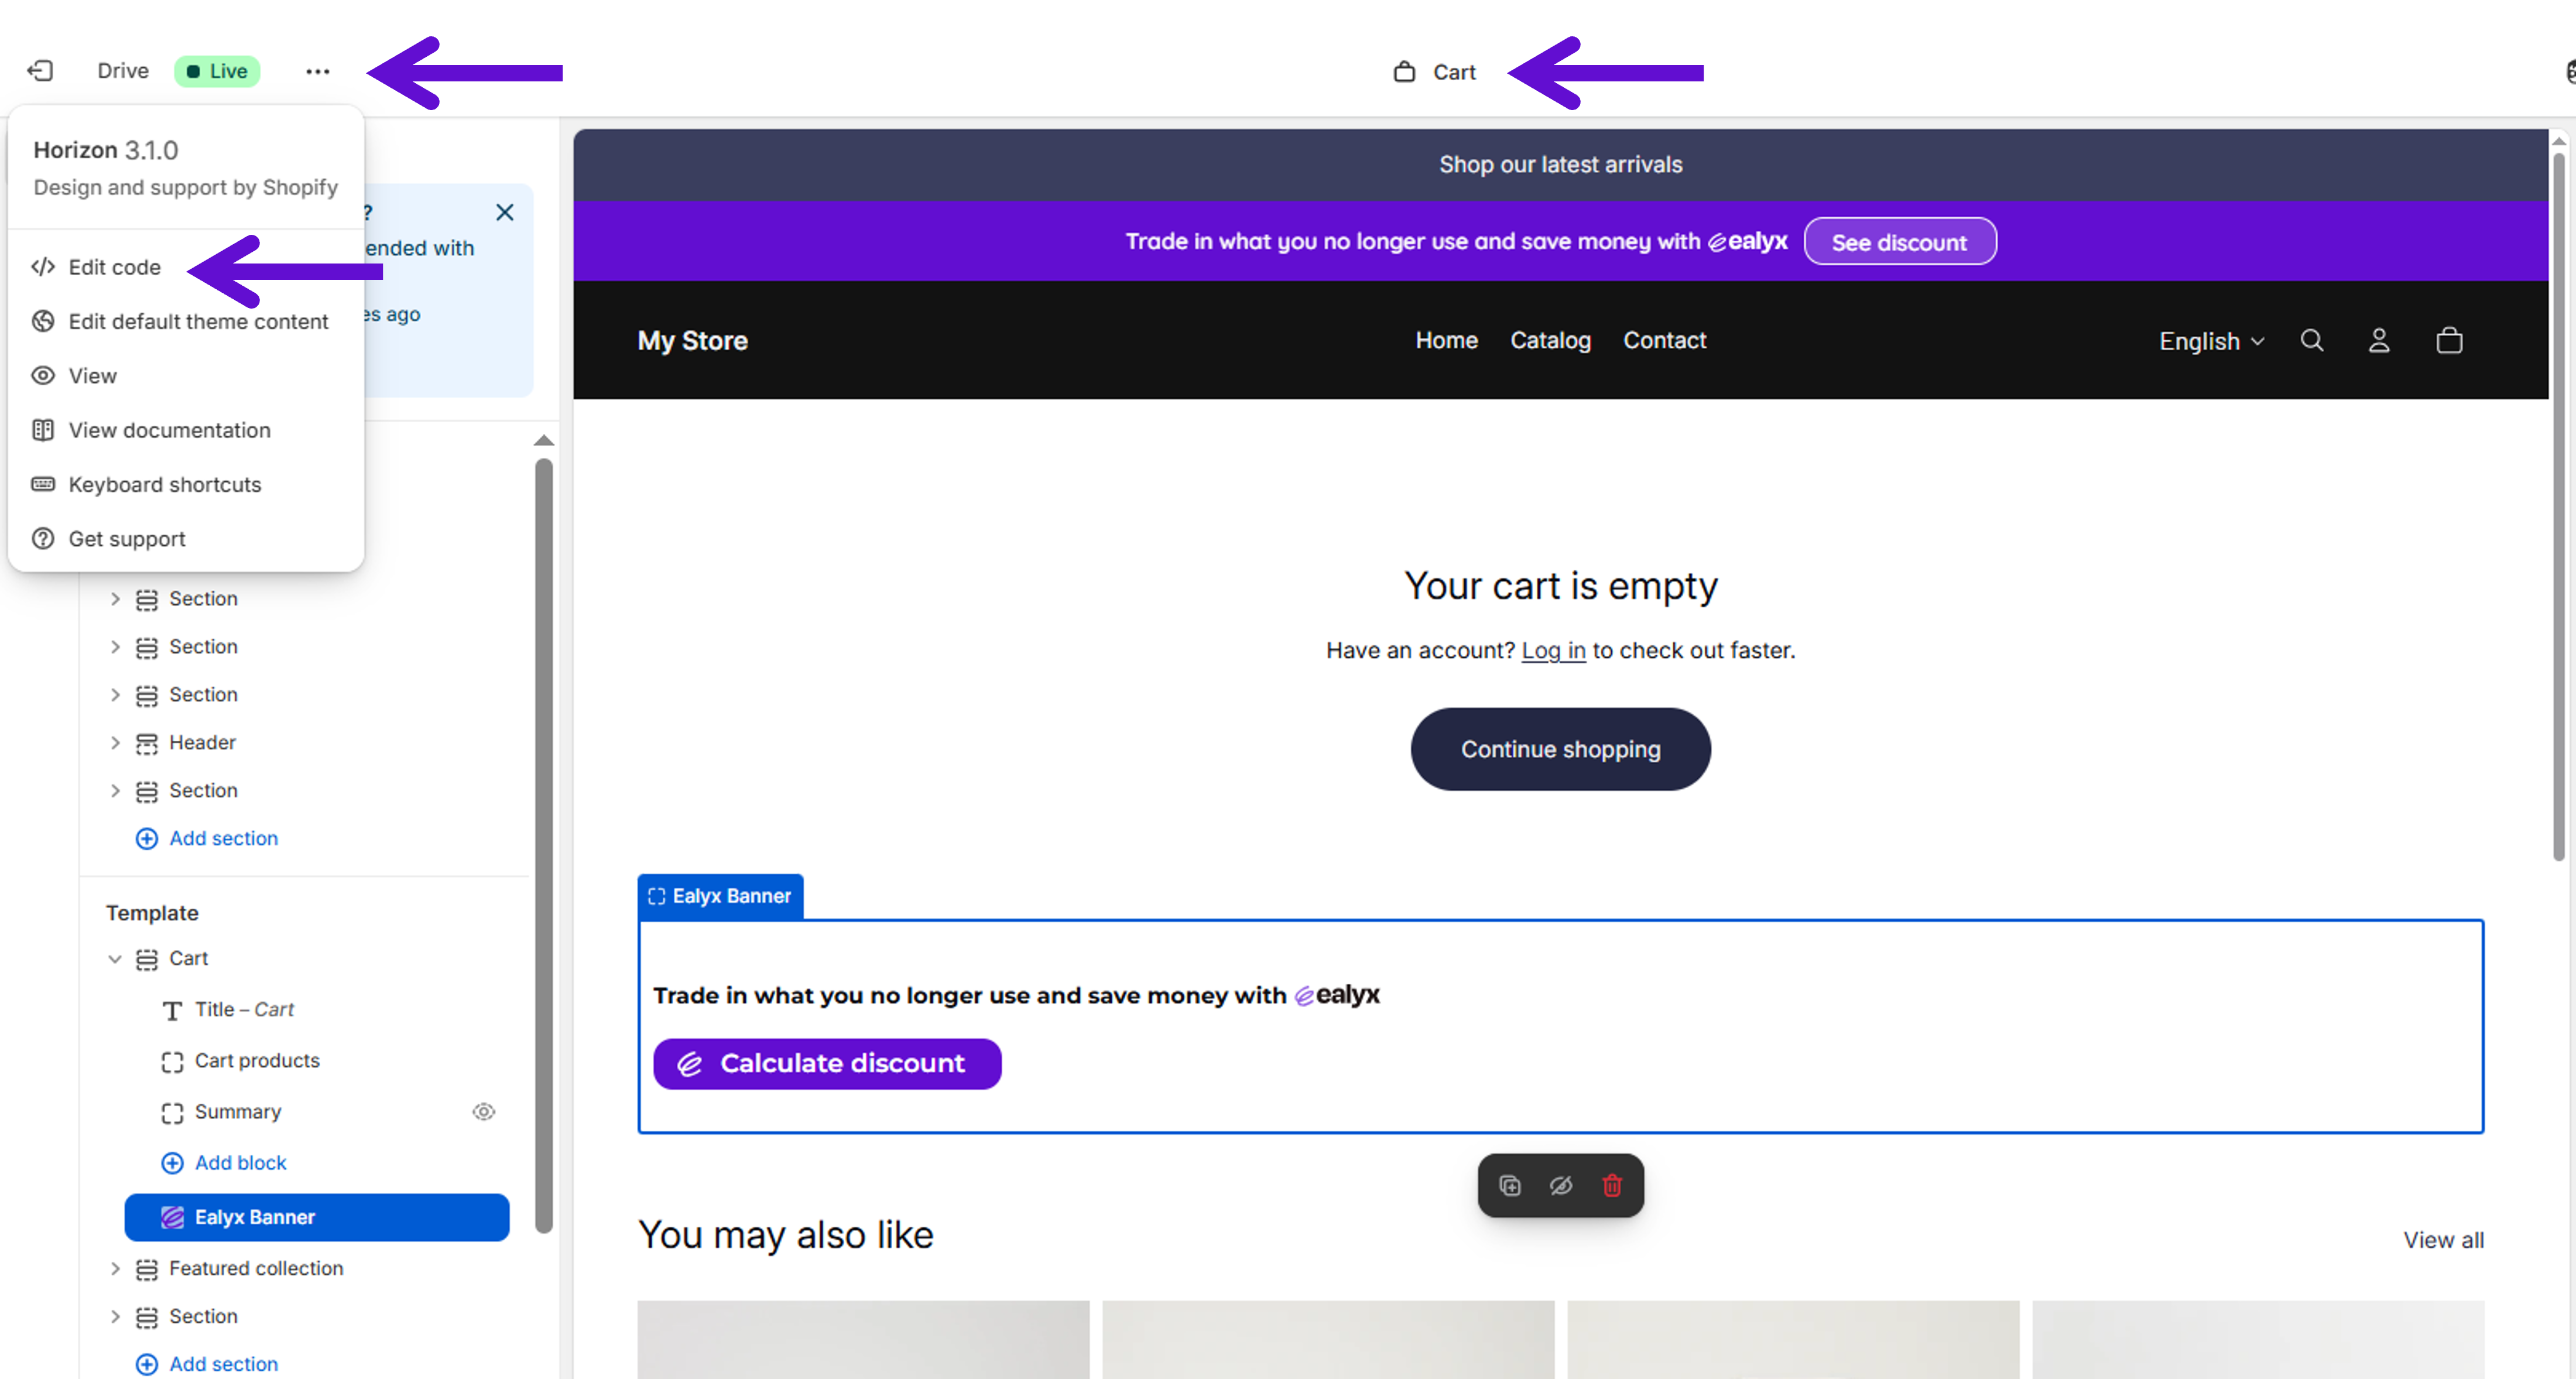
- Go to Online Store → Themes → Edit Code
-
Open: snippets/cart-summary.liquid
-
Find the element:
<div class="cart__summary-totals"> -
Add this snippet inside that element, just before the closing
</div>:<div class="ealyx-teaser" data-type="cart-summary"></div>
⚠️ Important: if this step is skipped, the Cart Widget will not appear even if enabled.
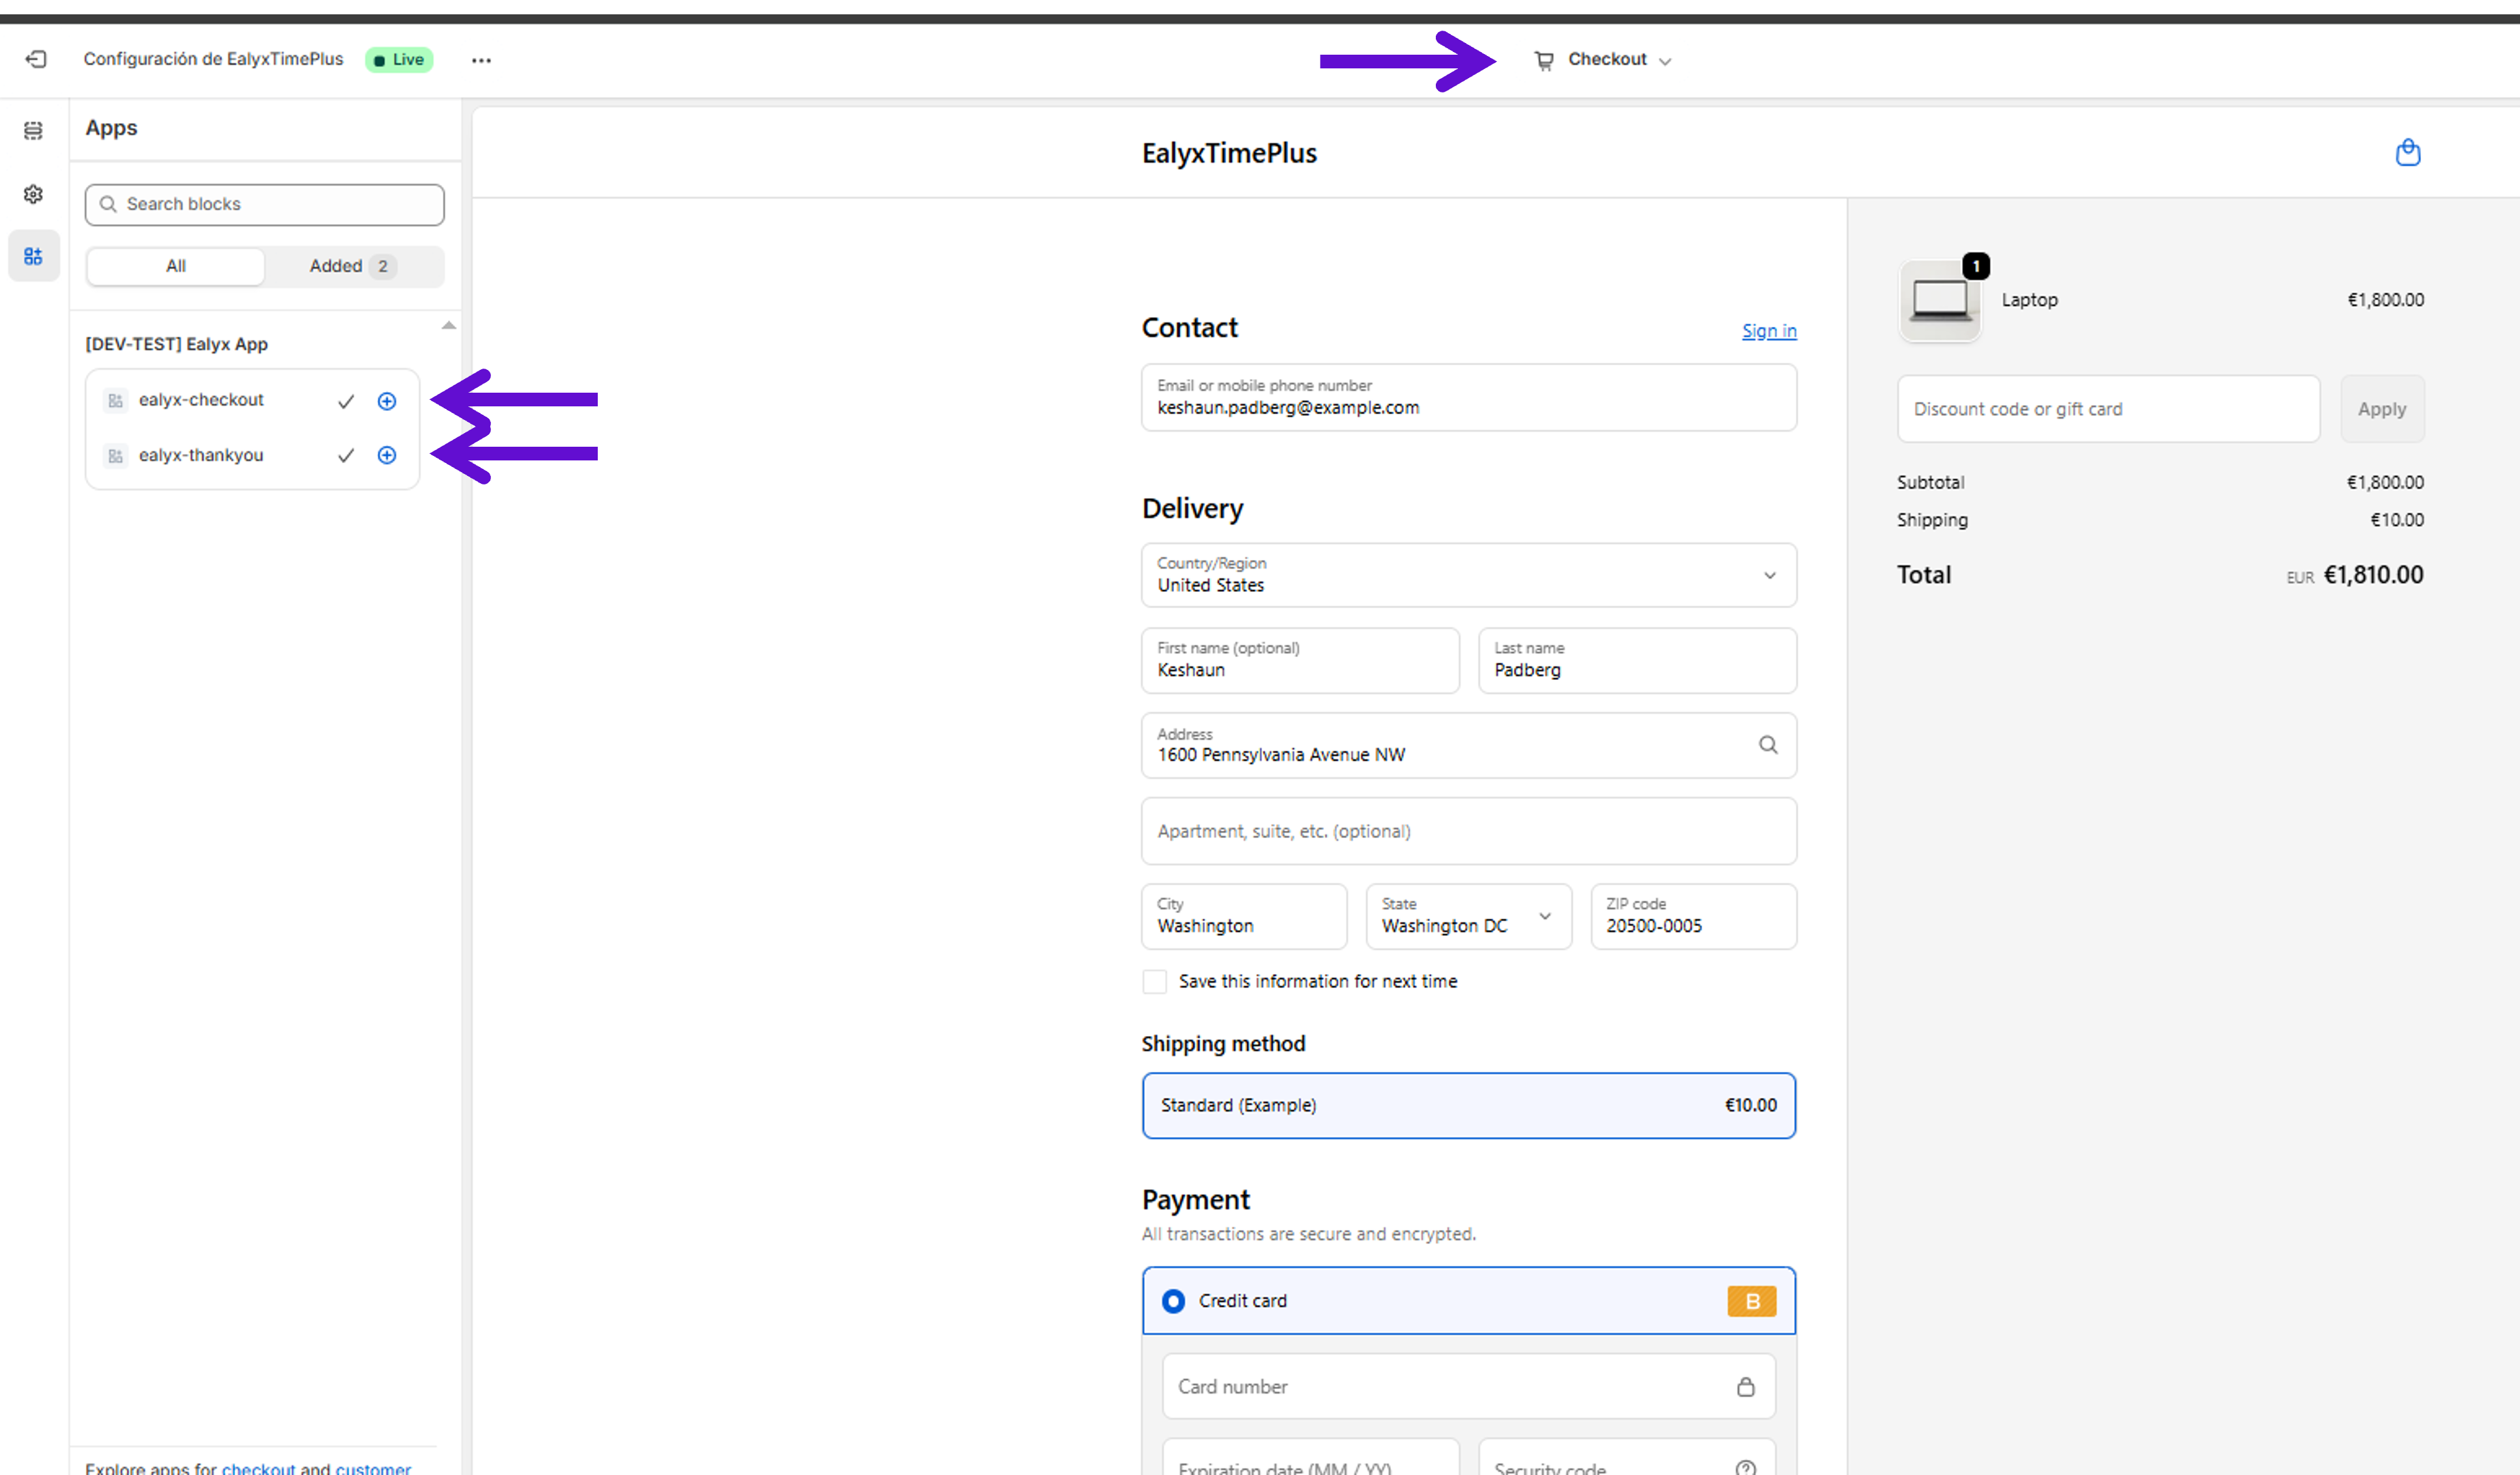
Checkout Blocks (Payment Page & Thank You Page)
Ealyx includes two additional widgets that appear during the final stages of the purchase flow:
- Checkout Block (Payment Page)
- Thank You Page Block
These widgets are not added through the Theme Editor.
They must be added through the Shopify Checkout Editor.
⚠️ Important limitations
- The Payment Page widget is only available for Shopify Plus merchants, because Shopify restricts checkout customisation.
- The Thank You Page widget is available for all merchants.
How to Add
- In Theme Editor, switch to the Checkout and customer accounts template.
- Go to Apps
- Search for Ealyx App.
- Select ealyx-checkout → Add to → Checkout
- Select ealyx-thankyou → Add to → Thank you
Payment Page Recommended Position
Place the widget:
- Directly below the Shipping Method block and above the Payment section
Why: This placement ensures the user sees their trade-in benefit right before selecting a payment method, increasing confidence and reducing friction at the most critical step of the checkout process.
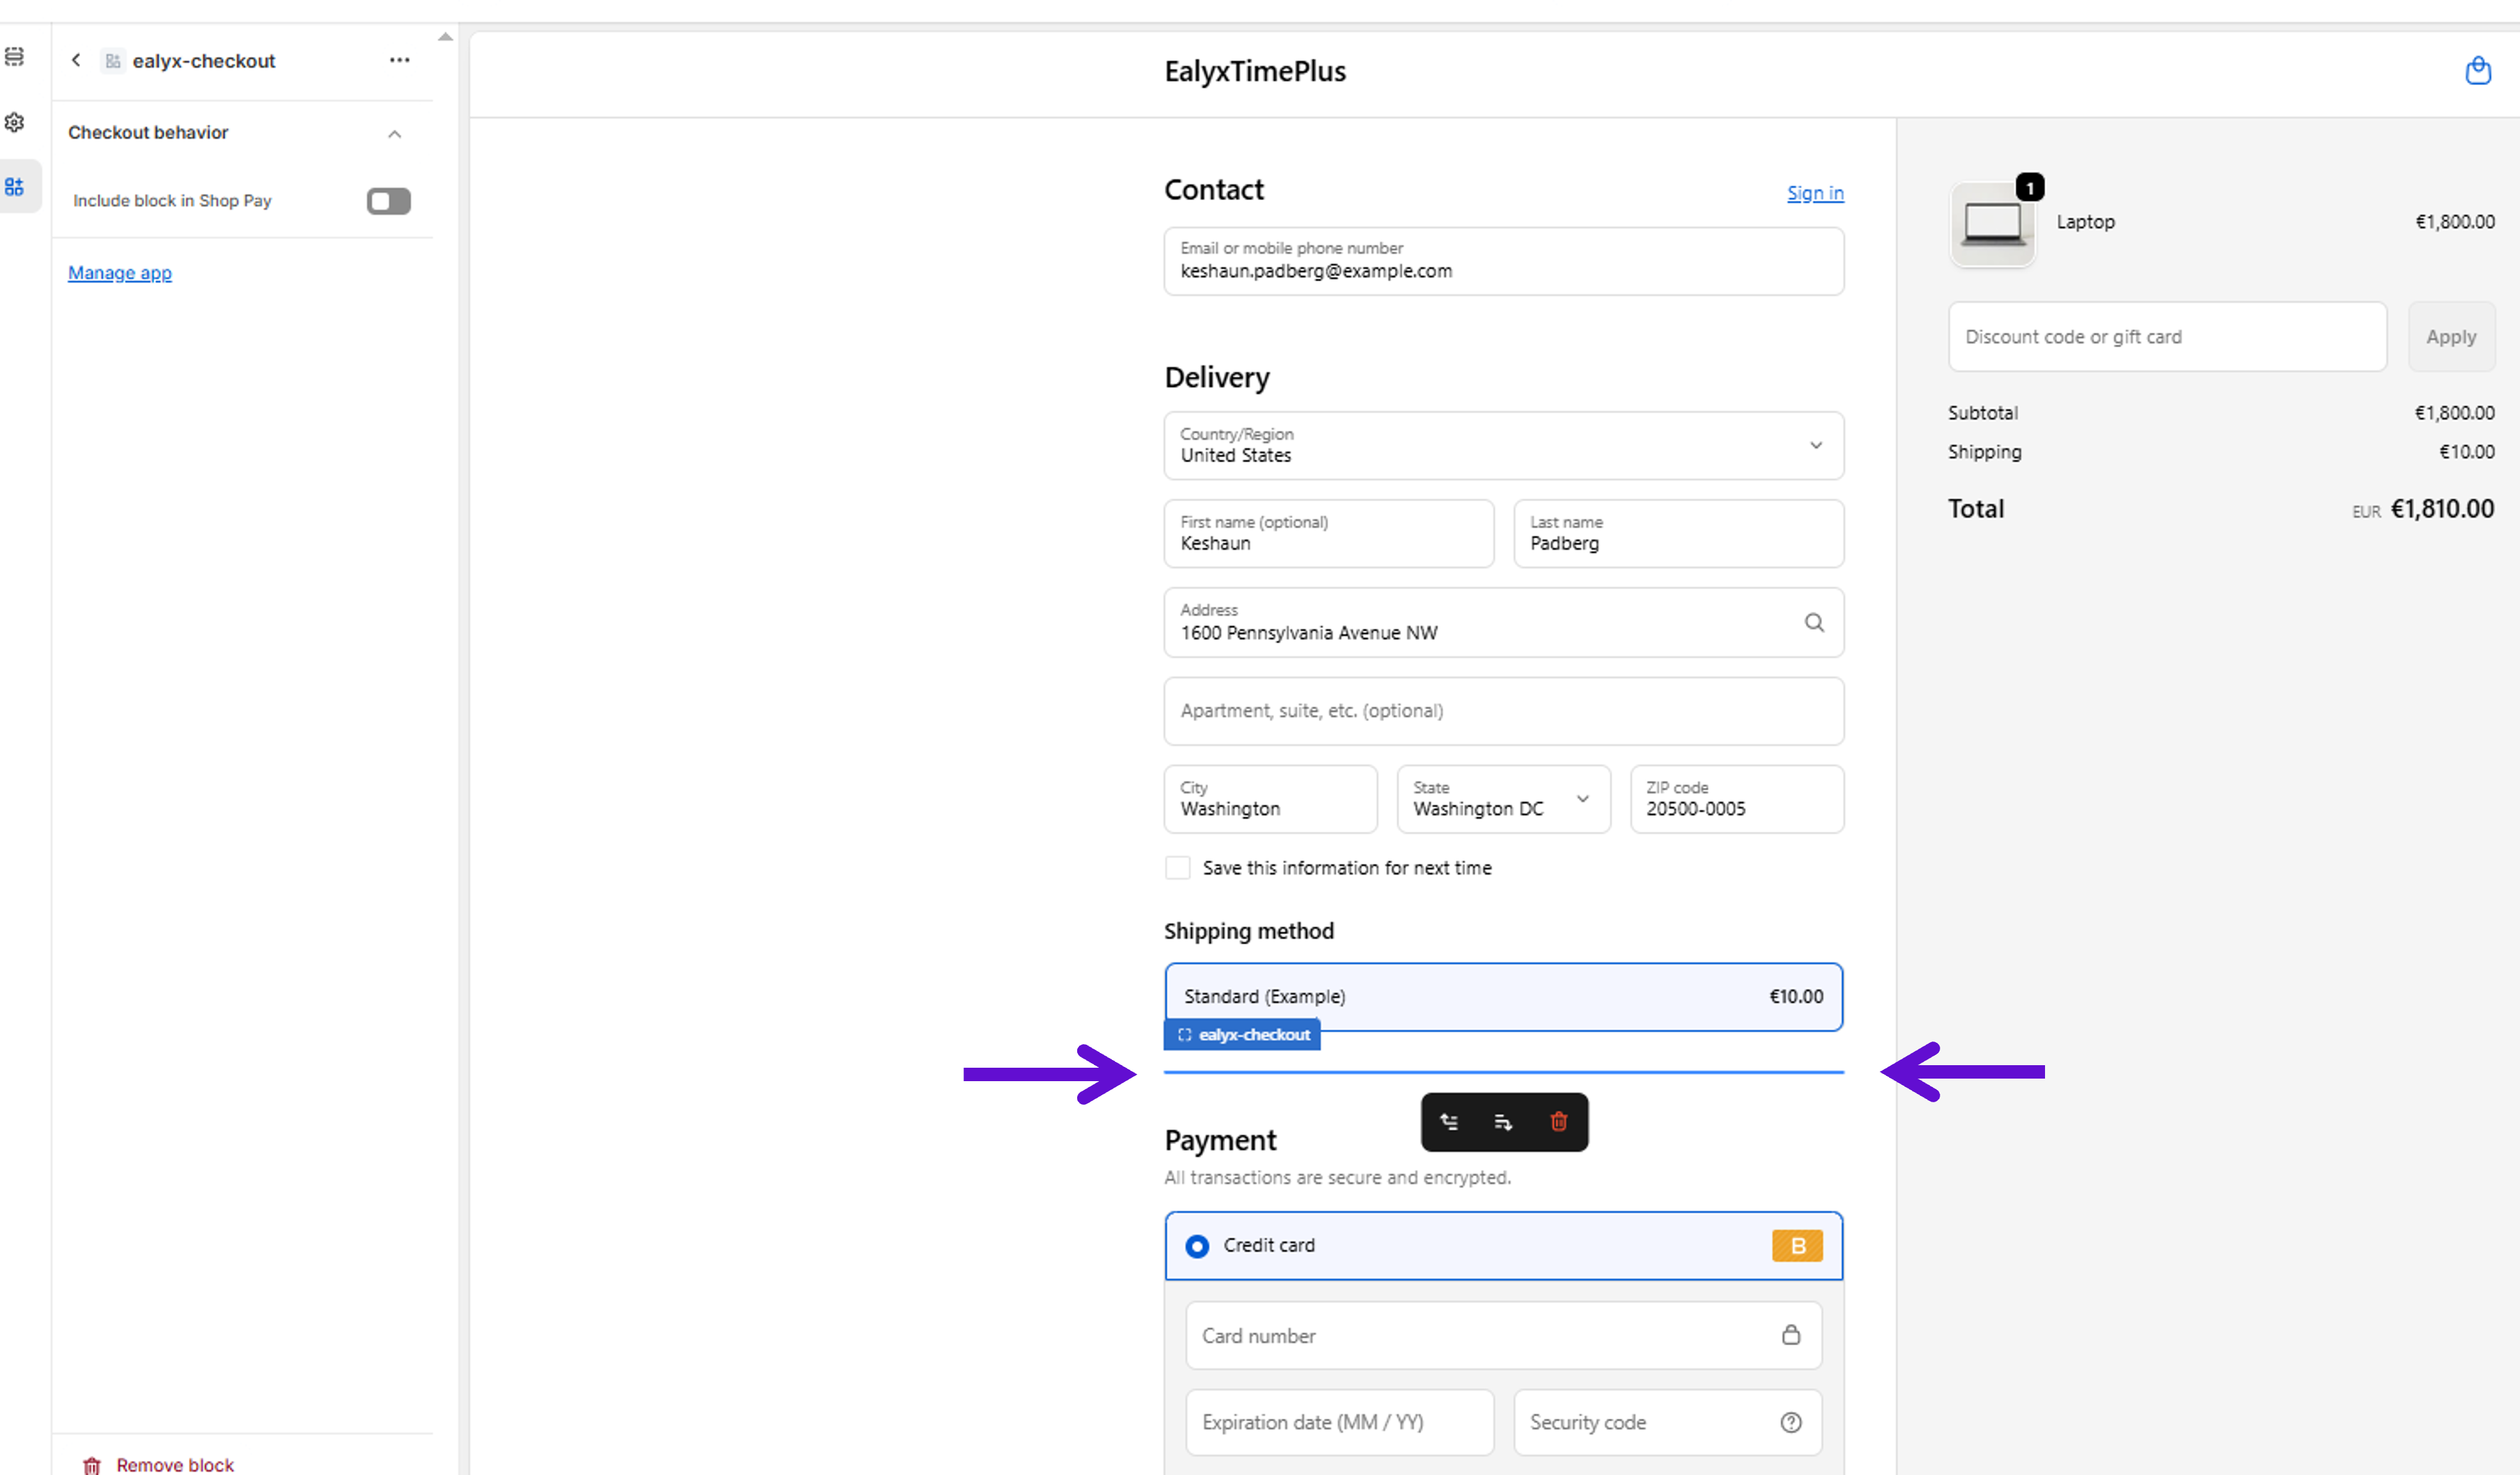
⚠️ Note: This block is only available for Shopify Plus merchants.
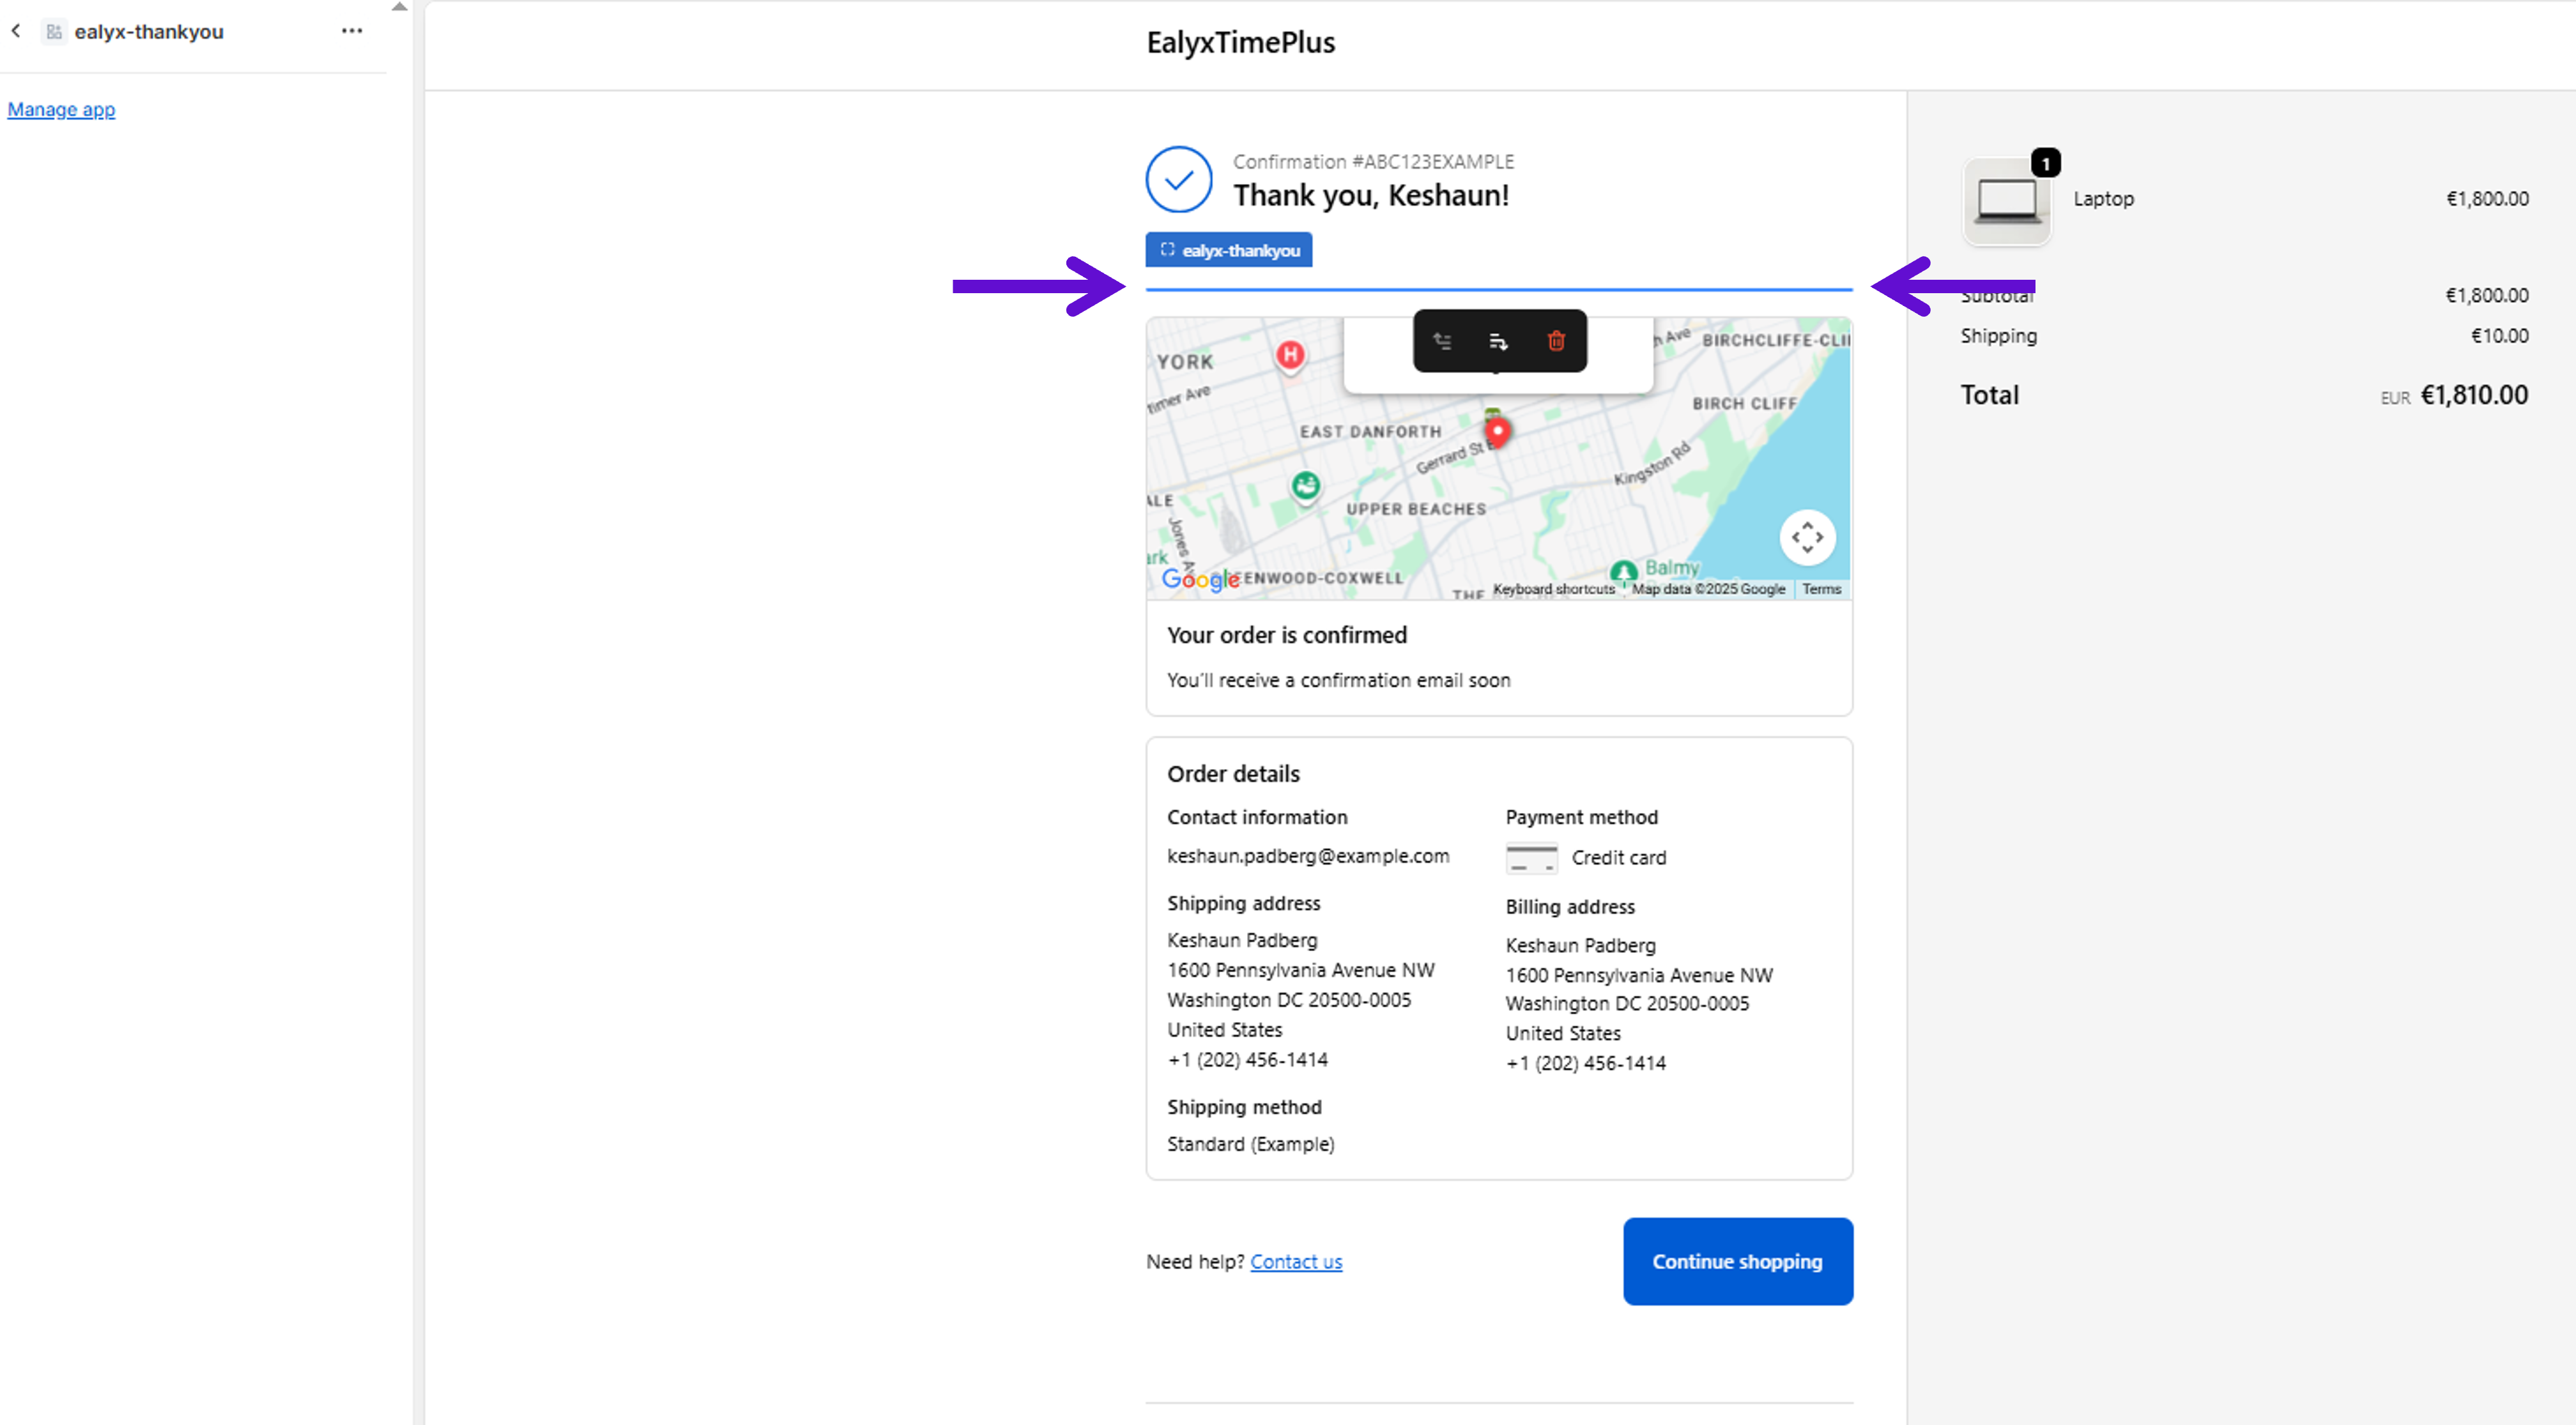
Thank You Page Recommended Position
Place the widget:
- At the top of the Thank You page, just below the confirmation header
Why: Displaying the widget immediately after order confirmation reinforces the user’s trade-in action and provides a clear next step. This increases post-purchase engagement and ensures users know their trade-in has been successfully registered.
Save and Test
After configuring any widget:
- Click Save in the Theme Editor
- Open your storefront in a new tab
- Verify that the widget loads and interacts correctly with Ealyx