Shopify
Ealyx provides a native Shopify App that enables the trade-in experience directly within your store.
Setting up Ealyx on a Shopify website requires completing three main steps:
- Install the App and connect your credentials — install the Ealyx App from your Shopify admin and authenticate your store.
- Enable the Ealyx App Embed — activate the Ealyx Extension in the Theme Editor so it is available across your store.
- Add and configure the Ealyx blocks — place the Ealyx widgets on the pages where you want them to appear.
Installation and Activation
Install the Ealyx App
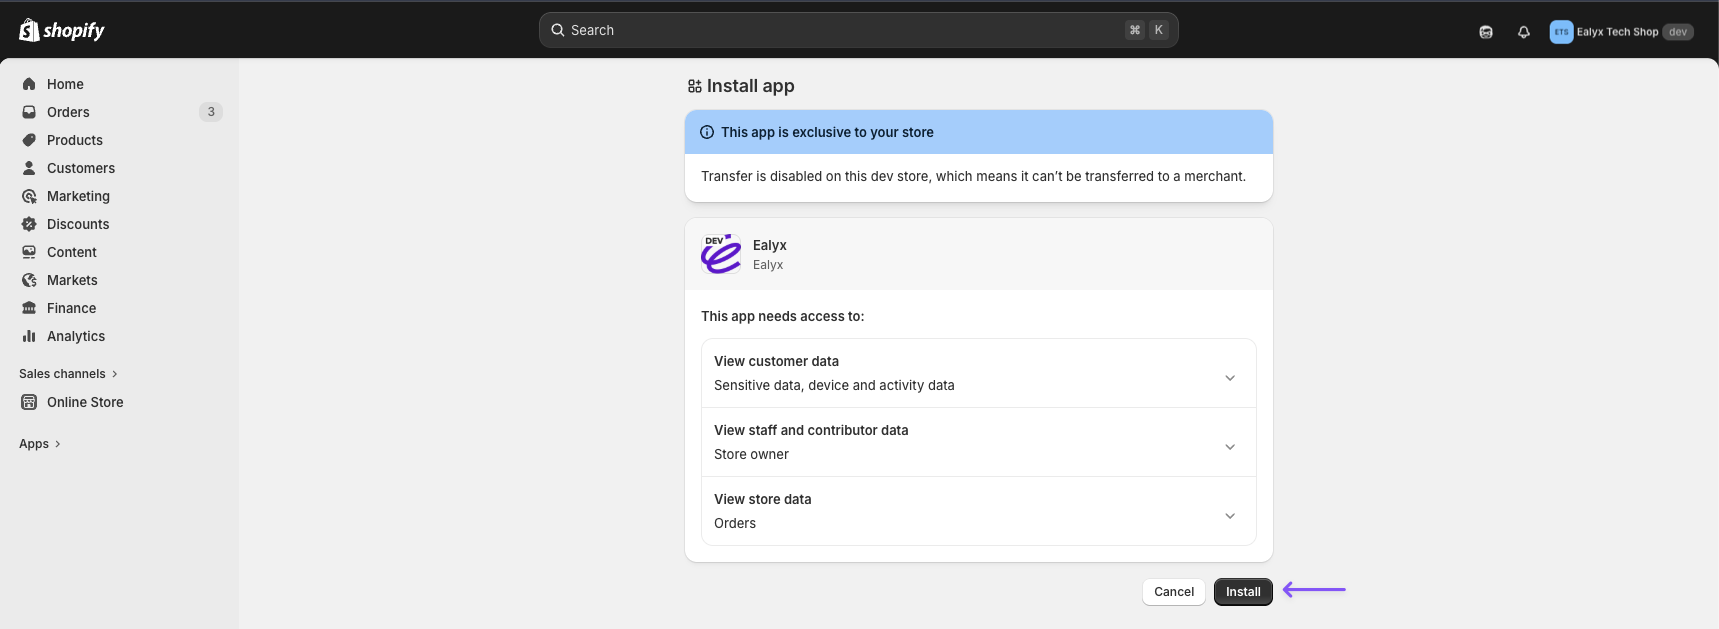
Once you have access to the App, open the installation link provided by your Ealyx account manager. You will see the Install app screen listing the permissions the App requires. Click Install to proceed.
Connect Your Credentials
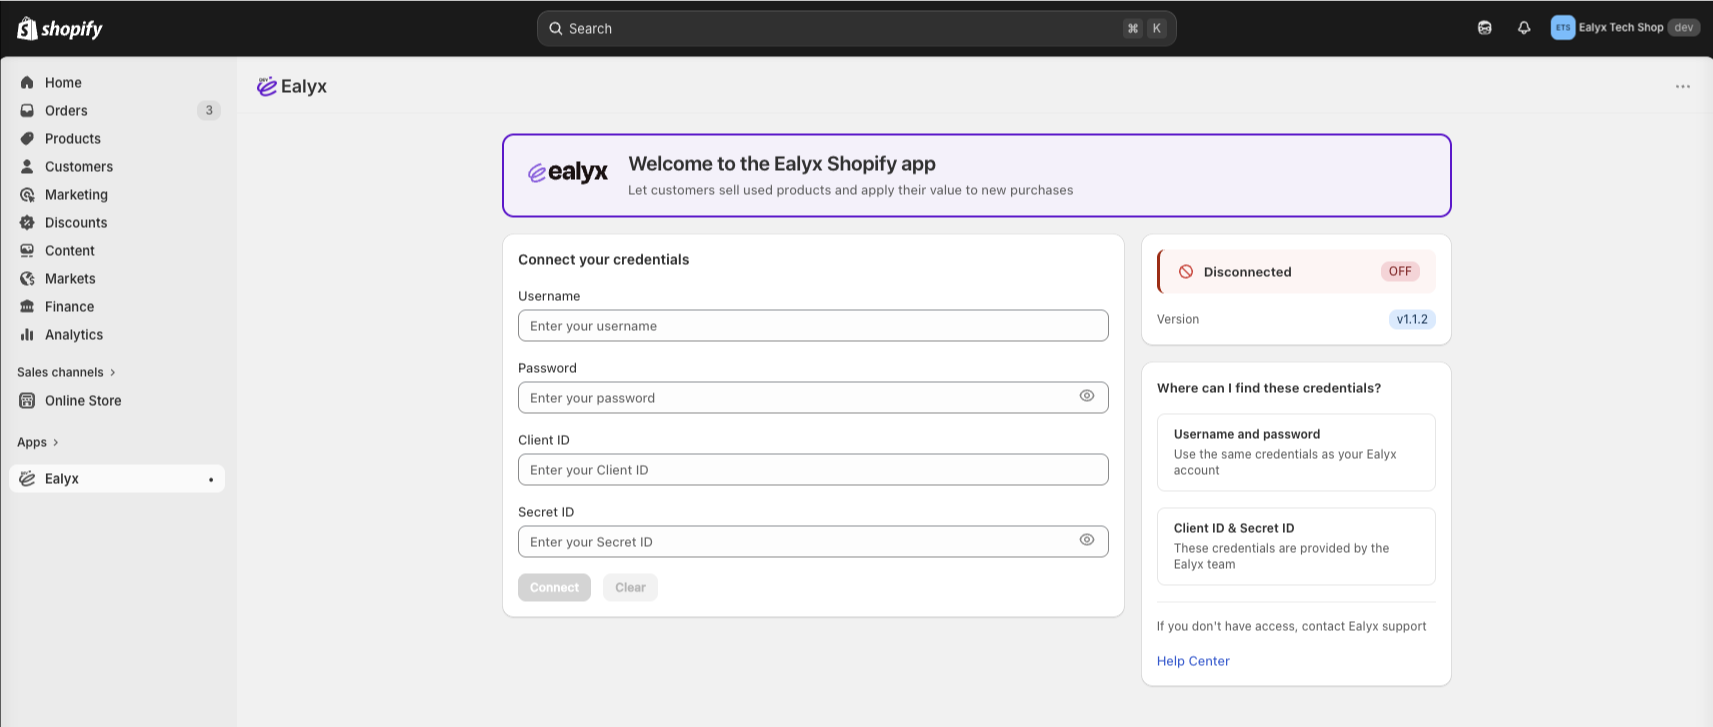
After installation, the App will open automatically inside your Shopify admin. You will see the Connect your credentials screen. Fill in the following fields and click Connect:
- Username — your Ealyx account username
- Password — your Ealyx account password
- Client ID — provided by the Ealyx team
- Secret ID — provided by the Ealyx team
💡 If you are unsure where to find these credentials, the panel on the right side of the screen includes a quick reference guide.
App Connected
Once the credentials are saved successfully, the App will show a Store connected confirmation and a setup overview with the next steps.
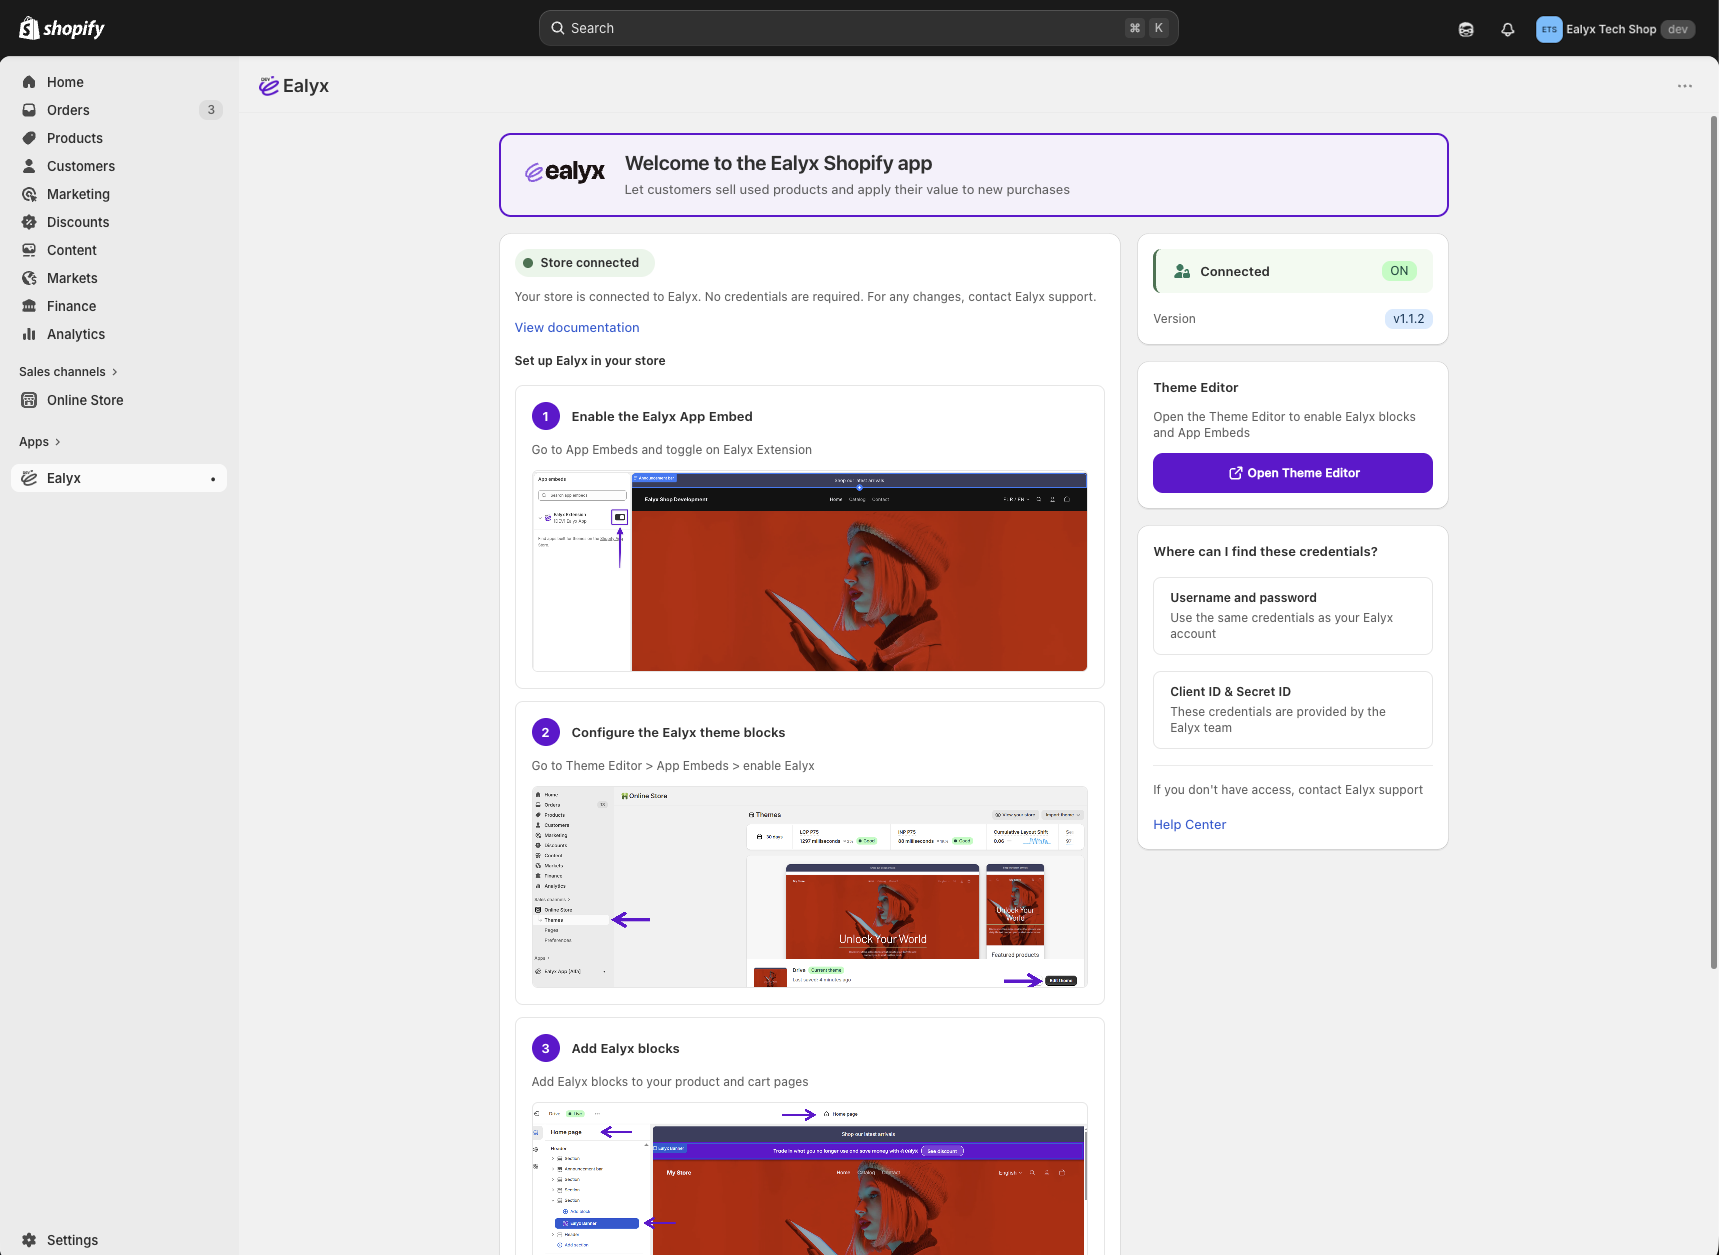
From here you can click Open Theme Editor to proceed directly to the configuration steps.
Add & Configure the Ealyx Blocks
All Ealyx widgets are placed through the Shopify Theme Editor, without any code snippets.
To open the Theme Editor:
- Go to Online Store → Themes.
- Click Customize on your active theme.

Once inside the Theme Editor, follow the block-specific instructions below.
Enable the Ealyx App Embed
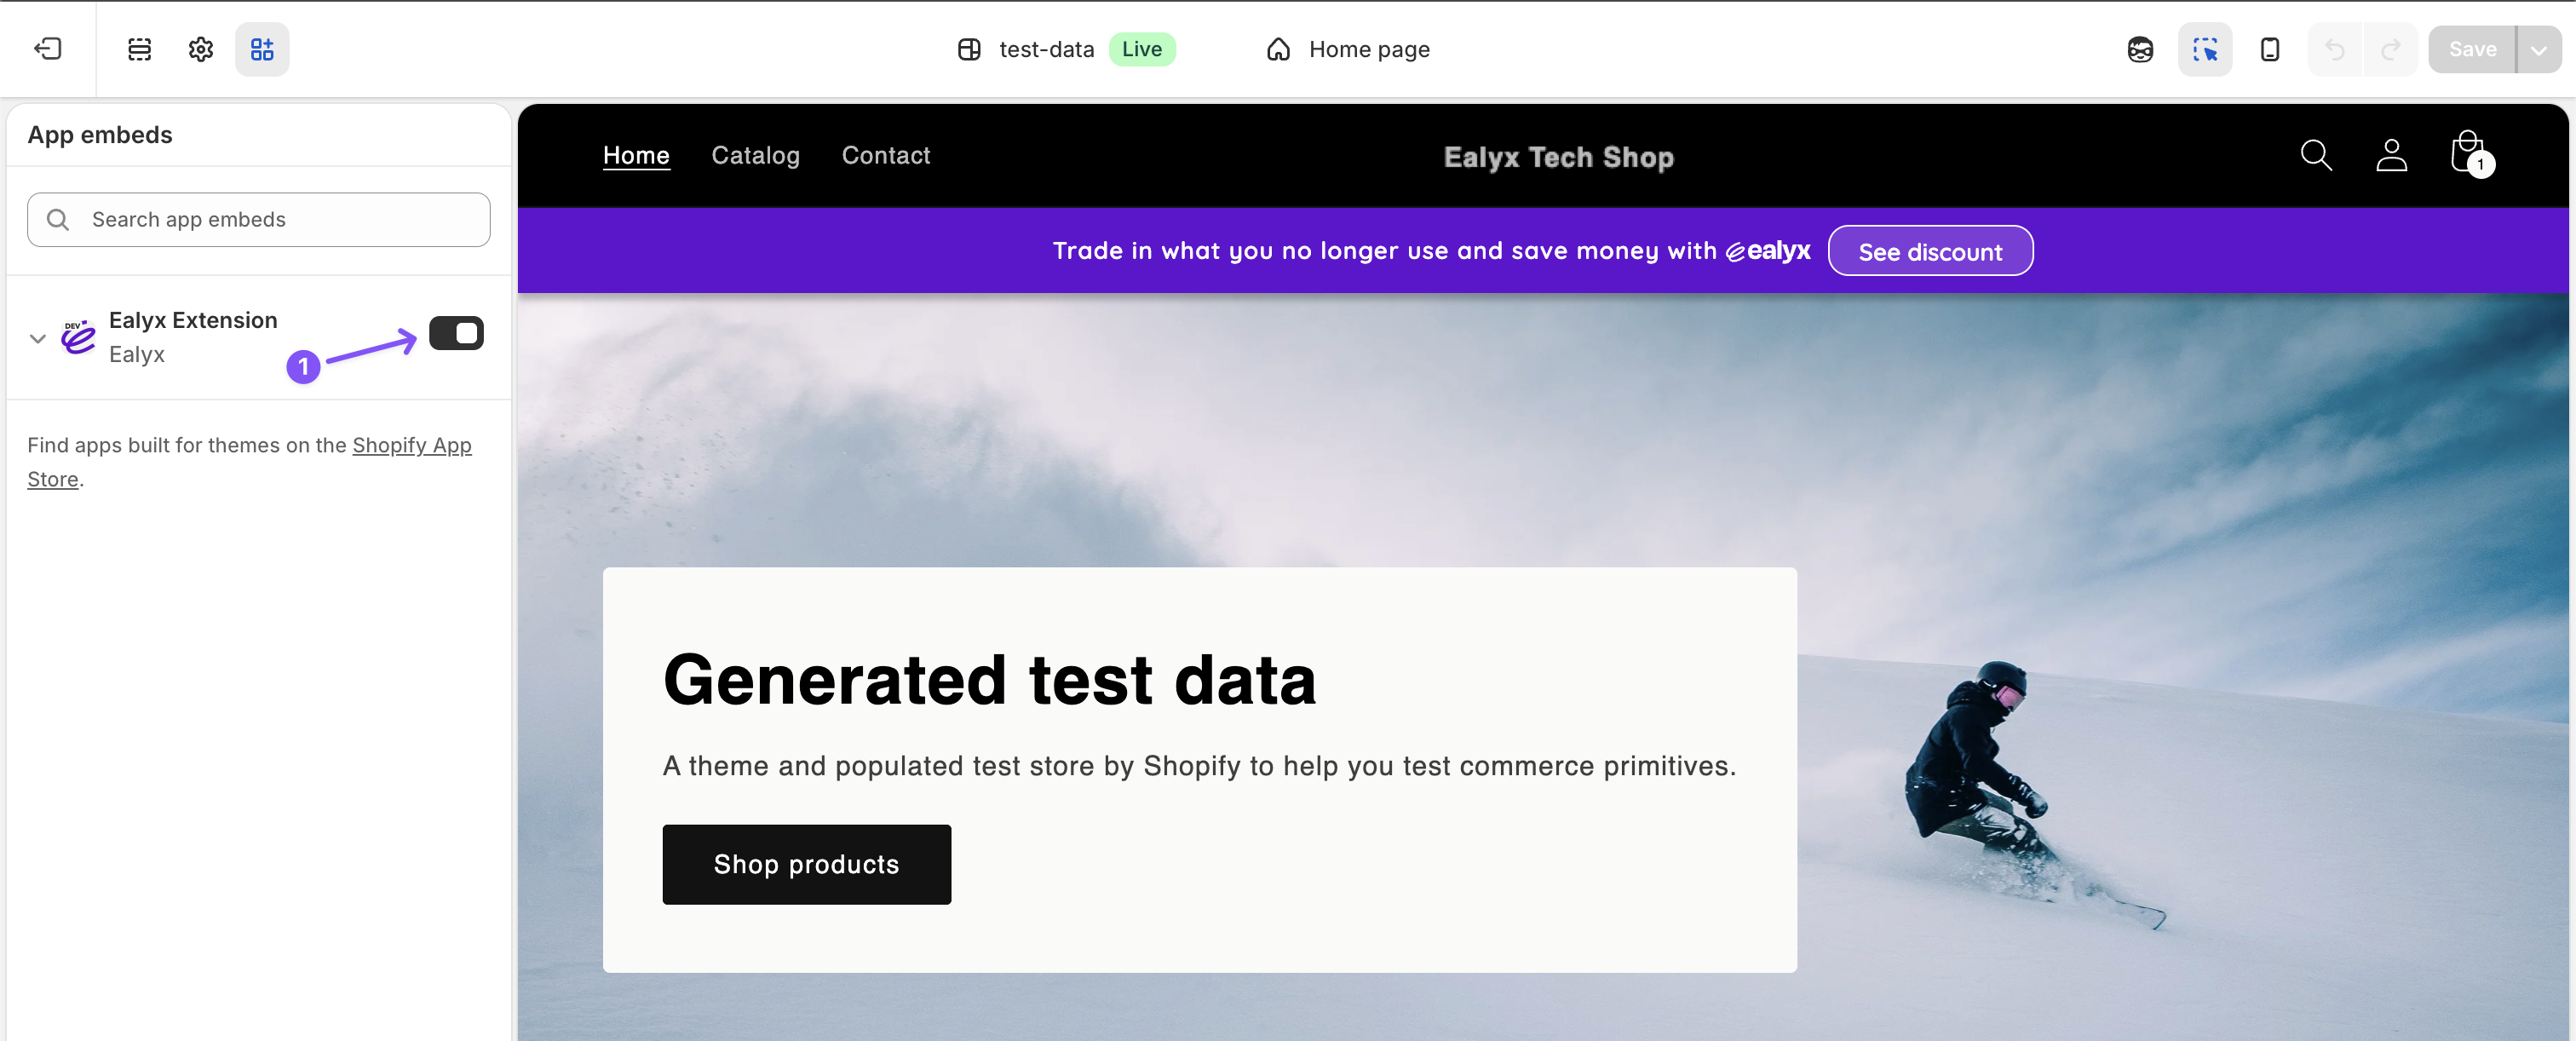
Before adding individual blocks to your pages, you must enable the Ealyx Extension in your theme's App Embeds. This step activates the App globally in your store.
- Go to Online Store → Themes.
- Click Customize on your active theme.
- In the left panel, click App embeds.
- Find Ealyx Extension and toggle it ON.
Ealyx Block Types & Configuration
Below you will find how to add the Ealyx block to each page, how to configure it, and the recommended placement for each.
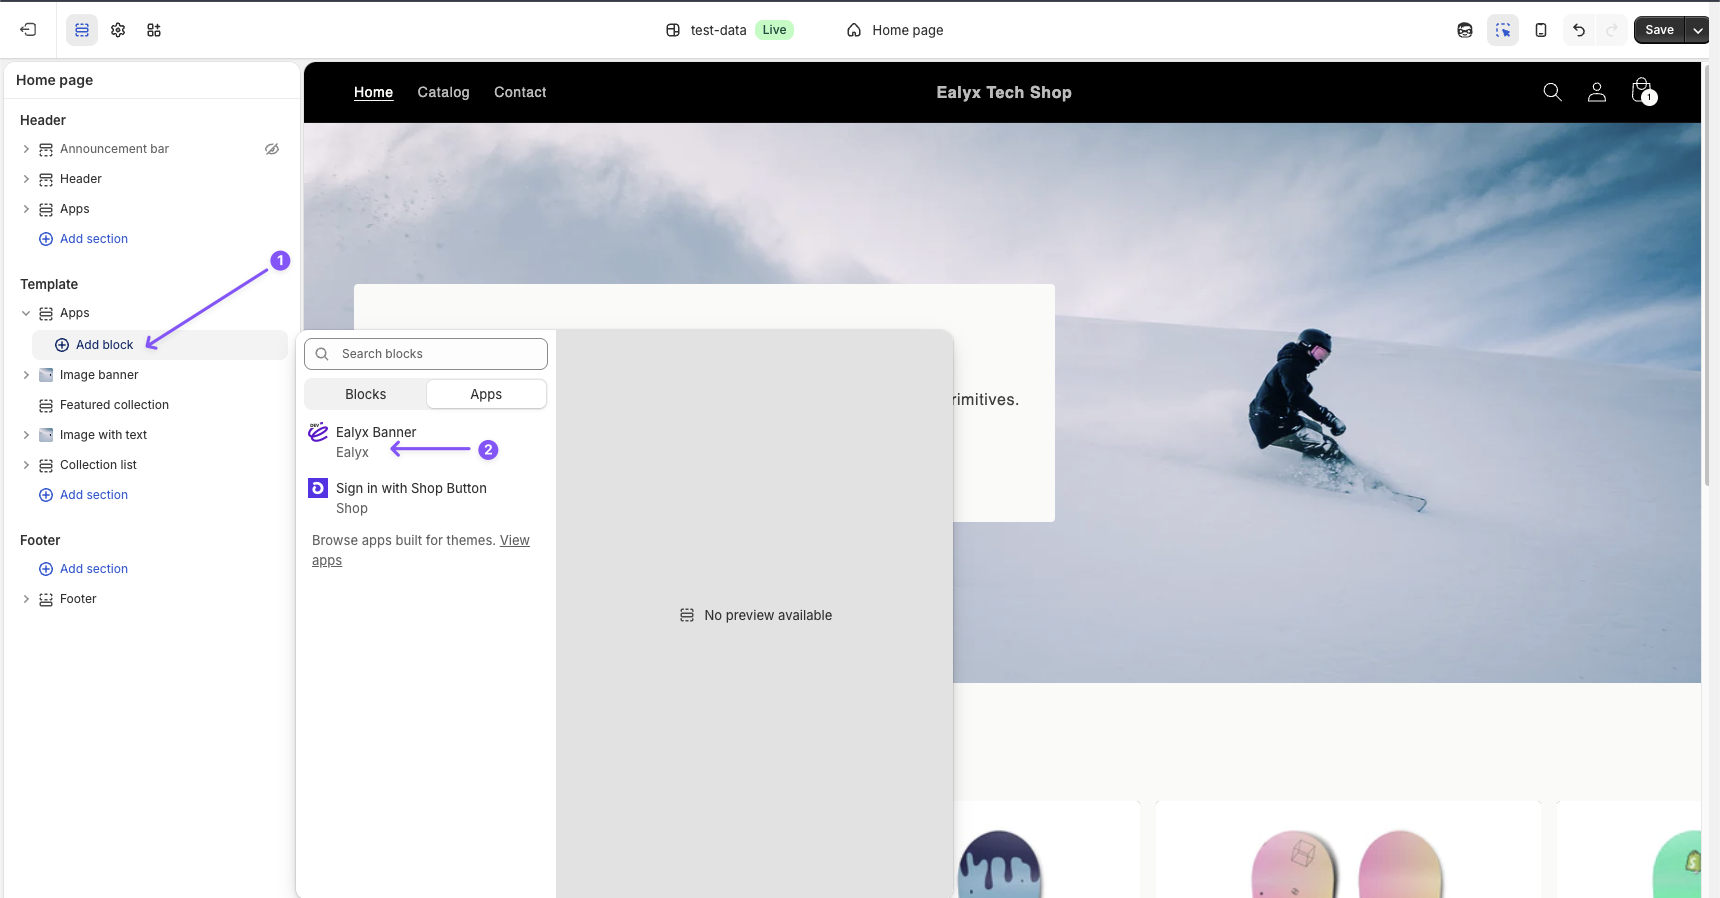
Home Page
The Ealyx block on the Home page allows you to highlight the trade-in benefit prominently at the beginning of the shopping journey.
How to Add
- Inside the Theme Editor, open the Home page template.
- In the left panel, click Add section.
- Go to the Apps tab and select Ealyx Banner.
Configure the Ealyx Block
Once the block is added, click on it in the left panel to open the configuration options:
- Component Type → Banner
- Full-width banner → On
- Top & Bottom Padding → 10px
- Visibility → Mobile and Desktop
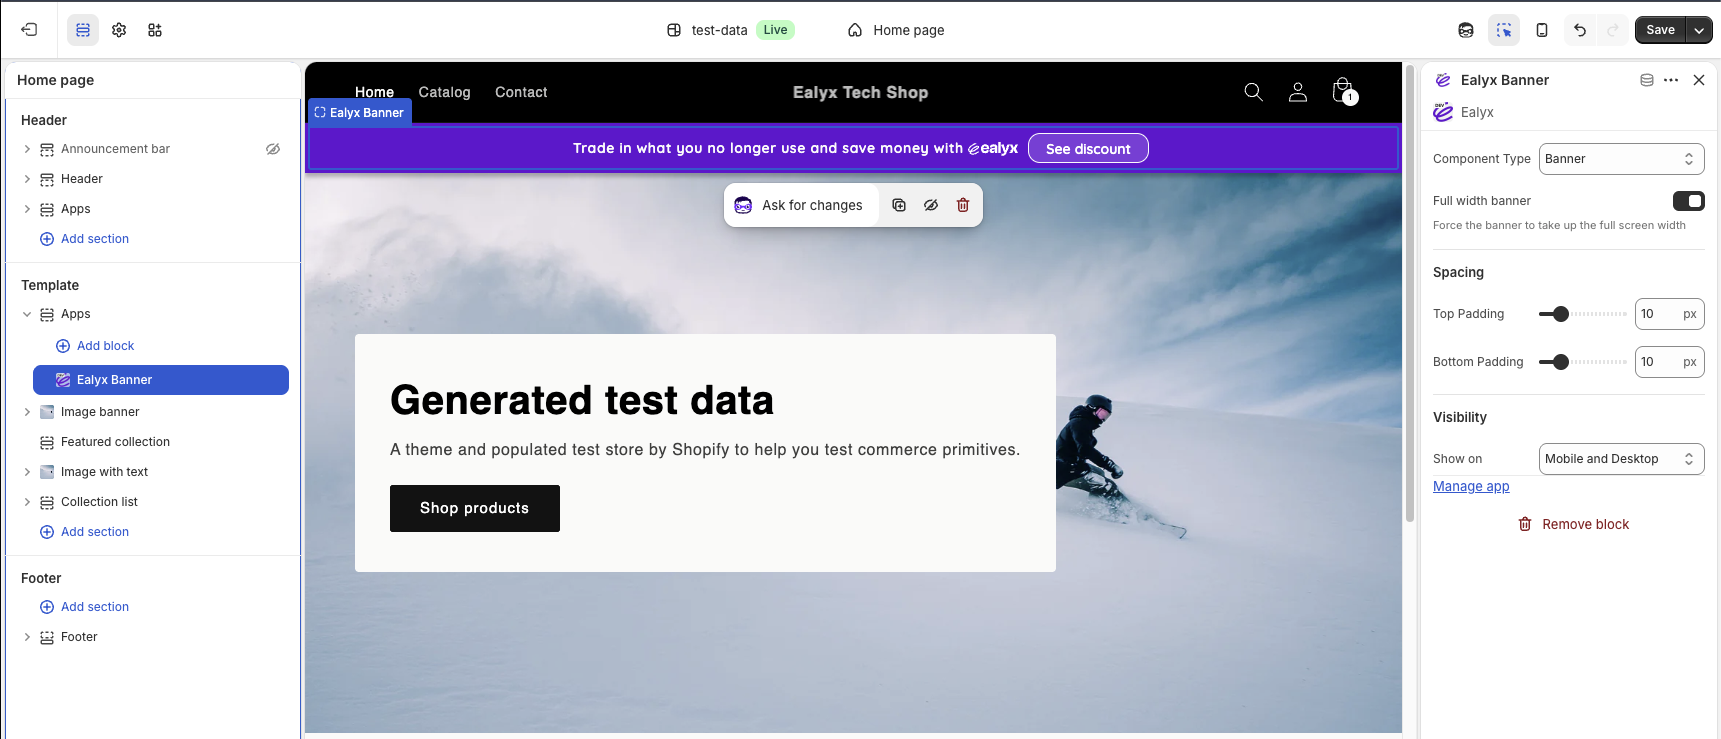
Recommended Position
Place the block at the top of the Home page, directly under the Shopify Announcement Bar if present.
Why: Placing the block here ensures maximum visibility for the trade-in benefit at the start of the shopping journey.
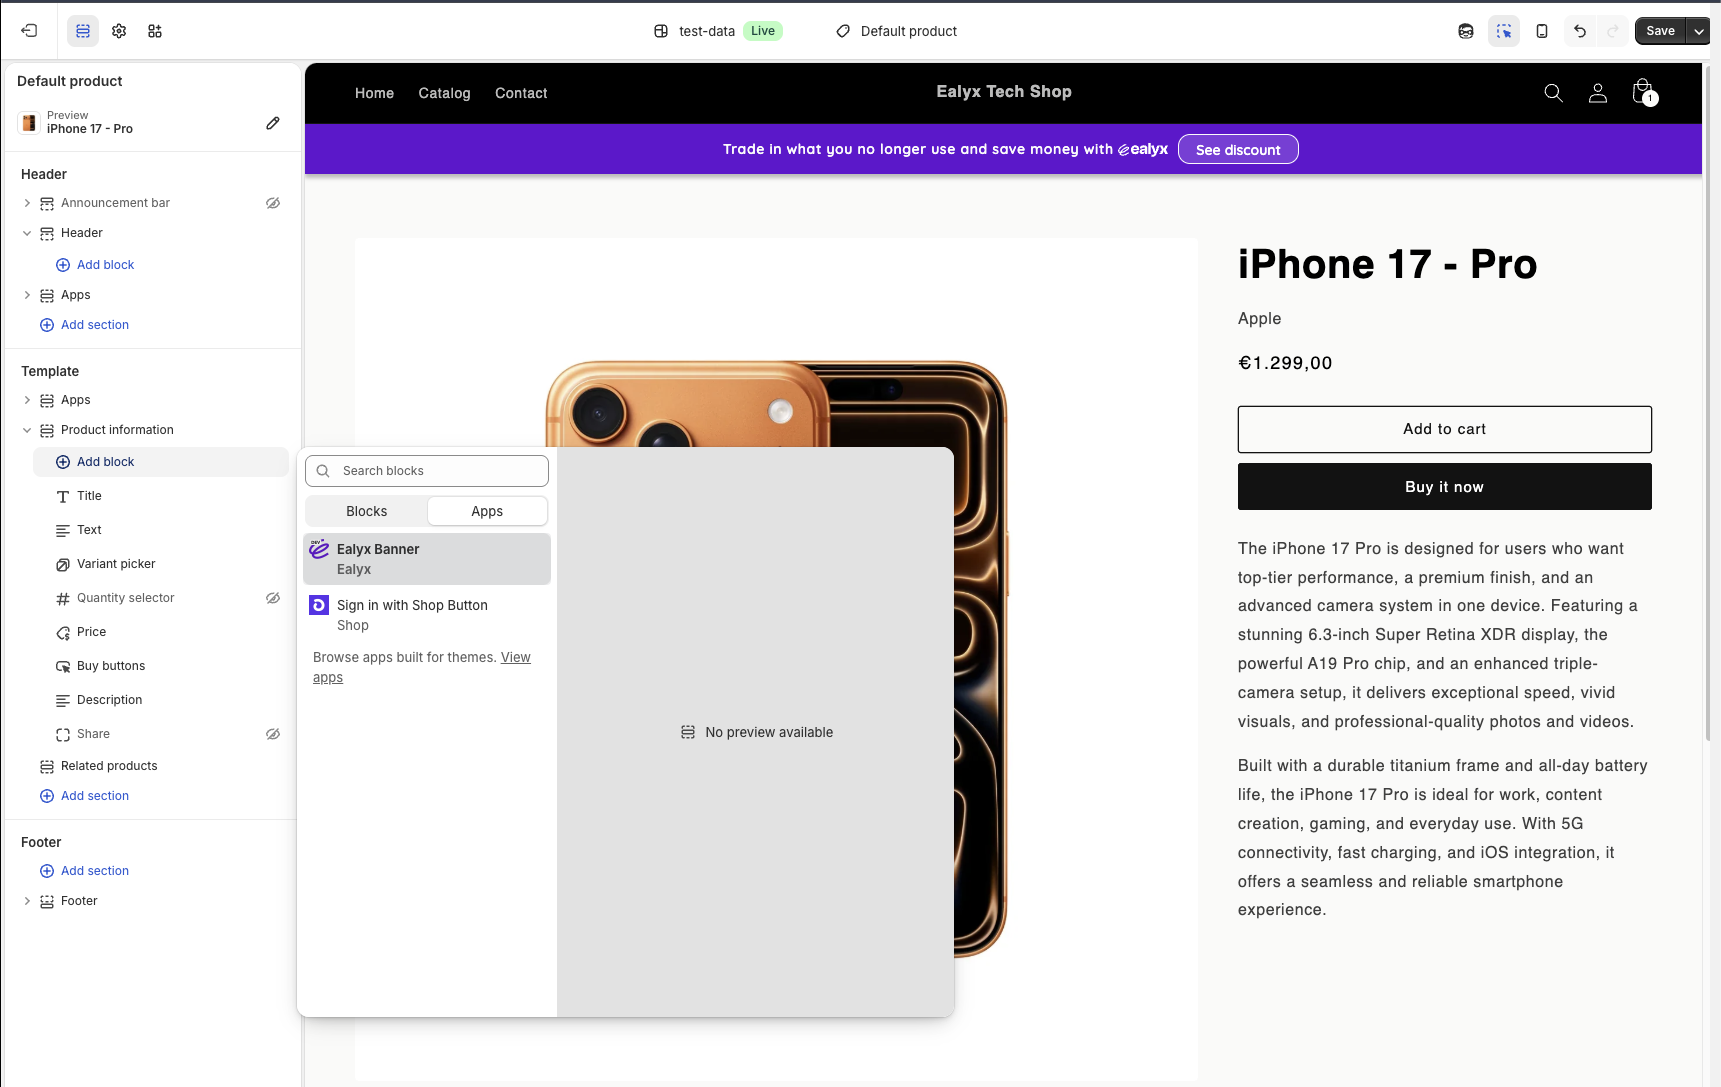
Product Page
The Ealyx block on product pages displays the trade-in value directly where users make purchase decisions. This block is highly conversion-oriented.
How to Add
- In the Theme Editor, switch to the Default product template.
- Select the section where you want to place the widget — typically below the Buy buttons.
- Click Add block.
- In the Apps tab, select Ealyx.
Configure the Ealyx Block
Once the block is added and selected, configure it in the right panel:
- Component Type → Product Widget
- Full-width banner → On
- Top & Bottom Padding → 10px
- Visibility → Mobile and Desktop
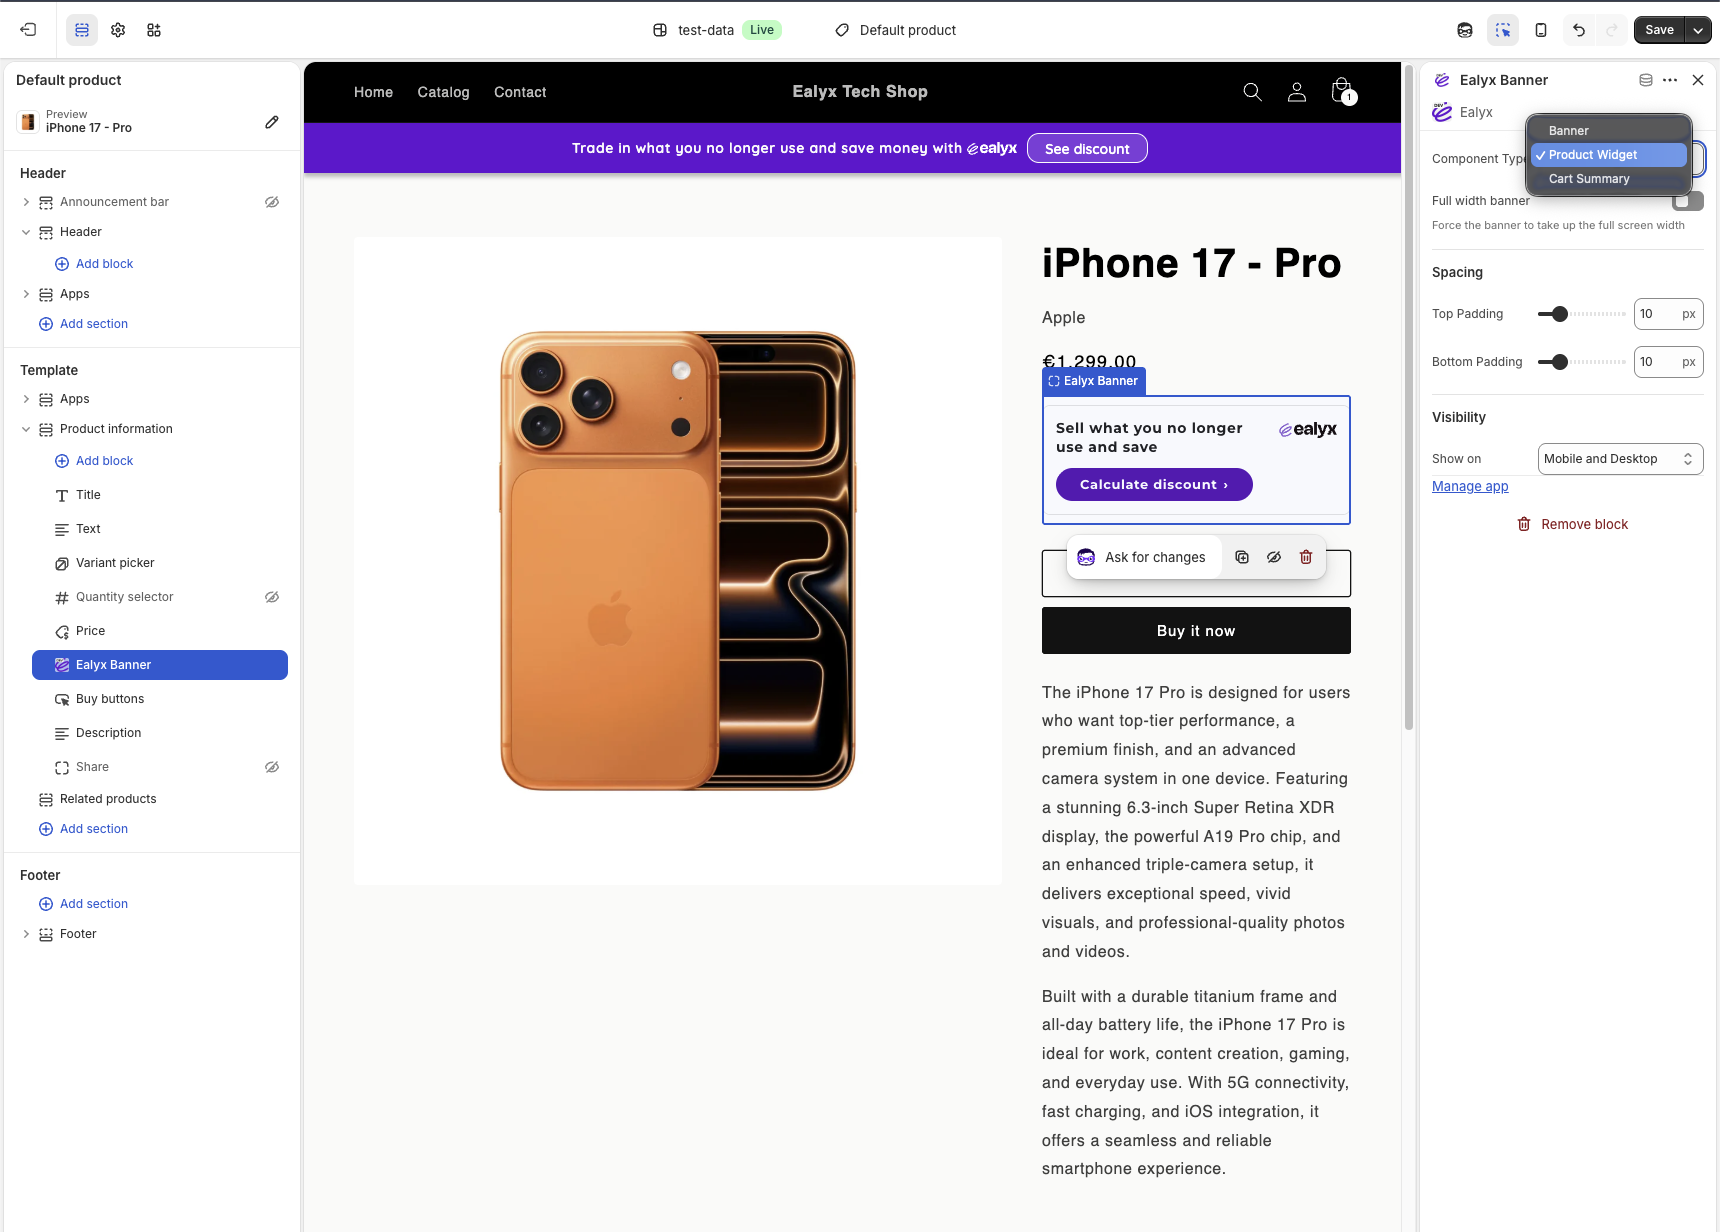
Recommended Position
Drag the block to position it:
- Below the More payment options text, or
- Above the "Add to cart" button
Why: At this stage, shoppers are evaluating affordability. Showing the trade-in benefit here maximises conversion.
Cart Page
The Ealyx block on the Cart page lets customers review the trade-in option before checkout.
If the user already completed a valuation, the block also shows the device being traded in and the discount applied.
How to Add
- In the Theme Editor, switch to the Cart template.
- In the left panel, click Add section.
- Go to the Apps tab and select Ealyx Banner.
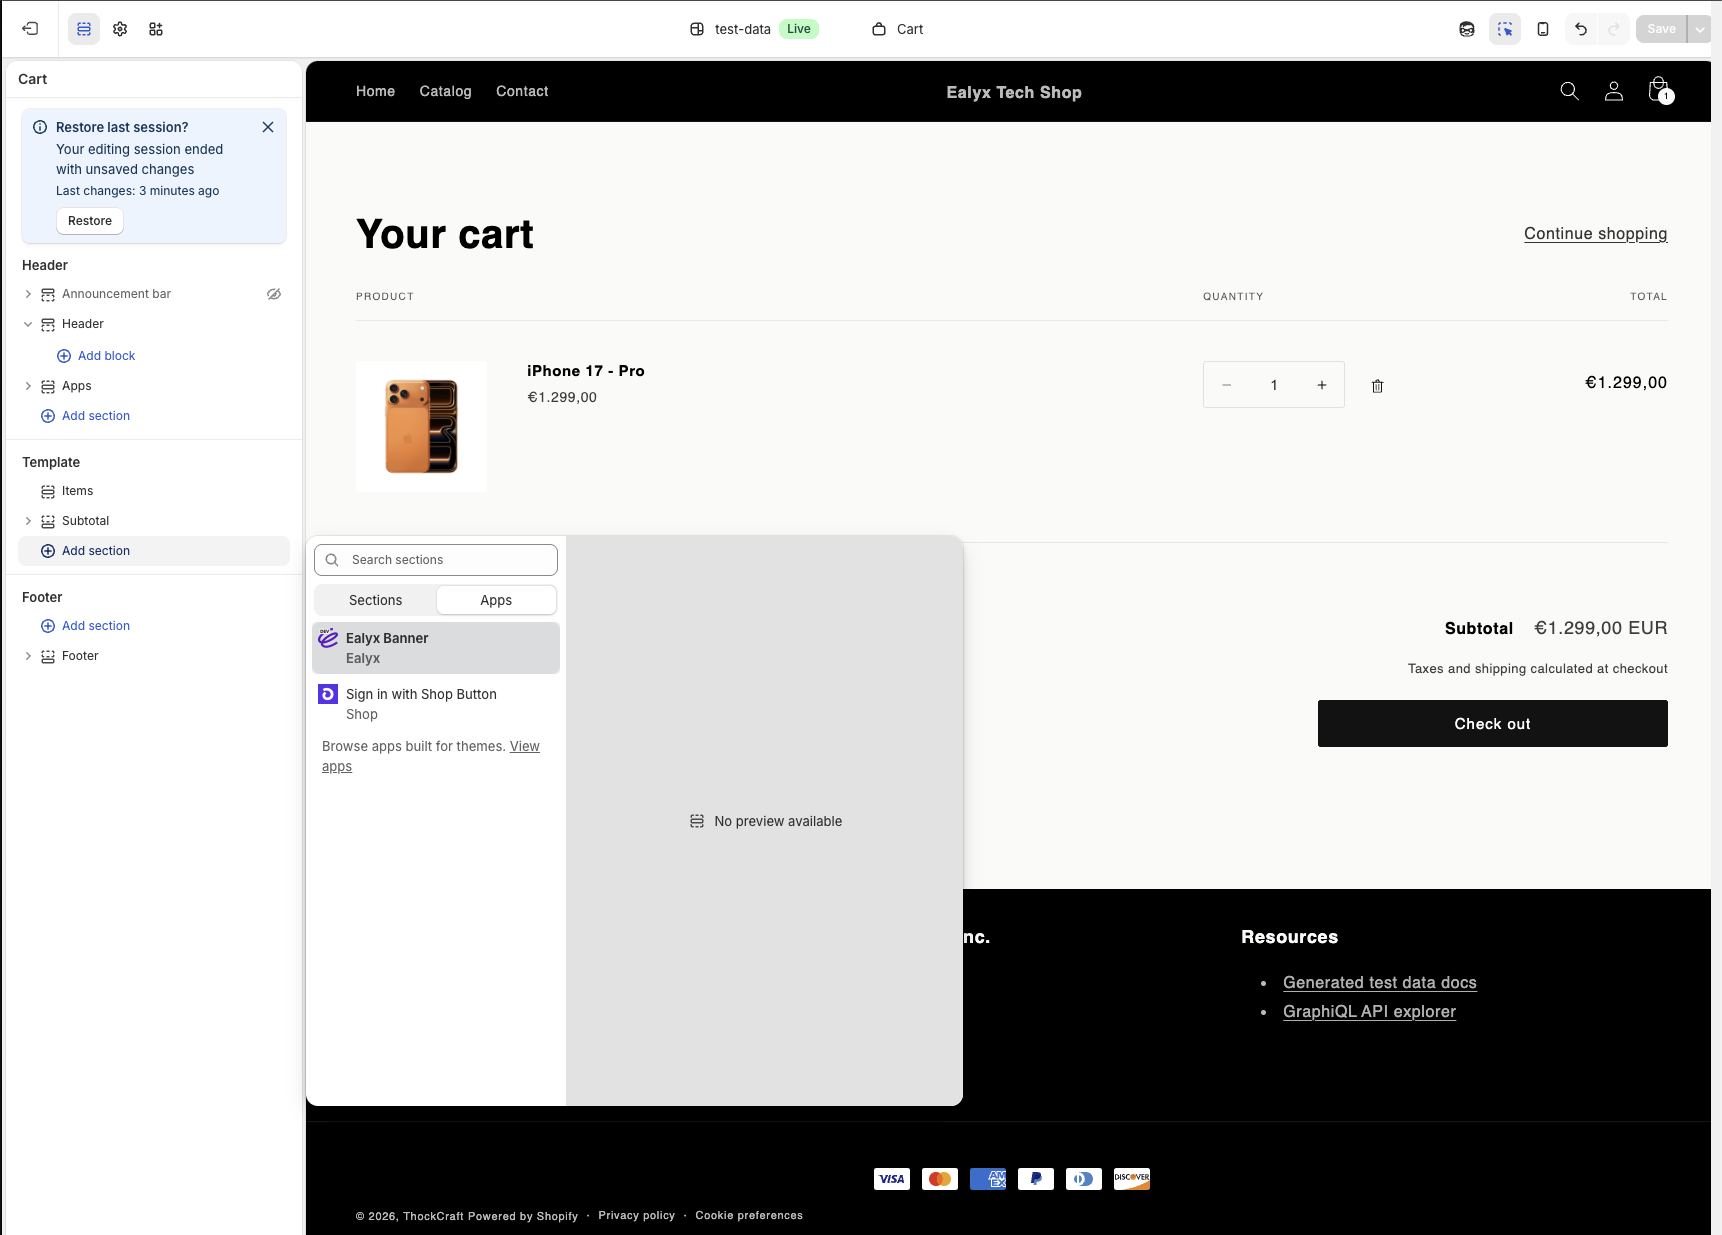
Configure the Ealyx Block
Once the block is added and selected:
- Component Type → Cart Summary
- Full-width banner → On
- Top & Bottom Padding → 10px
- Visibility → Mobile and Desktop
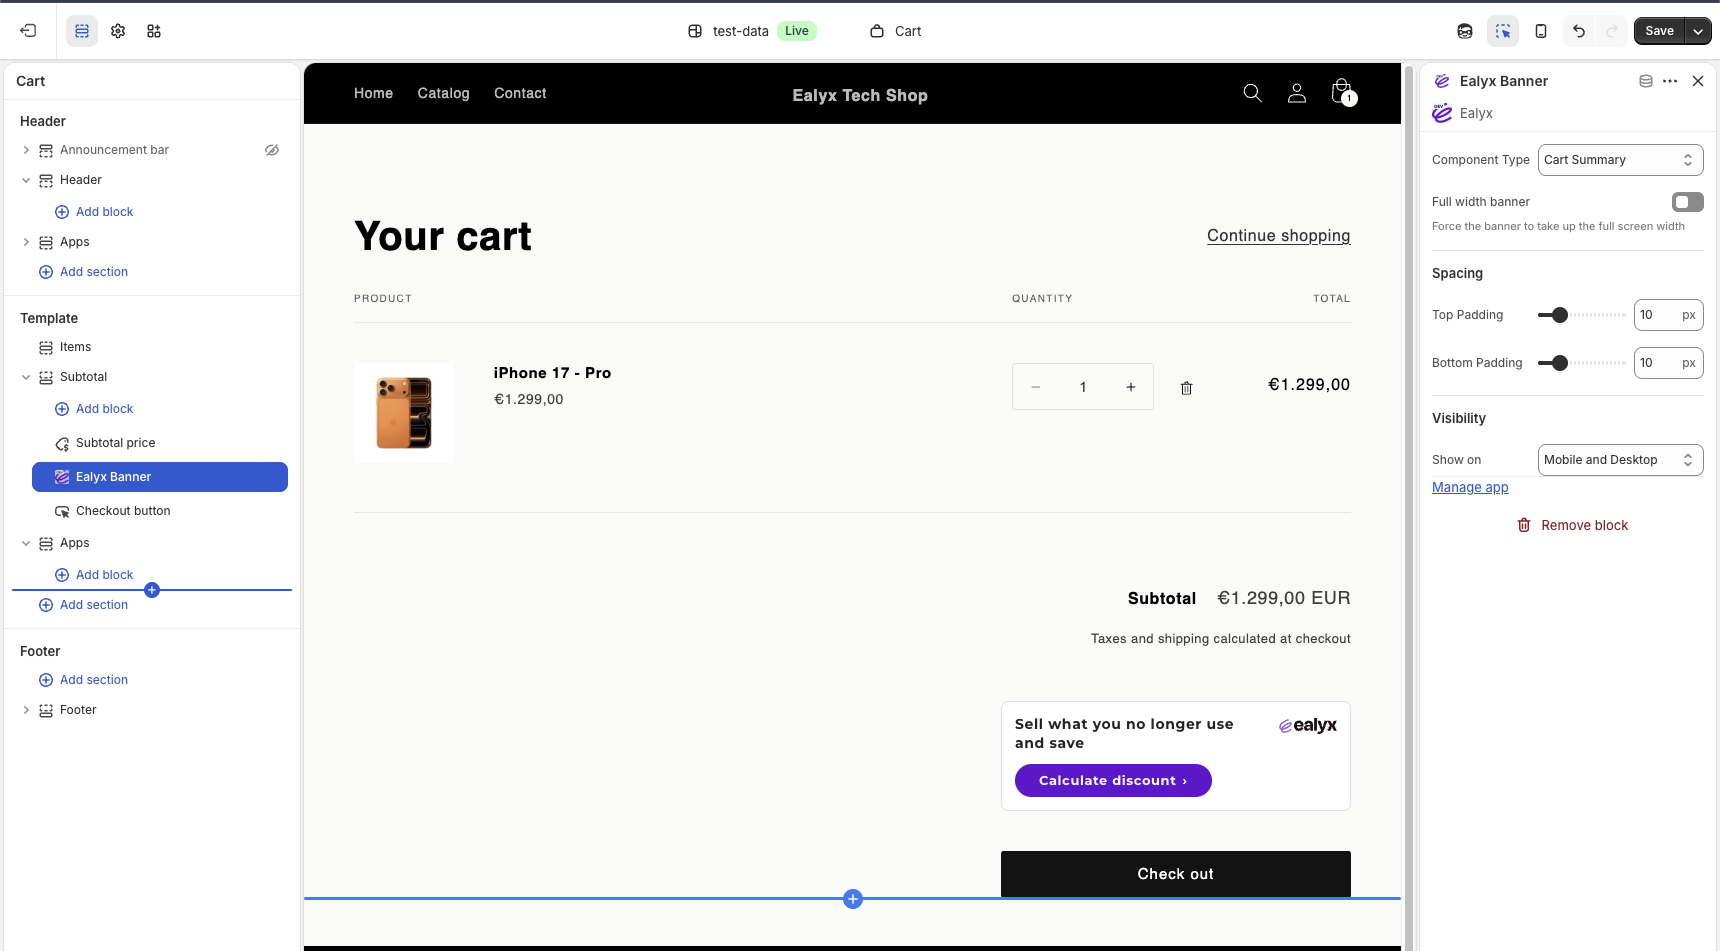
Recommended Position
Place the block at the bottom of the Cart page, just above the checkout button.
Why: Users reviewing their total should immediately see how a trade-in can reduce the checkout amount.
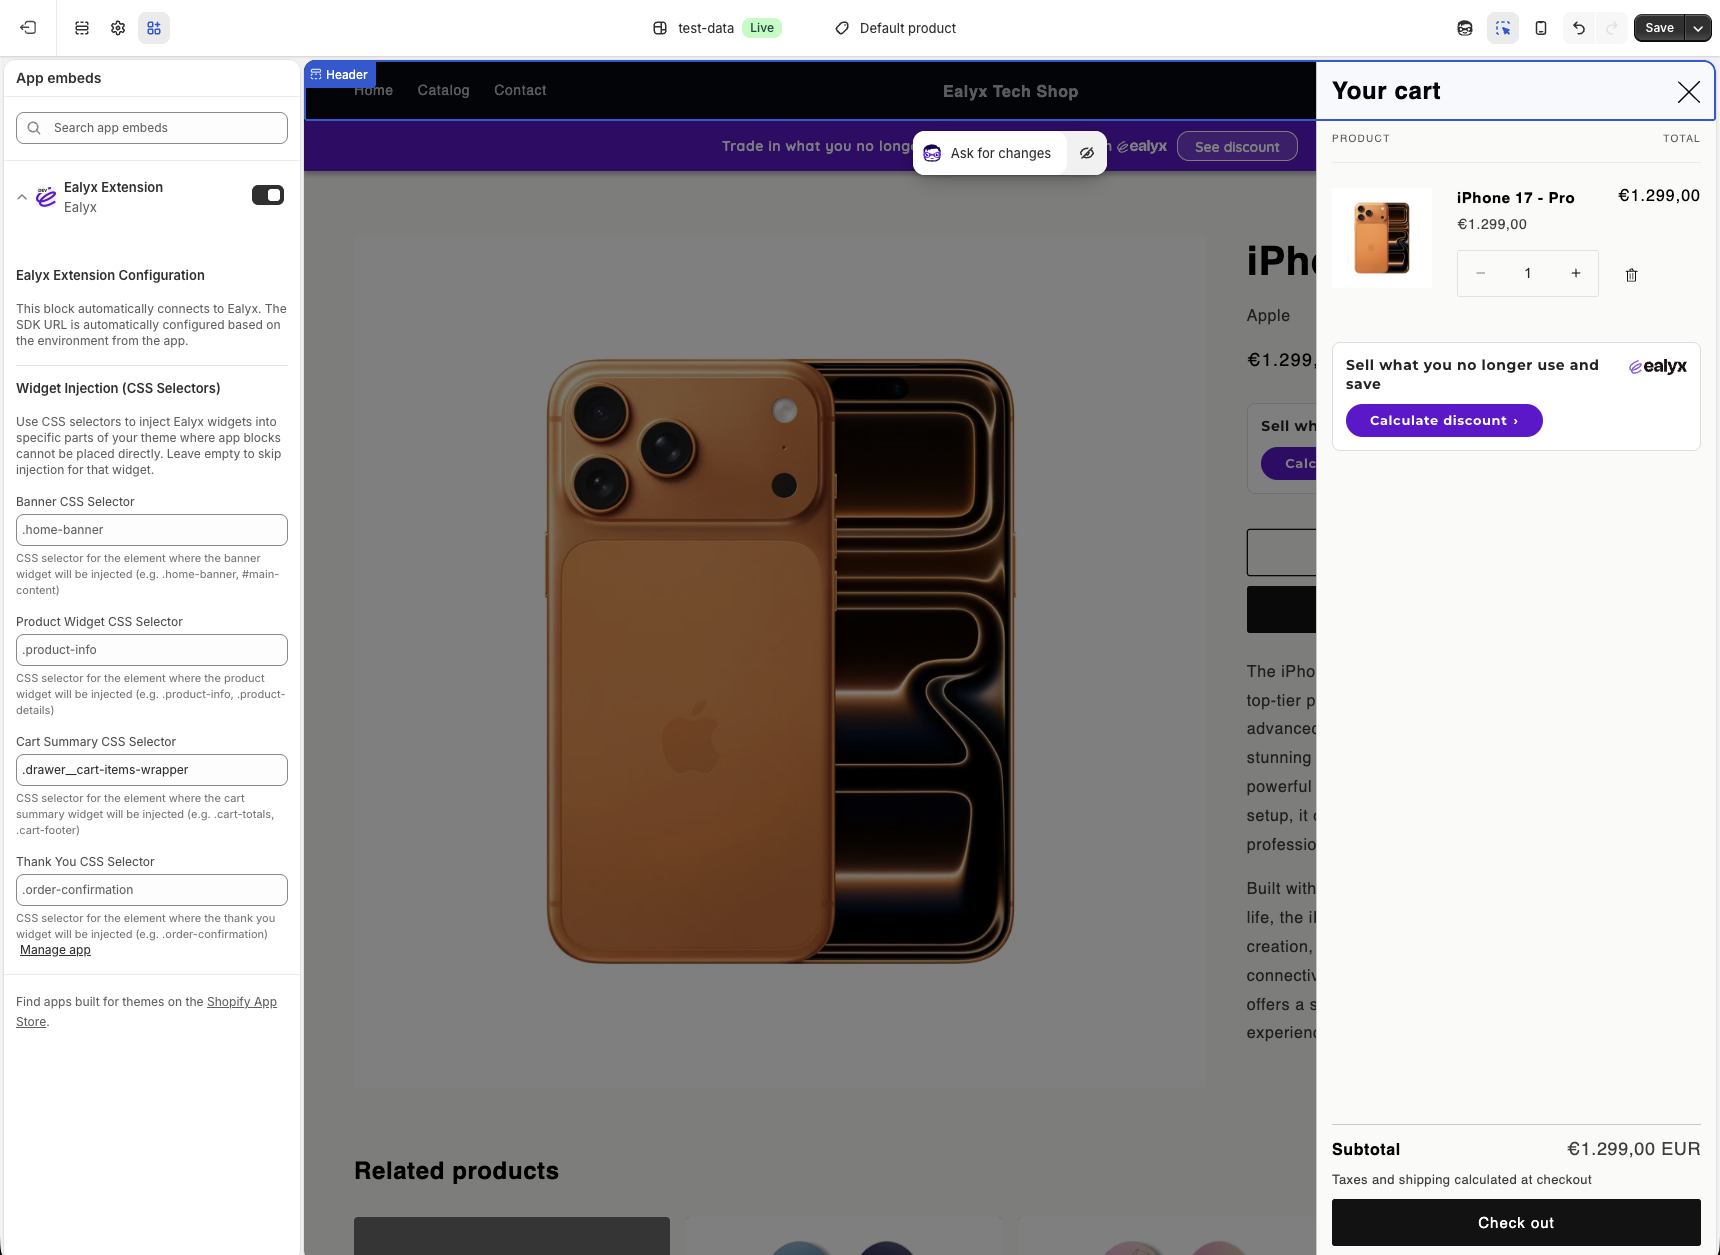
CSS Selectors (Advanced)
If your theme requires custom placement for any of the Ealyx widgets, you can specify a CSS selector for each injection point. To do so, go to Online Store → Themes → Customize → App embeds → Ealyx Extension and fill in the corresponding fields. Leave them empty to use the default positions.
- Home Banner CSS Selector
- Product Widget CSS Selector
- Cart Summary CSS Selector
- Thank You CSS Selector
Checkout Blocks (Payment Page & Thank You Page)
Ealyx includes two additional widgets that appear during the final stages of the purchase flow:
- ealyx-checkout — shown on the Payment page (Order Summary area)
- ealyx-thankyou — shown on the Thank You / Order Confirmation page
These widgets are not added through the Theme Editor.
They must be added through the Shopify Checkout Editor.
⚠️ Important limitations
- The Payment Page widget is only available for Shopify Plus merchants, because Shopify restricts checkout customisation.
- The Thank You Page widget is available for all merchants.
How to Add
- In the Theme Editor, switch to the Checkout and customer accounts template.
- In the left panel, go to Apps.
- You will see both ealyx-checkout and ealyx-thankyou listed under Ealyx App.
- Click the + button next to each one to add it to the corresponding page.
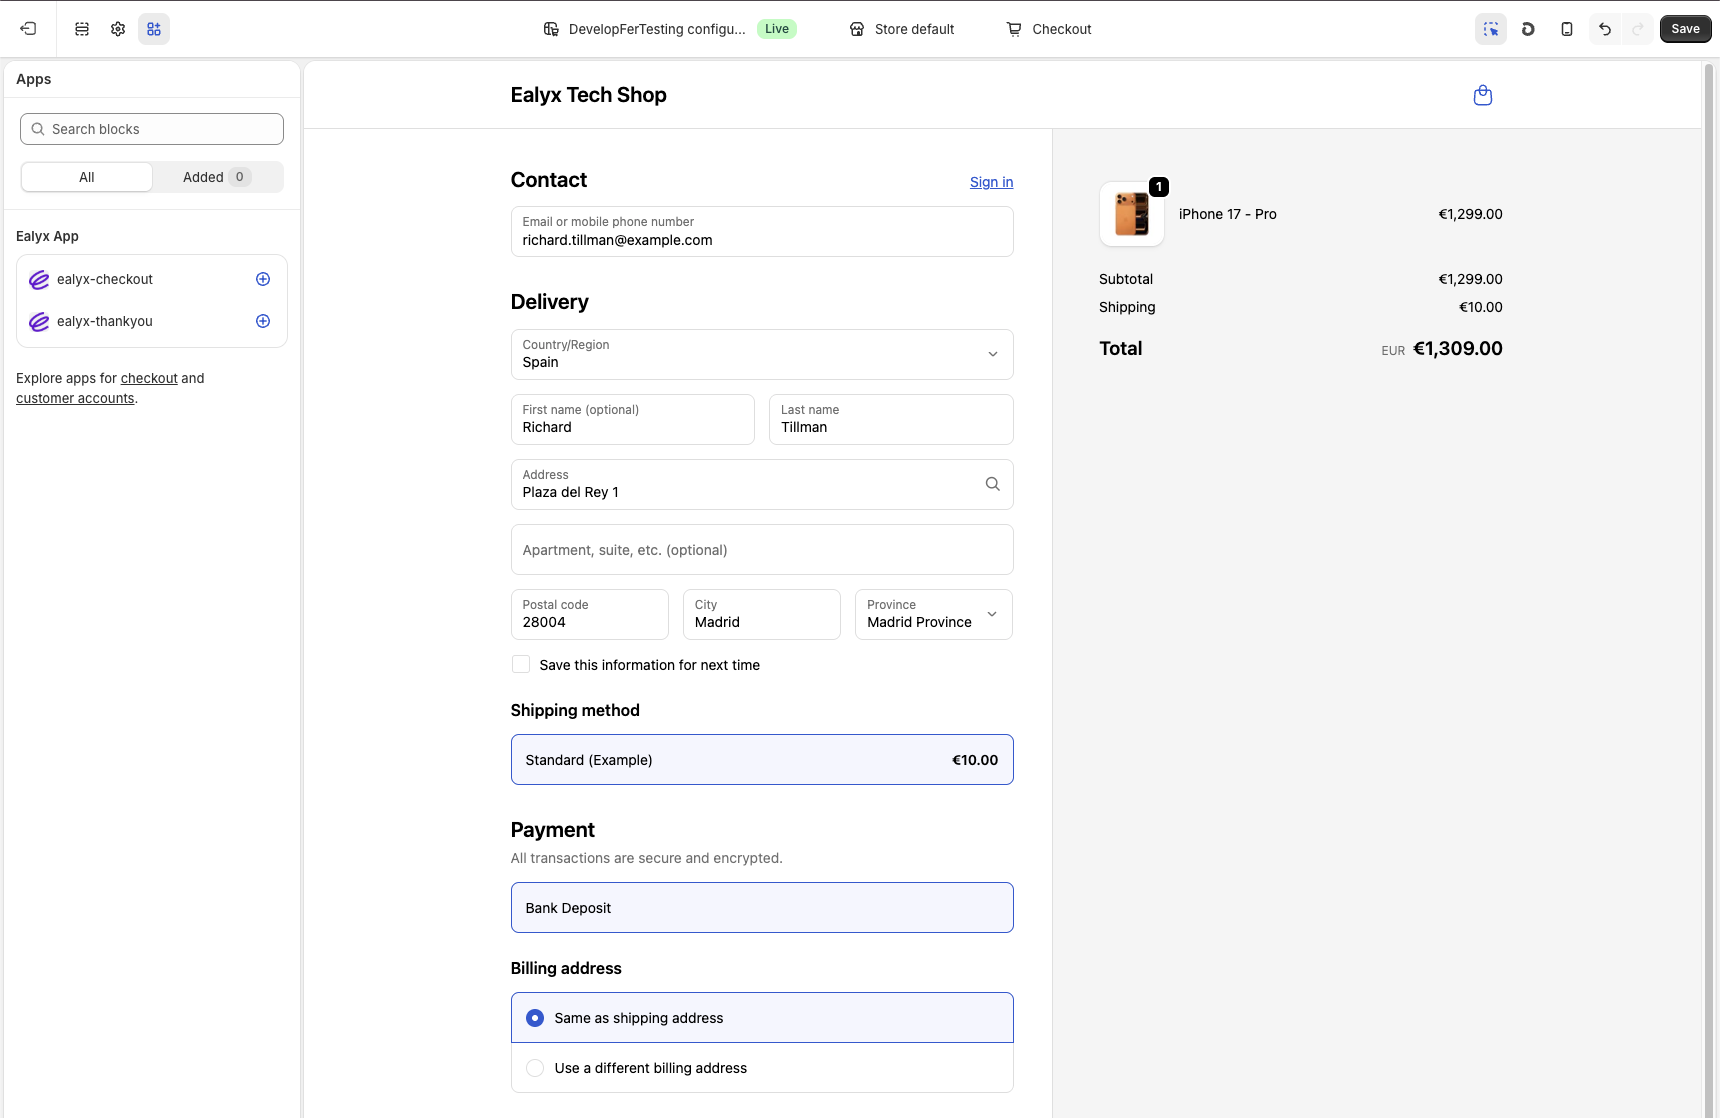
Payment Page
Once ealyx-checkout is added, you will see a preview of the Ealyx Trade-in widget in the Order Summary area of the checkout page.
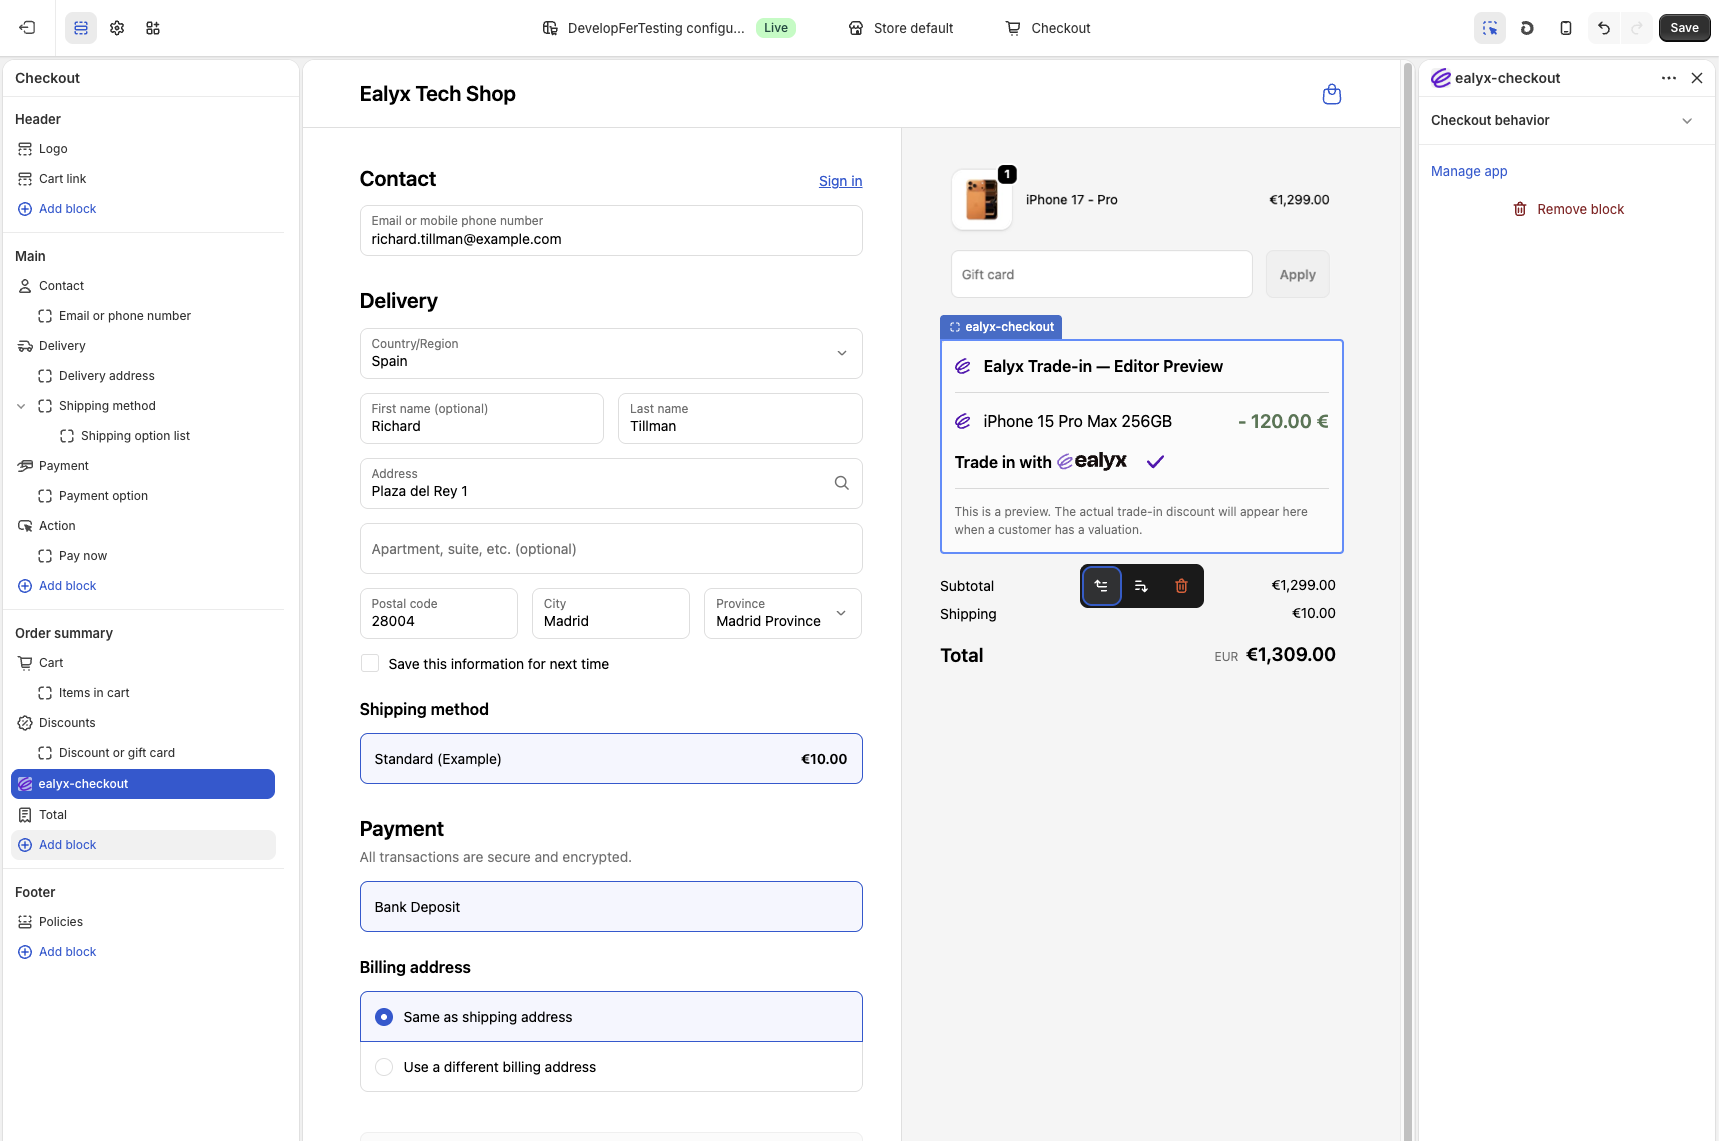
Recommended position: directly below the Shipping Method block and above the Payment section.
Why: This placement ensures the user sees their trade-in benefit right before selecting a payment method, increasing confidence and reducing friction at the most critical step of the checkout process.
⚠️ This block is only available for Shopify Plus merchants.
Thank You Page
Once ealyx-thankyou is added, the widget will appear on the Order Confirmation page showing a summary of the trade-in registered and the next steps for the customer.
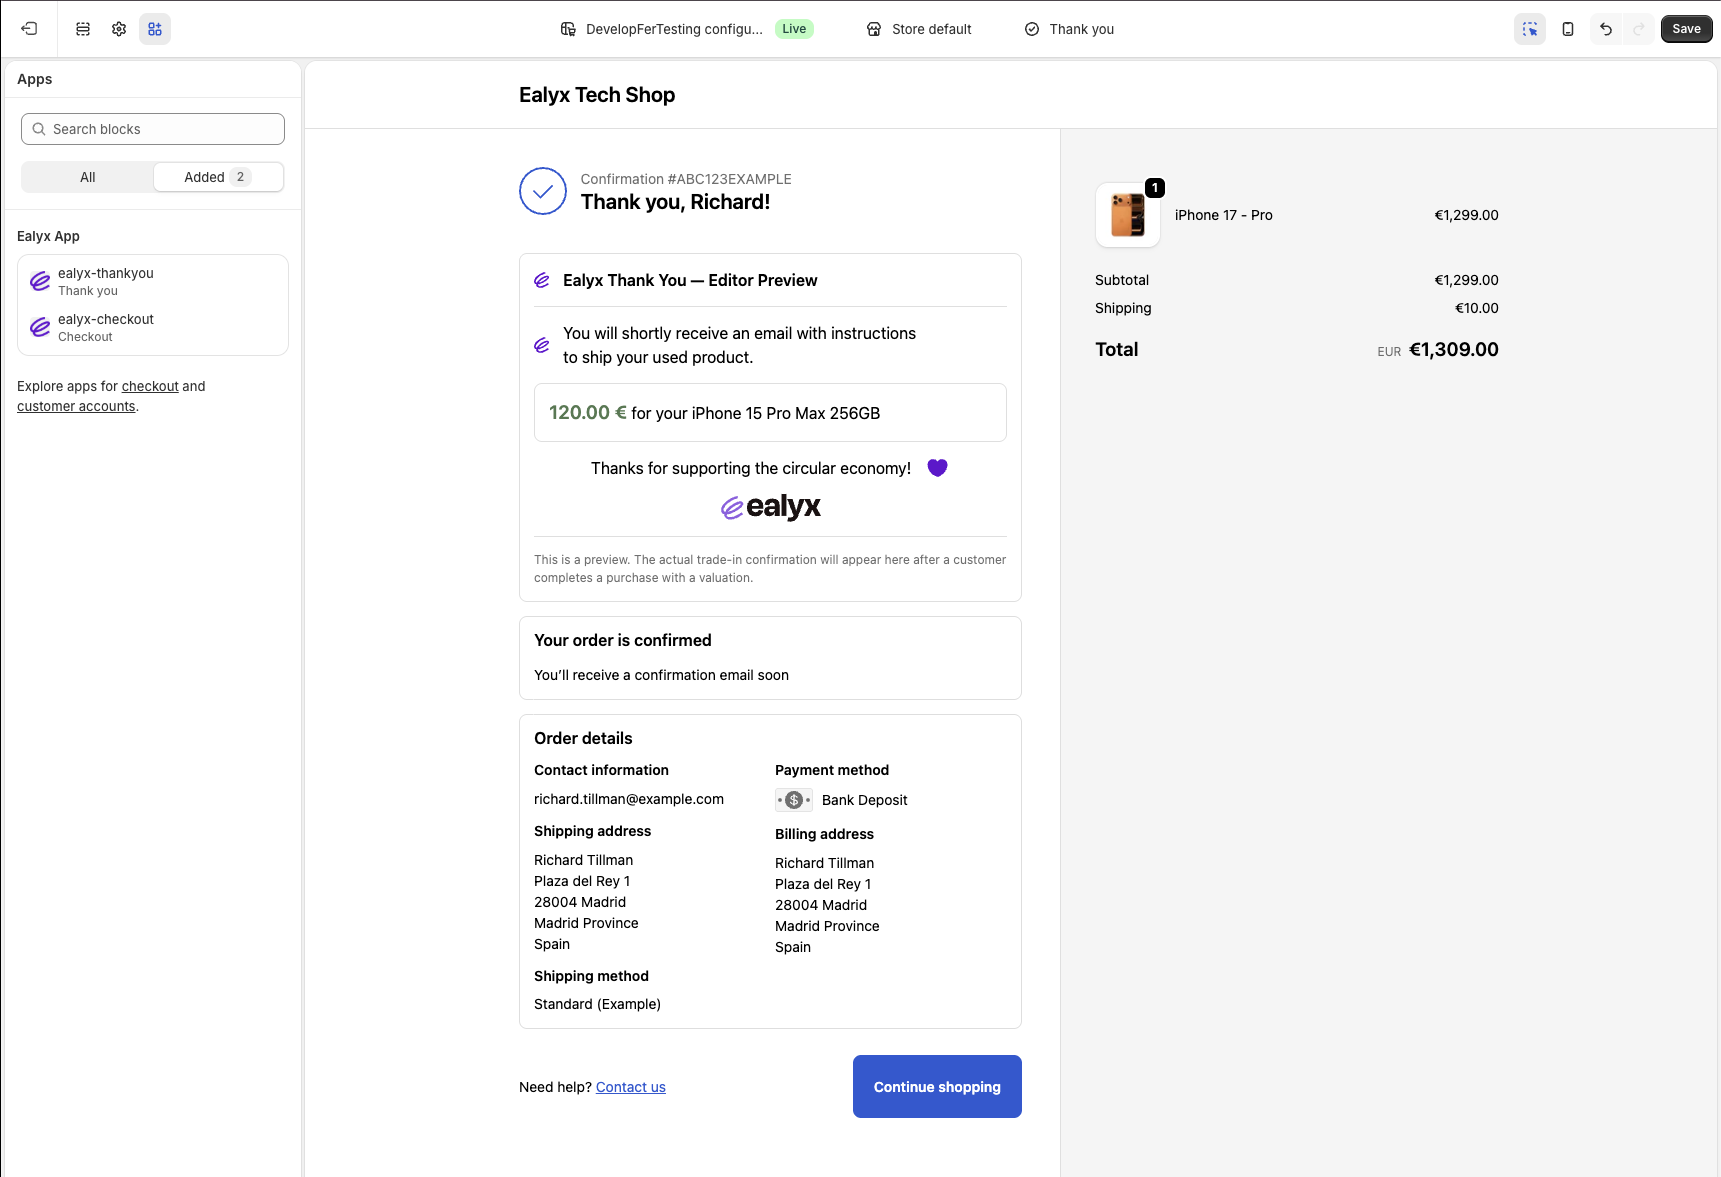
Recommended position: at the top of the Thank You page, just below the confirmation header.
Why: Displaying the widget immediately after order confirmation reinforces the user's trade-in action and provides a clear next step. This increases post-purchase engagement and ensures users know their trade-in has been successfully registered.
Save and Test
After configuring any widget:
- Click Save in the Theme Editor.
- Open your storefront in a new tab.
- Verify that the widget loads and interacts correctly with Ealyx.