Prestashop
Ealyx provides a ready-to-install extension for Prestashop stores.
Before integrating
Requirements
The Ealyx Prestashop plugin supports Prestashop versions 1.7 to 9.0.
The minimum PHP version required is 7.4 but we recommend 8.0 or higher.
Plugin Installation
Here's how to install the Ealyx plugin step by step.
Before Installation
Request the Plugin
Make sure you have the .zip file of the Ealyx Prestashop plugin for your shop.
If you do not have one, please contact your Ealyx account manager.
If you have not been assigned an account manager, request the plugin at:
Request Credentials
Ask the onboarding manager for test credentials or production credentials if all testing has been completed.
Start Installation
Upload the Plugin
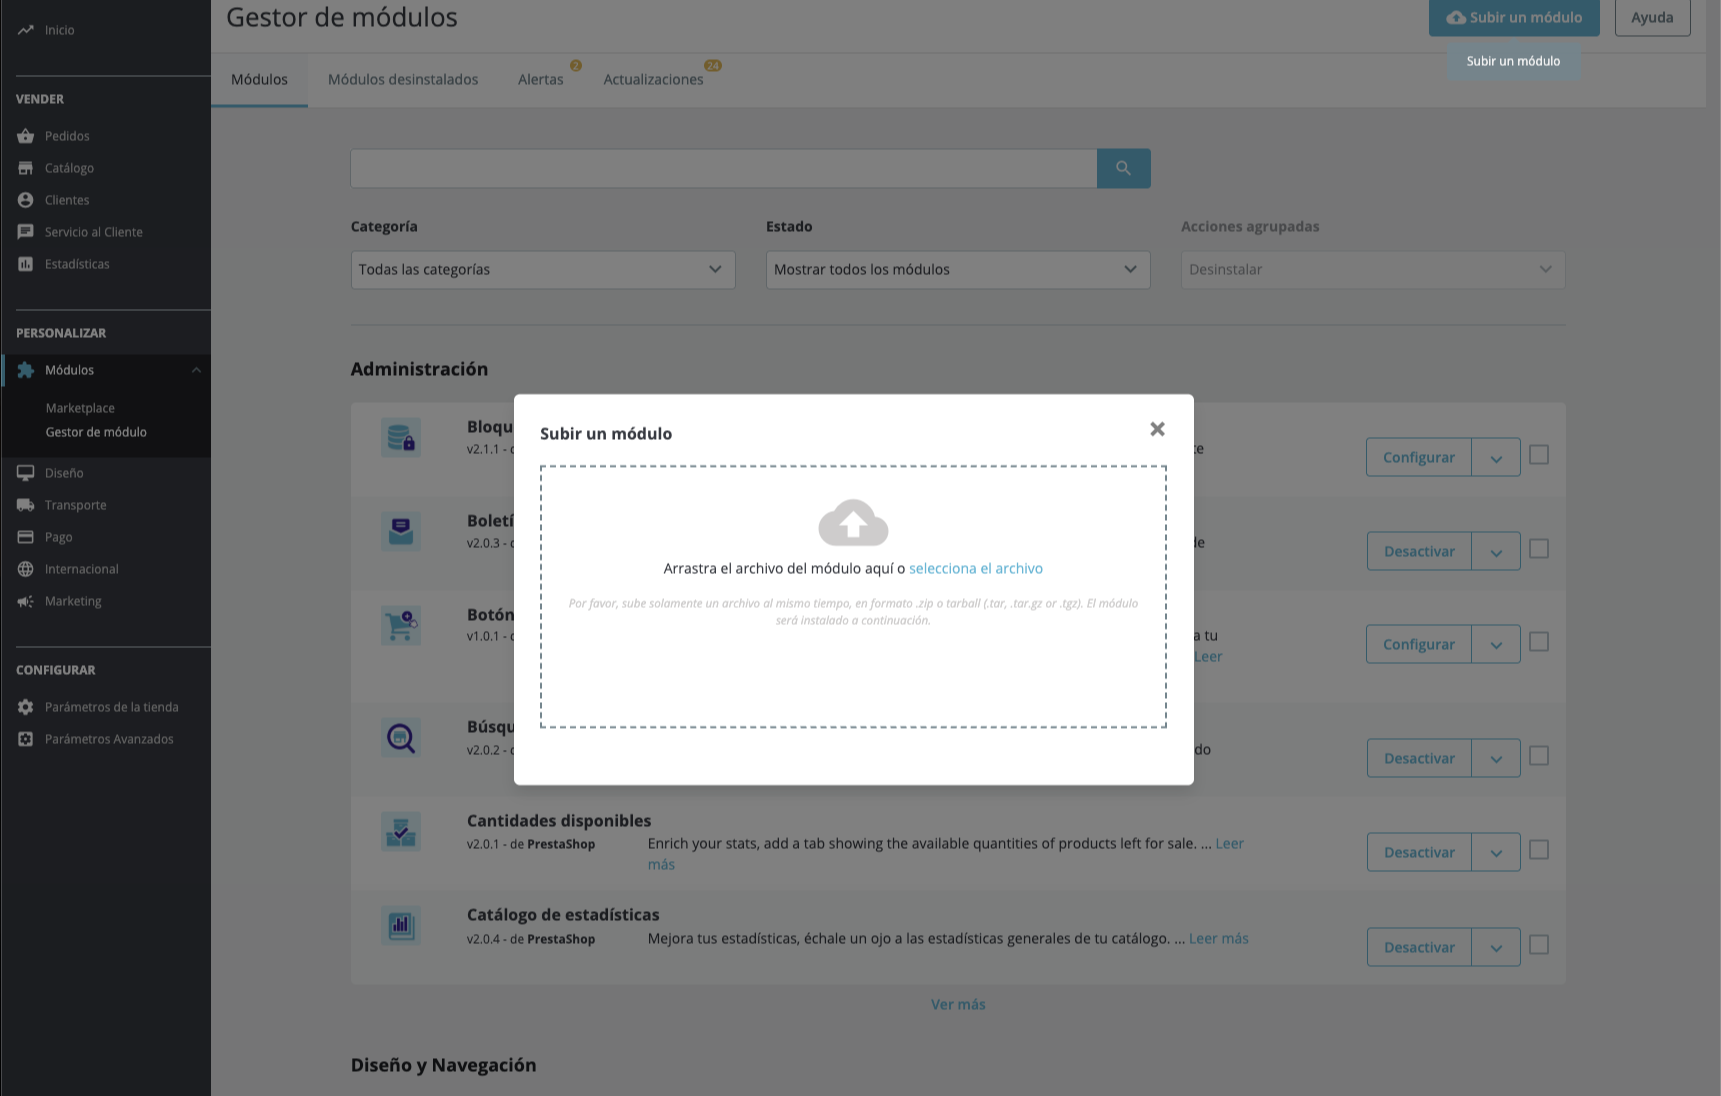
To install the Ealyx plugin, navigate to Modules → Module Manager in your Prestashop back office.
Then click the Upload a module button (top right) and upload the .zip file provided.
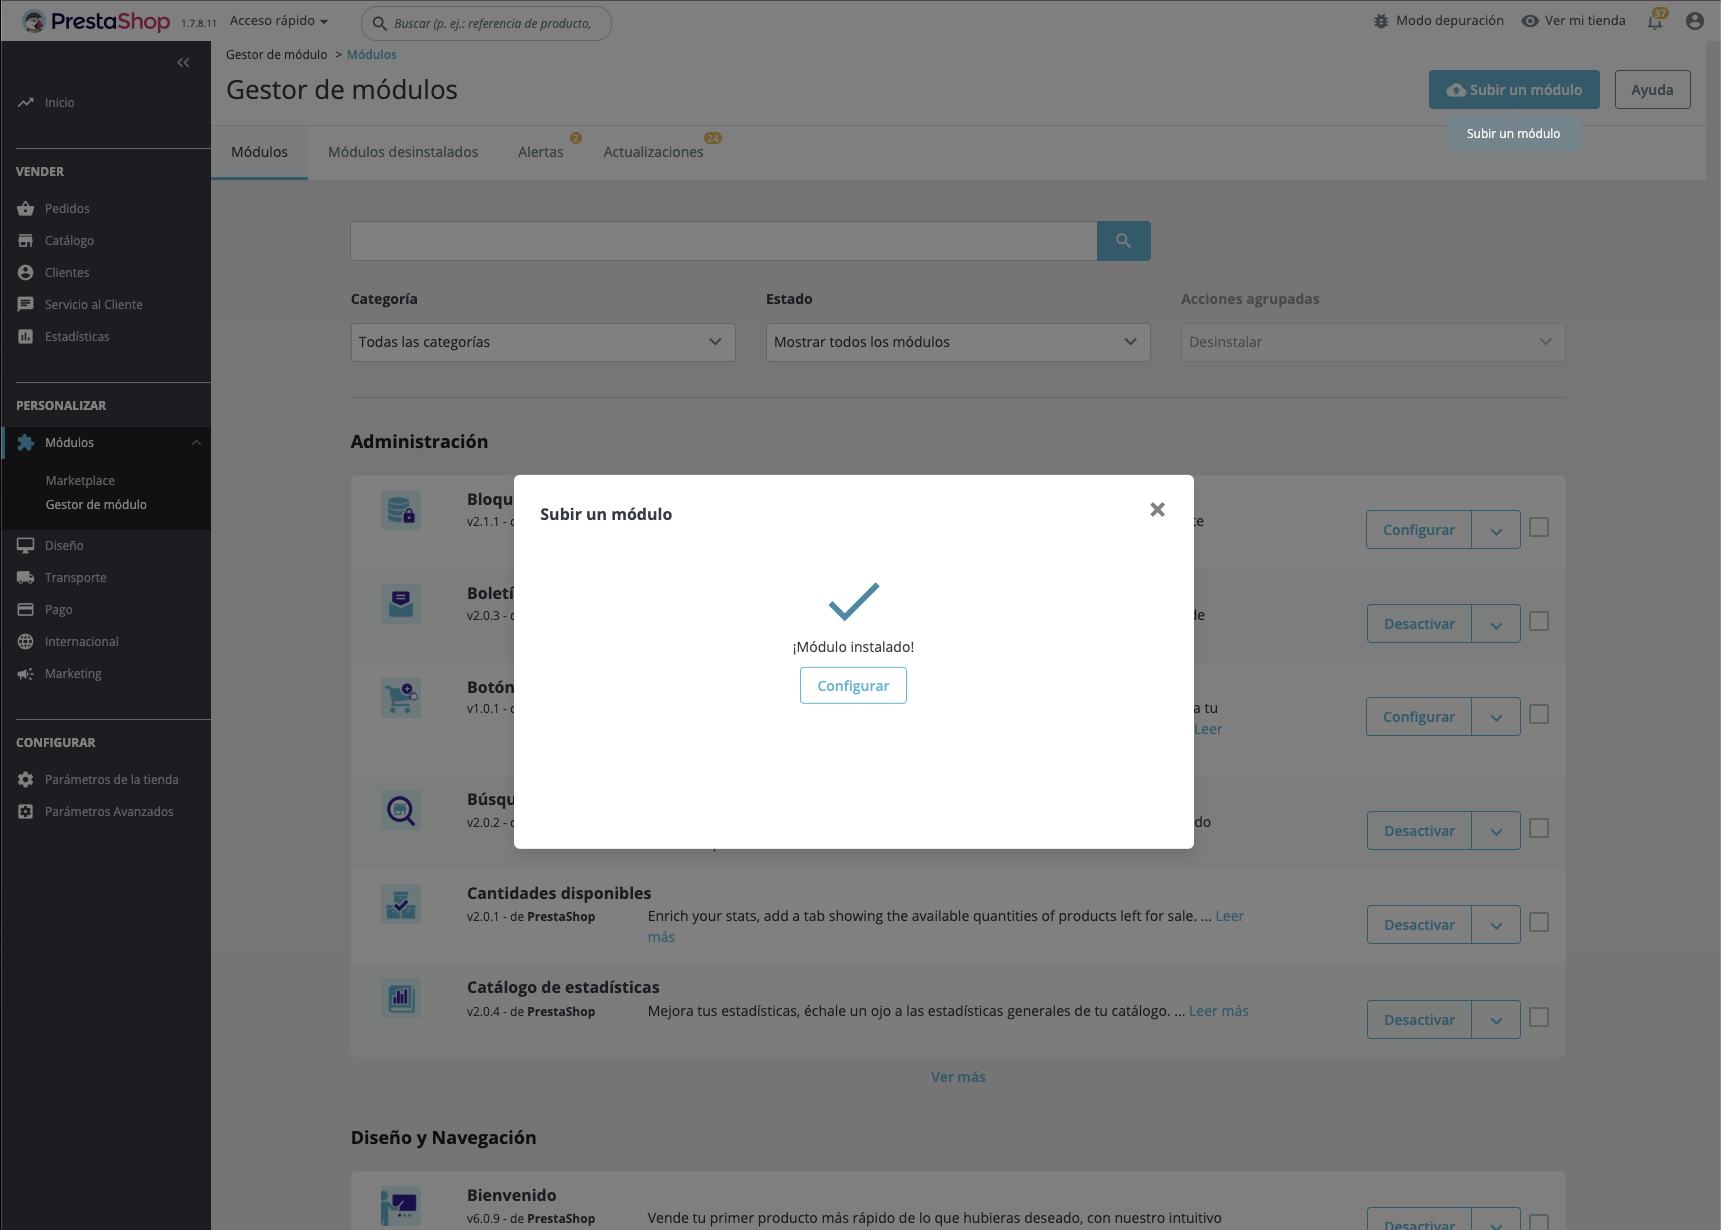
Once the upload is complete, you will see a confirmation screen indicating the module has been installed successfully. Click Configure to proceed.
Enter Your Credentials
After clicking Configure, you will land on the Ealyx configuration page. Fill in the following fields and click Guardar / Save when done:
- Account user — your Ealyx account username
- Account password — your Ealyx account password
- Client ID — provided by your Ealyx account manager
- Client Secret — provided by your Ealyx account manager
- Merchant UUID — your unique merchant identifier
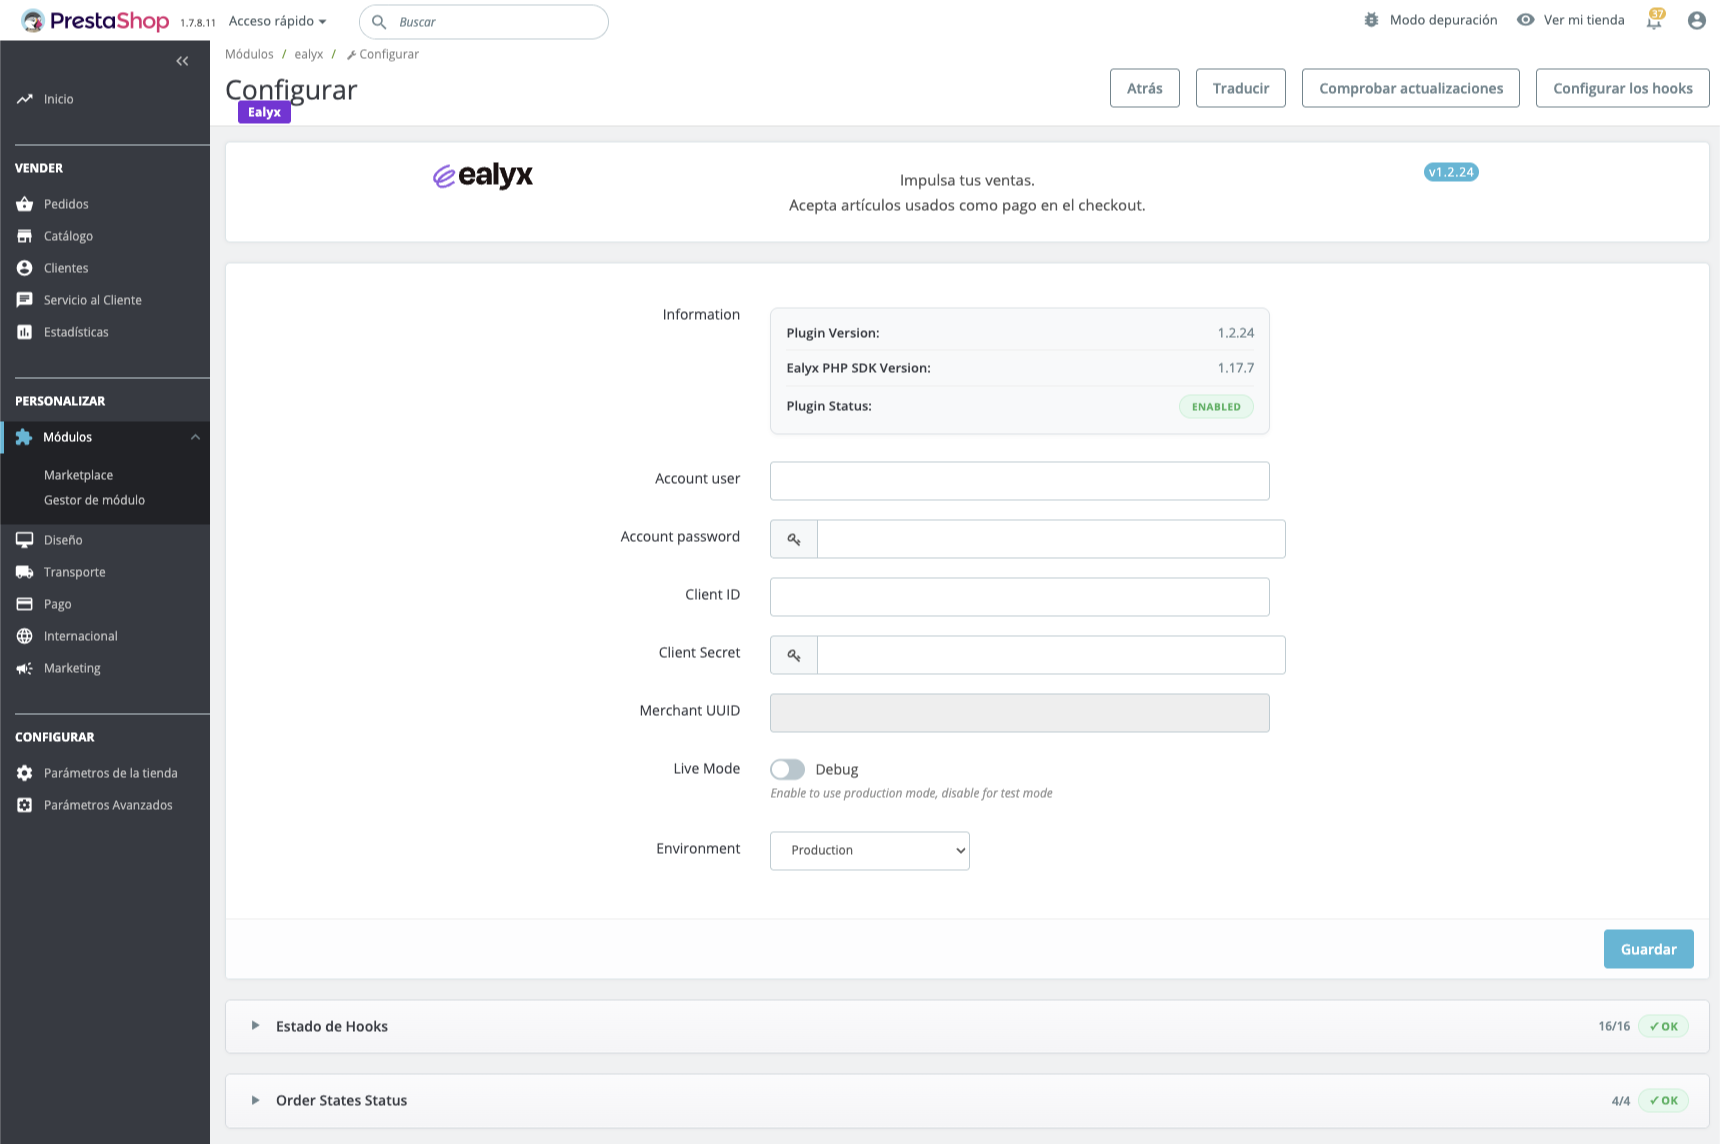
You can also verify the current status of the plugin directly from this screen:
- Plugin Version — installed version of the Ealyx module
- Ealyx PHP SDK Version — version of the underlying SDK
- Plugin Status — should show ENABLED after a successful installation
Plugin Configuration
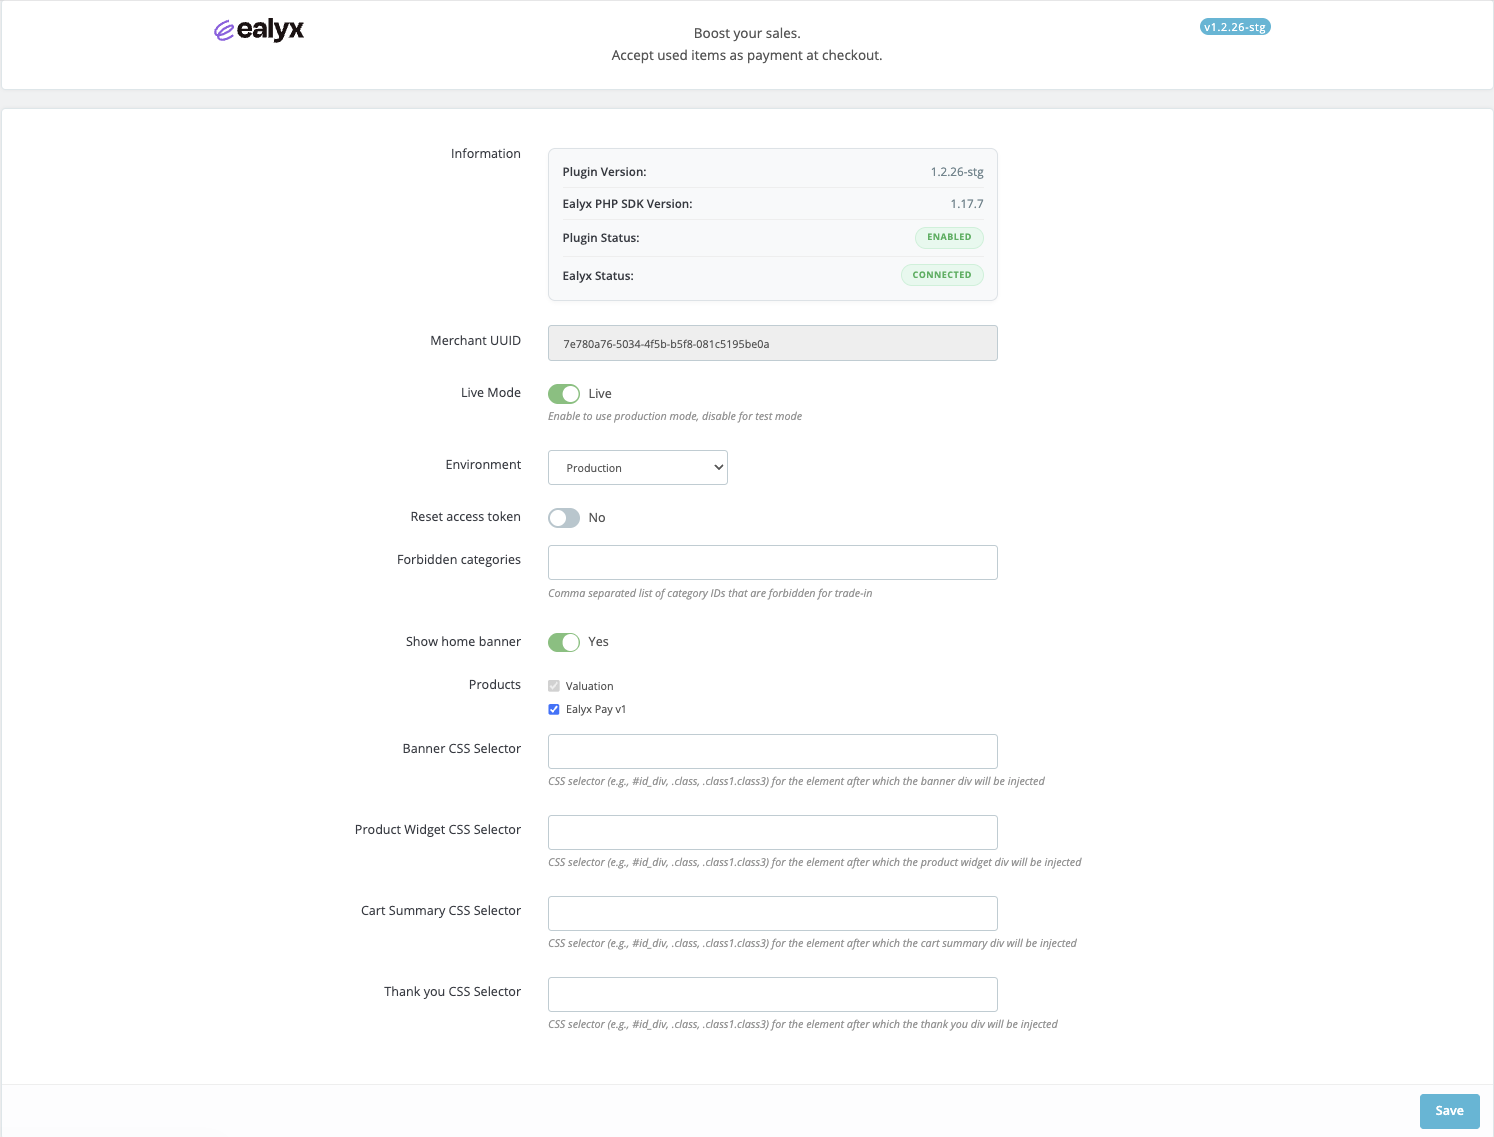
Once your credentials are saved and the connection is established, the configuration page expands to show all available settings. You will also see Ealyx Status: CONNECTED in the information block.
General Settings
Live Mode
Toggle Live Mode to switch between production and test (debug) mode.
Enable it only when you are ready to go live with real transactions.
Environment
Select the environment from the dropdown — Production or Staging — according to your current setup.
Reset Access Token
Use the Reset access token toggle to force a token refresh if you experience authentication issues.
Categories Configuration
If there is a category where you do not want the Ealyx plugin to be displayed (previously agreed with Ealyx),
add the corresponding category IDs in the Forbidden categories field, separated by commas.
Display Settings
Show Home Banner
Enable the Show home banner toggle to display the Ealyx banner on your store's home page.
Products
Select which Ealyx products should be active in your store:
- Valuation — enables the trade-in valuation widget
- Ealyx Pay v1 — enables the Ealyx Pay checkout option
CSS Selectors
If your theme requires custom placement for the Ealyx widgets, you can specify a CSS selector for each injection point. Leave these fields empty to use the default hook positions.
- Banner CSS Selector — element after which the home banner will be injected
- Product Widget CSS Selector — element after which the product widget will be injected
- Cart Summary CSS Selector — element after which the cart summary widget will be injected
- Thank you CSS Selector — element after which the thank you page widget will be injected
Hooks Configuration
You don't need to do anything — Ealyx has already placed the hooks to maximise your sales.
Our solution is integrated into four main steps in the purchasing process:
- 🏠 On Home page
- 🛍️ On Product page
- 🛒 On Cart page
- 💳 At Checkout page
You can verify the status of all hooks directly from the configuration page by expanding the Hooks Status panel. All hooks should appear as REGISTERED.
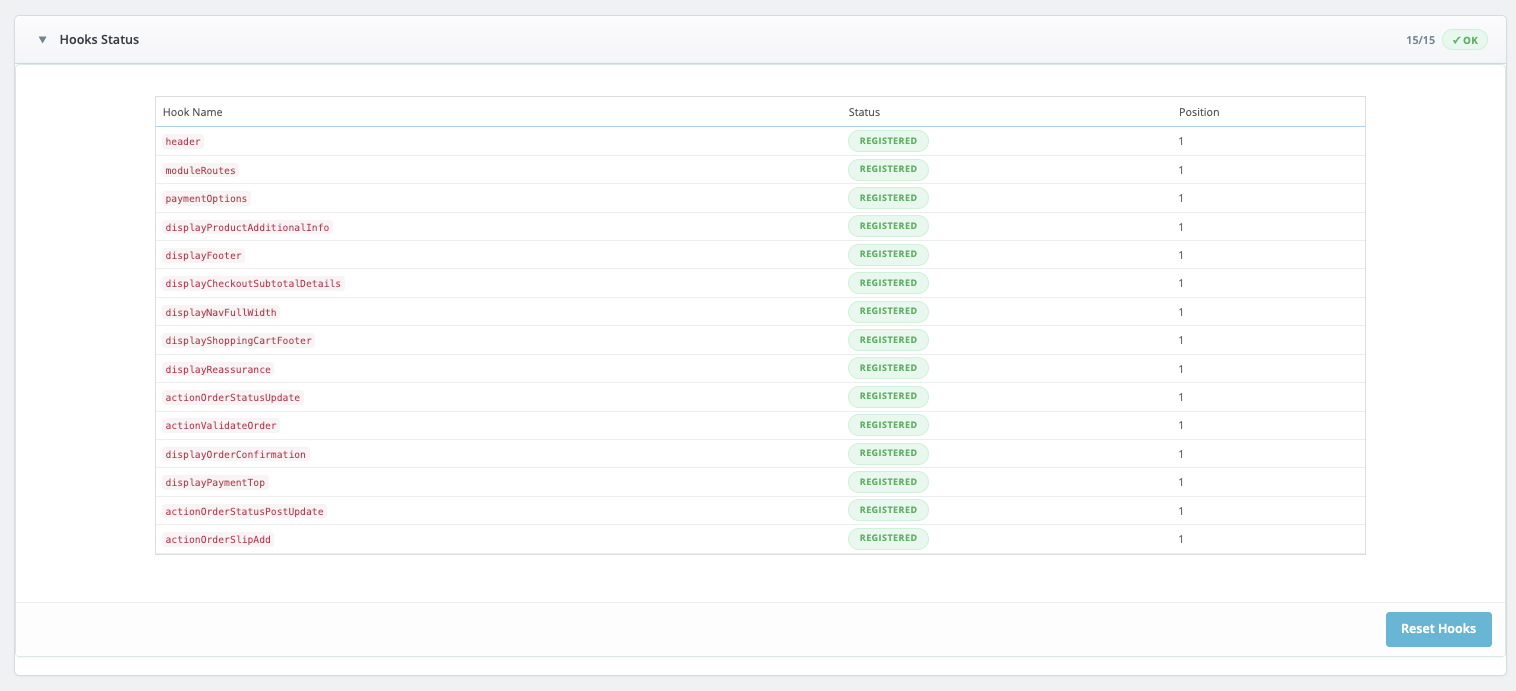
If any hook is missing, click Reset Hooks to re-register them. You can also use the Configure Hooks button at the top of the configuration page to manage hook positions manually.
Order States
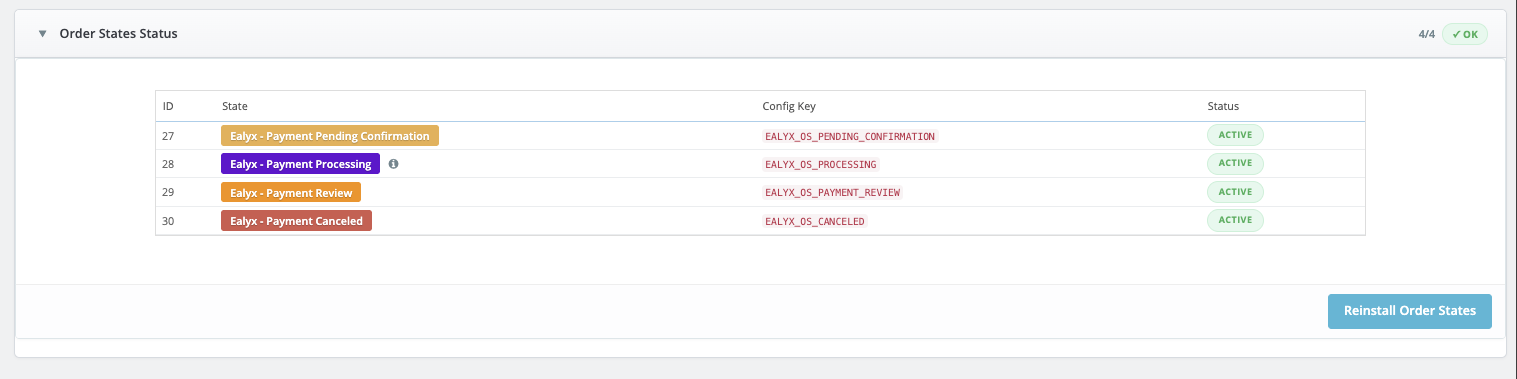
The plugin automatically creates four custom order states for Ealyx transactions. You can verify they are active by expanding the Order States Status panel — all four should show ACTIVE.
| State | Description |
|---|---|
| Ealyx - Payment Pending Confirmation | The order is awaiting payment confirmation from Ealyx |
| Ealyx - Payment Processing | The payment is being processed |
| Ealyx - Payment Review | The payment is under review |
| Ealyx - Payment Canceled | The payment was canceled |
If any state is missing, click Reinstall Order States to restore them.
Payment Configuration
To configure Ealyx Pay, follow this path:
Then verify that the following Preferences are correct according to your signed contract.
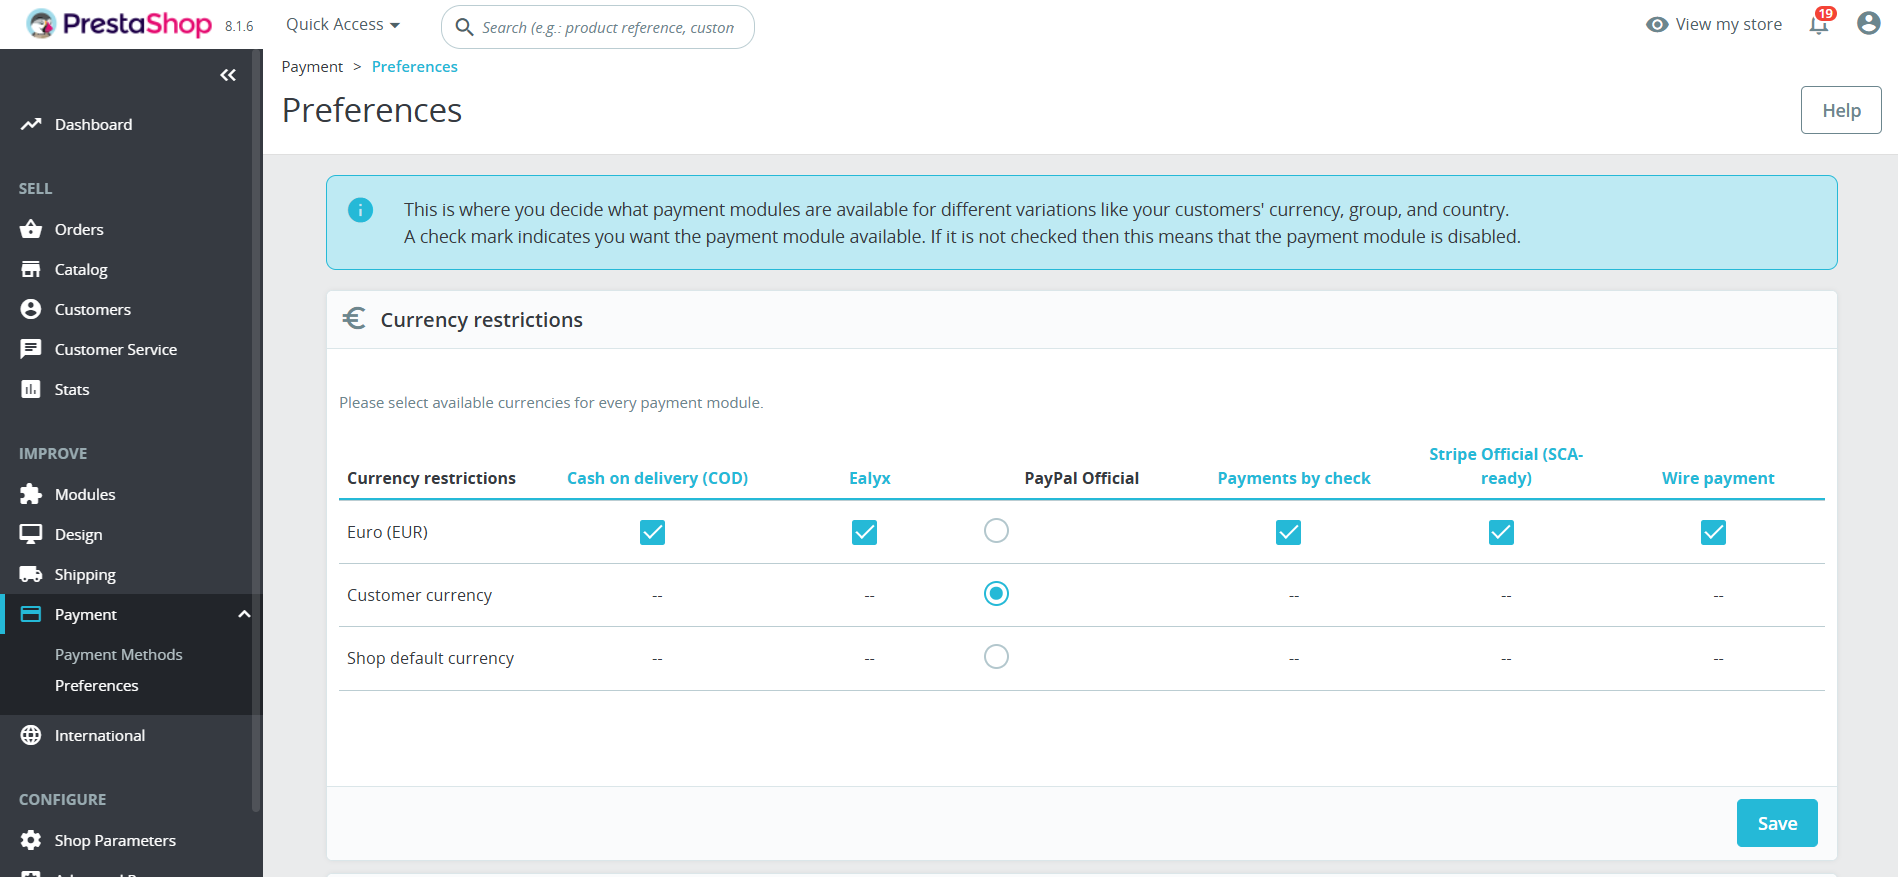
Currency Restrictions
Select the currencies in which your customers will be able to pay with Ealyx Pay.
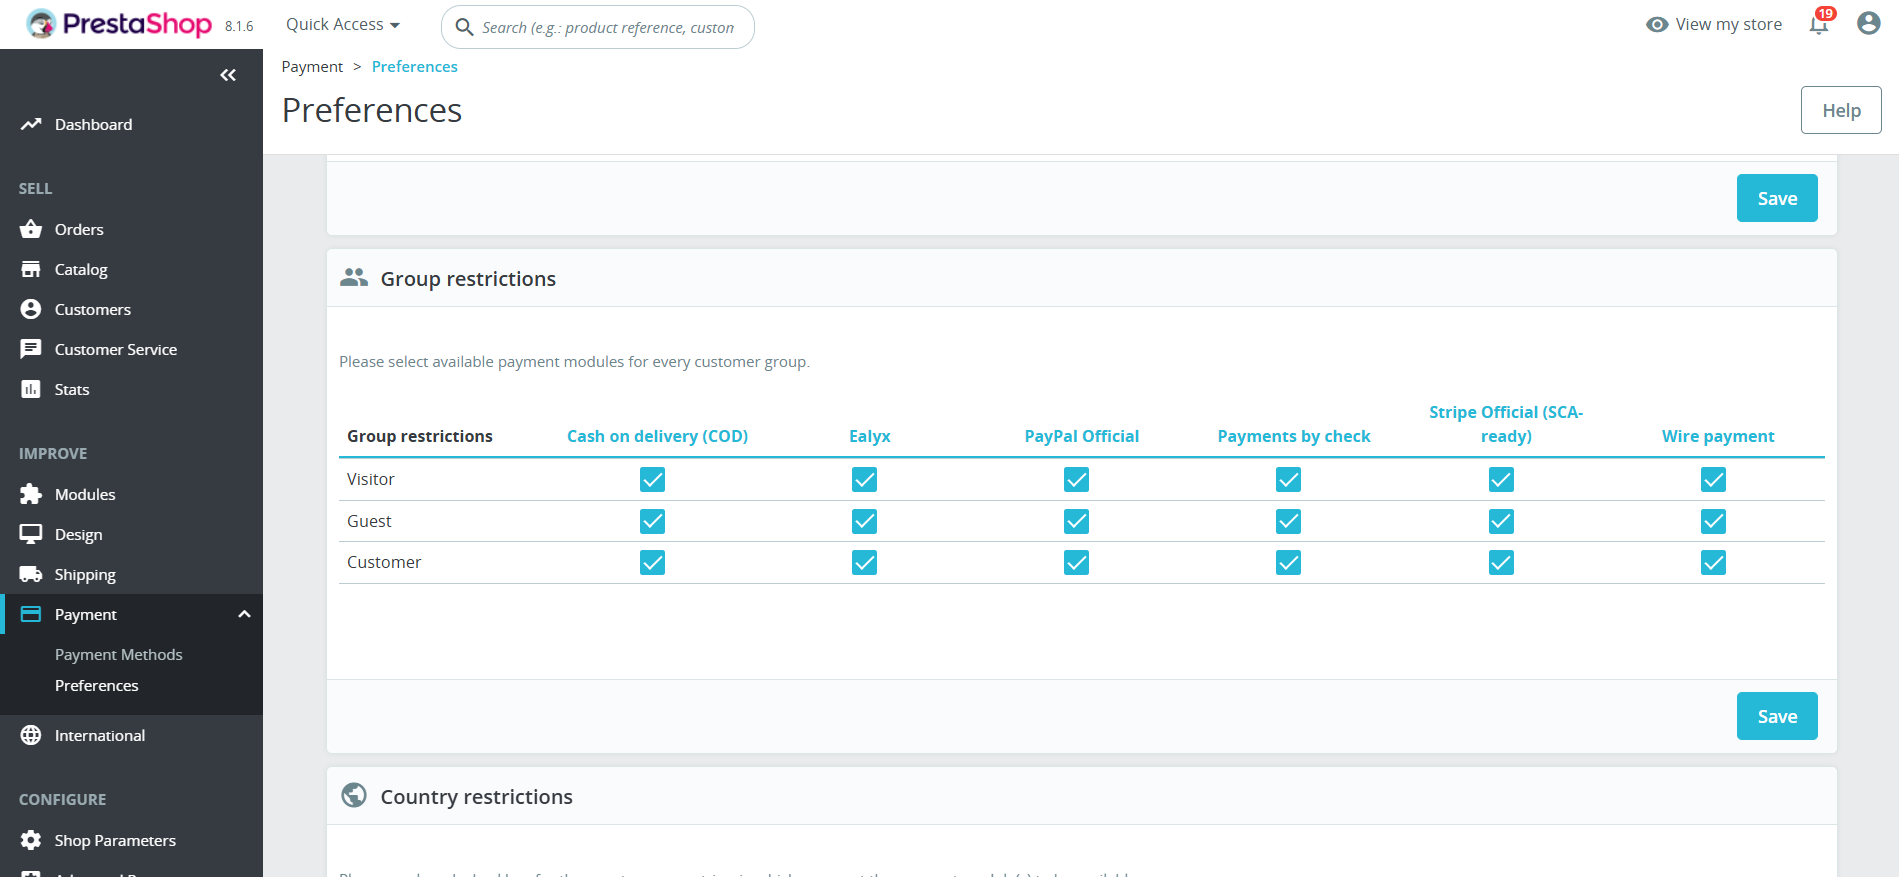
Restrictions by Group
Make sure that all groups are selected.
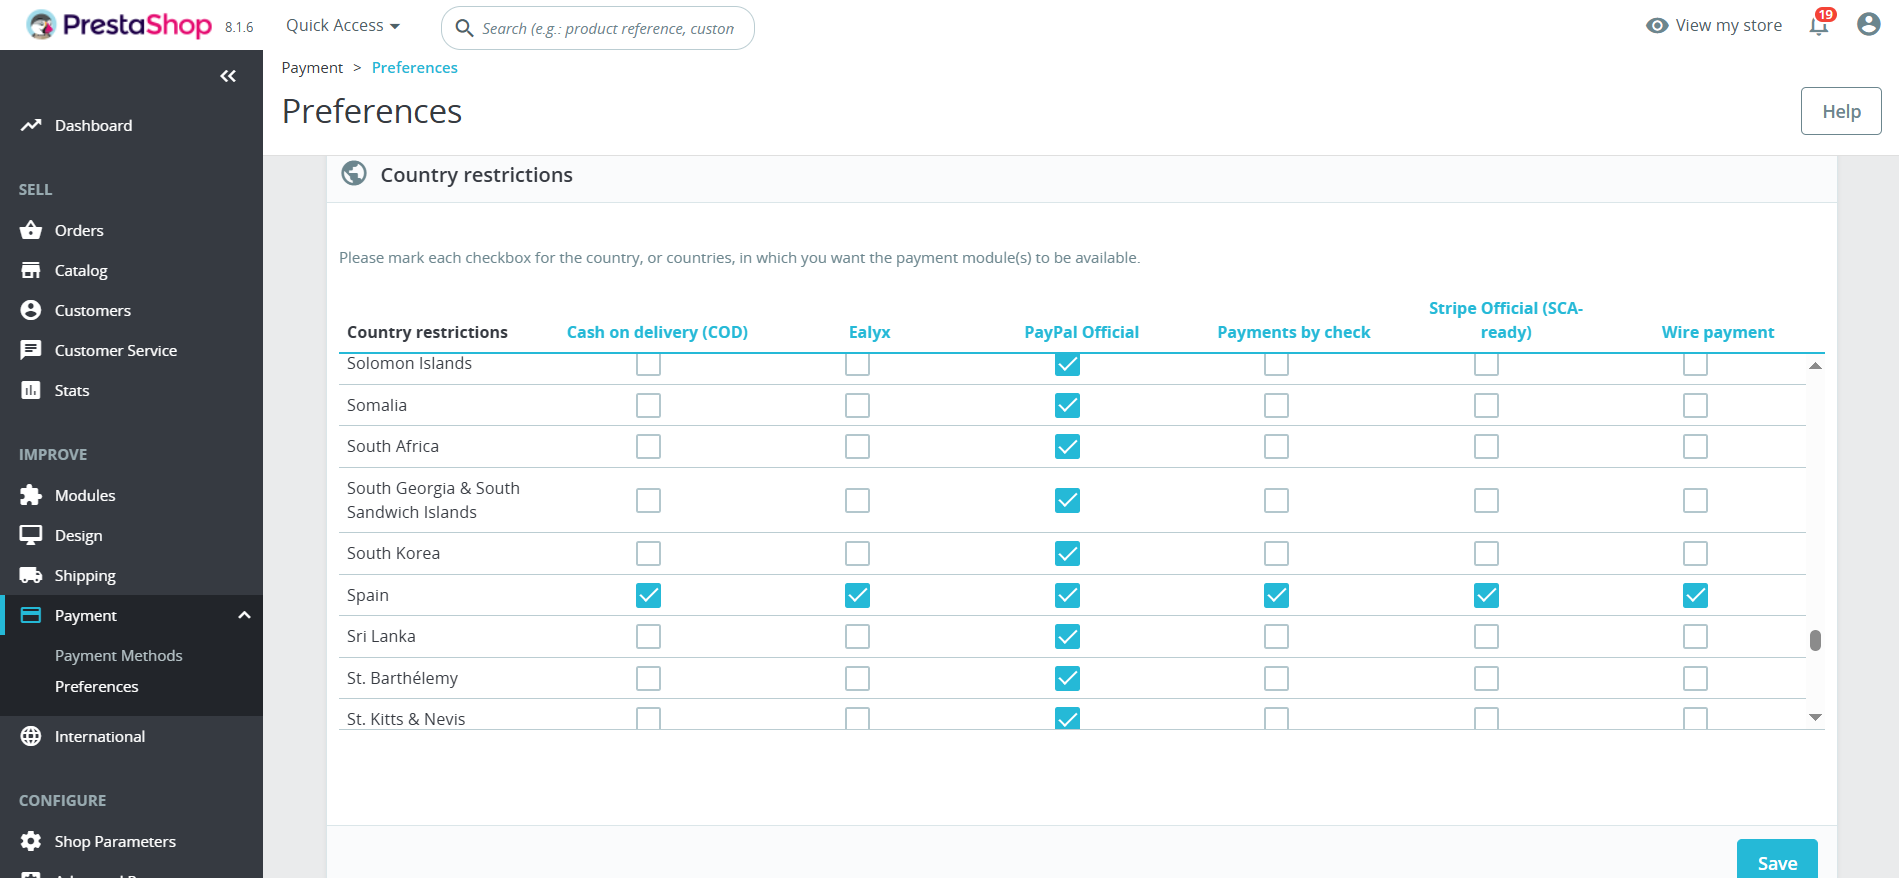
Restrictions by Country
Select the countries in which your customers will be able to pay with Ealyx Pay.
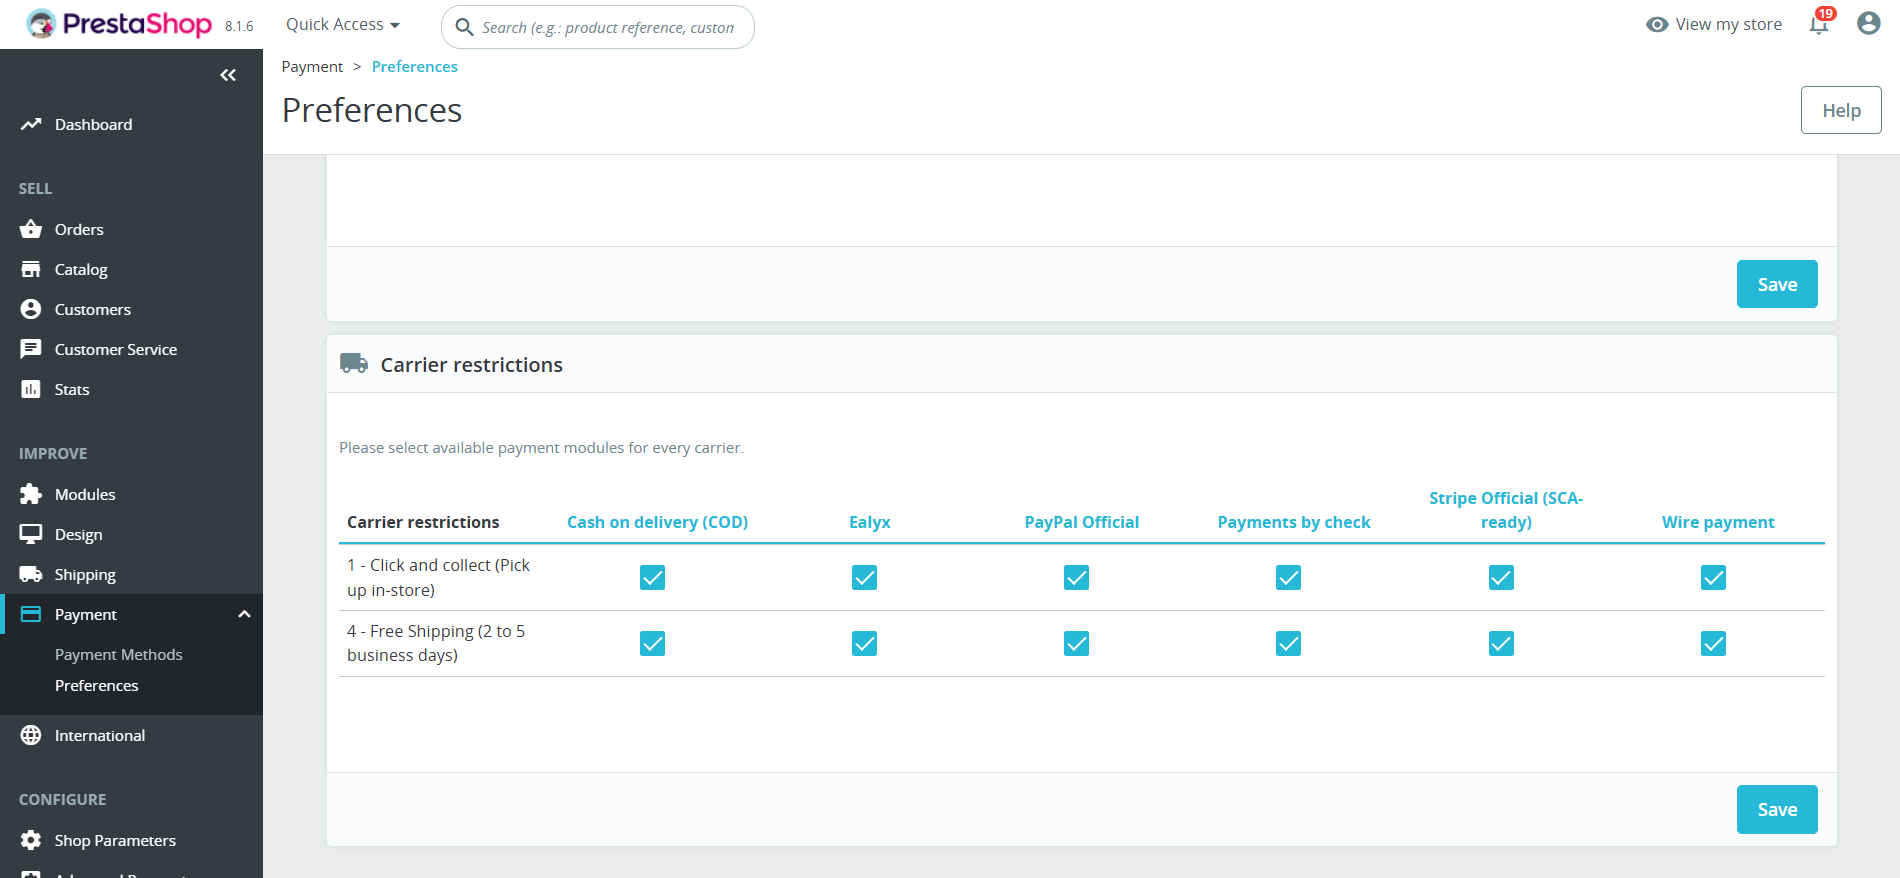
Restrictions by Carrier
Make sure that all carriers are selected.
✅ Your Ealyx plugin is now installed and ready to boost your store's performance!