Magento 2
Ealyx provides a ready-to-install extension for Magento 2 stores.
Before integrating
Requirements
This plugin was designed to work with a compatible version of Magento 2.
Currently, it supports versions from 2.4.5.
Plugin Installation
Here’s how to install the Ealyx plugin step by step.
Before Installation
Request the Plugin
Make sure you have the .zip file of the Ealyx Magento 2 plugin for your shop.
If you do not have one, please contact your Ealyx account manager.
If you have not been assigned an account manager, request the plugin at:
Request Credentials
Ask the onboarding manager for test credentials or production credentials if all testing has been completed.
System Requirements
Before installing the plugin, make sure your Magento 2 environment is properly prepared:
- Required scripts are executable (
chmod +x script_name.sh) - Magento 2 is installed at
/var/www/html/magento2/ - You have sudo access for system commands
- The Ealyx plugin exists in
/var/www/html/magento2/app/code/Ealyx - Apache and PHP installed and running properly
Step-by-Step Installation
Copy the Ealyx Plugin to Magento
sudo mkdir -p /var/www/html/magento2/app/code/Ealyx
sudo cp -R /home/ubuntu/plugin-magento/Ealyx /var/www/html/magento2/app/code/
Navigate to the Magento Installation Directory
cd /var/www/html/magento2/
Enable the Ealyx Module and Update Magento
sudo php bin/magento config:set dev/template/allow_symlink 1
sudo php bin/magento module:enable Ealyx_CustomPayment
sudo php bin/magento setup:upgrade
sudo php bin/magento indexer:reindex
sudo php bin/magento setup:static-content:deploy -f
sudo php bin/magento cache:flush
Set Correct File and Directory Permissions
# File permissions
sudo find /var/www/html/magento2 -type f -exec chmod 644 {} \;

# Directory permissions
sudo find /var/www/html/magento2 -type d -exec chmod 755 {} \;

# Writable directories
sudo find /var/www/html/magento2/var -type d -exec chmod 775 {} \;
sudo find /var/www/html/magento2/pub/static -type d -exec chmod 775 {} \;
sudo find /var/www/html/magento2/pub/media -type d -exec chmod 775 {} \;
sudo find /var/www/html/magento2/generated -type d -exec chmod 775 {} \;

# Writable files
sudo find /var/www/html/magento2/var -type f -exec chmod 664 {} \;
sudo find /var/www/html/magento2/pub/static -type f -exec chmod 664 {} \;
sudo find /var/www/html/magento2/pub/media -type f -exec chmod 664 {} \;
sudo find /var/www/html/magento2/generated -type f -exec chmod 664 {} \;
Set Proper Ownership
sudo chown -R ubuntu:www-data /var/www/html/magento2
Make Magento CLI Executable
sudo chmod +x /var/www/html/magento2/bin/magento
Restart Apache
sudo systemctl restart apache2
Final Confirmation
Once all steps are complete, verify the installation by running:
sudo php bin/magento module:status | grep Ealyx
You should see:
Ealyx_CustomPayment → enabled
Troubleshooting
| Problem | Solution |
|---|---|
| Permission Denied | Use sudo |
| Magento Commands Failing | Ensure you’re in /var/www/html/magento2/ |
| Apache Not Restarting | Check with sudo systemctl status apache2 |
Plugin Configuration
To configure and enable Ealyx Pay, navigate to:
Stores → Configuration → Sales → Payment Methods
You’ll find a dedicated section for Ealyx Pay.
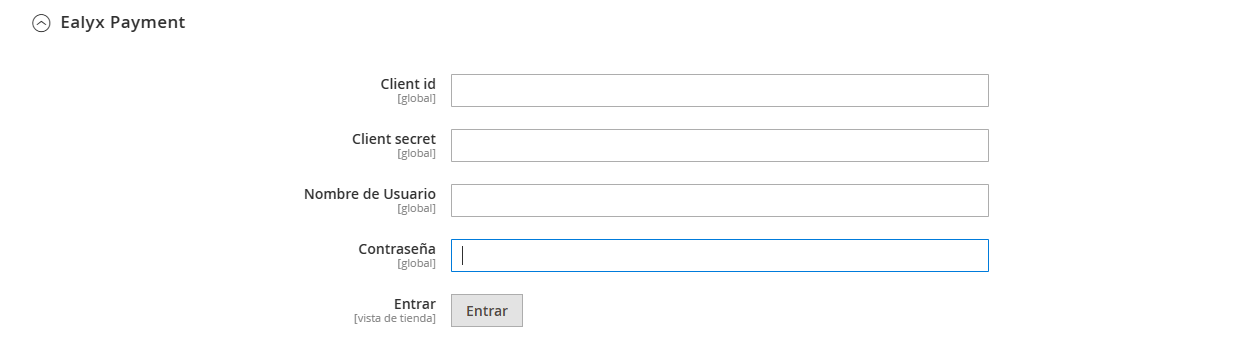
Enter Your Credentials
Our technical team will provide:
- Client ID
- Client Secret
- User
- Password
These fields are required for Ealyx Payment authentication.
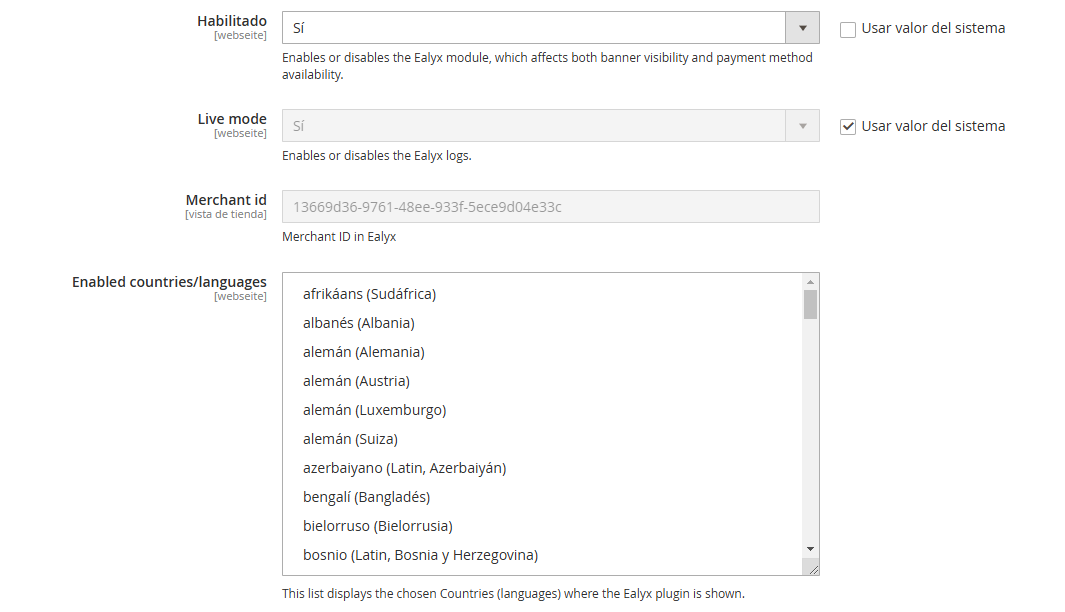
General Settings
Within Ealyx Payment, you’ll find the main configuration options:
| Setting | Description |
|---|---|
| Enable/Disable | Turns the Ealyx module on/off |
| Live Mode | Enables or disables Ealyx logs |
| Merchant ID | Your assigned Ealyx merchant ID |
| Enabled Countries/Languages | Defines where the plugin appears |
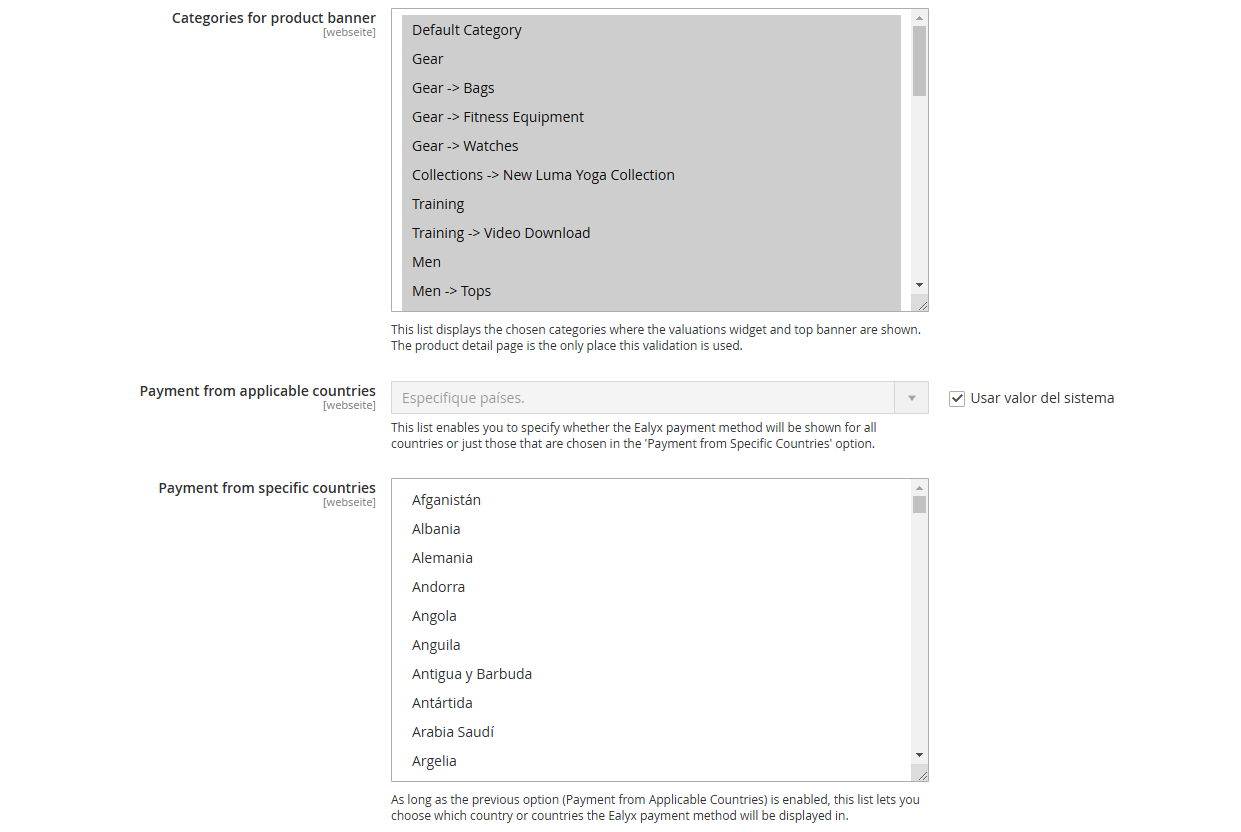
| Categories for Product Banner | Specifies which categories show Ealyx banners |
| Payment from Applicable Countries | Show payment for all or specific countries |
| Payment from Specific Countries | Select which countries support Ealyx Pay |
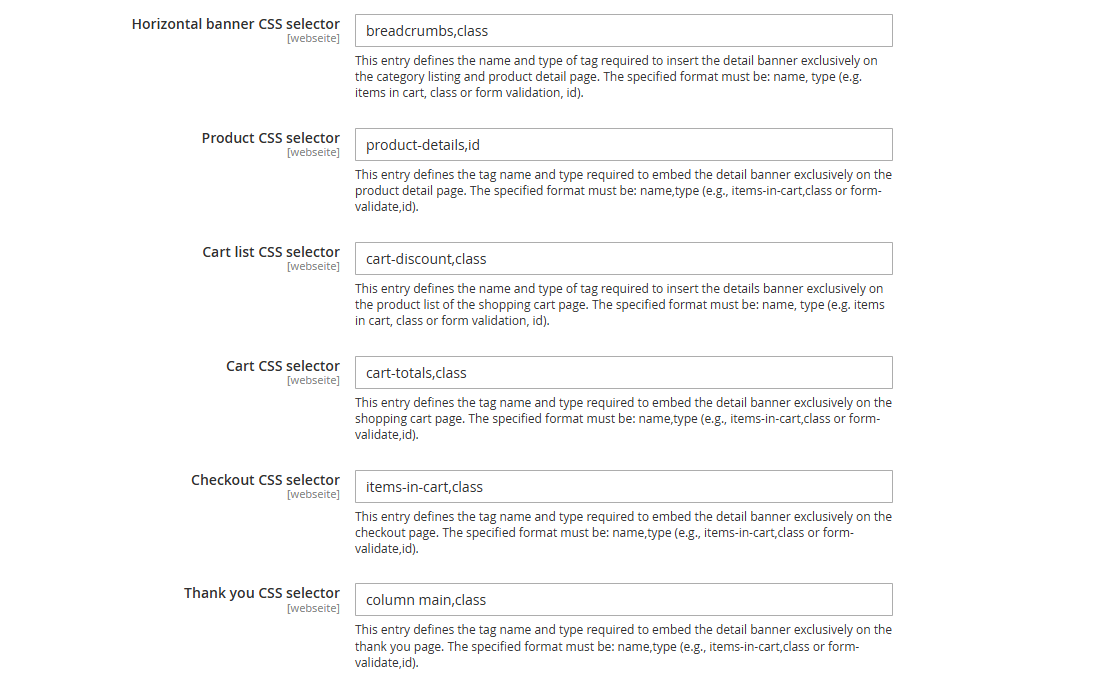
Widget Configurations
This section allows you to customize the Ealyx widget on multiple pages:
| Field | Description |
|---|---|
| Horizontal Banner CSS Selector | Tag name/type to insert the banner in product listings |
| Product CSS Selector | Selector for embedding banner on product detail page |
| Cart List CSS Selector | Selector for banner in cart item list |
| Cart CSS Selector | Selector for the shopping cart page |
| Checkout CSS Selector | Selector for checkout page |
| Thank You CSS Selector | Selector for the post-purchase “thank you” page |
✅ Your Ealyx Magento 2 plugin is now installed, configured, and ready to enhance your store!